User Manual
i Series / iX Series
41
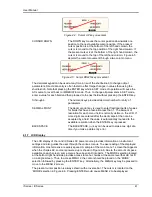
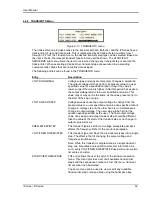
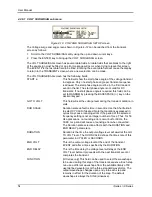
Figure 4-4: Cursor UP key movement
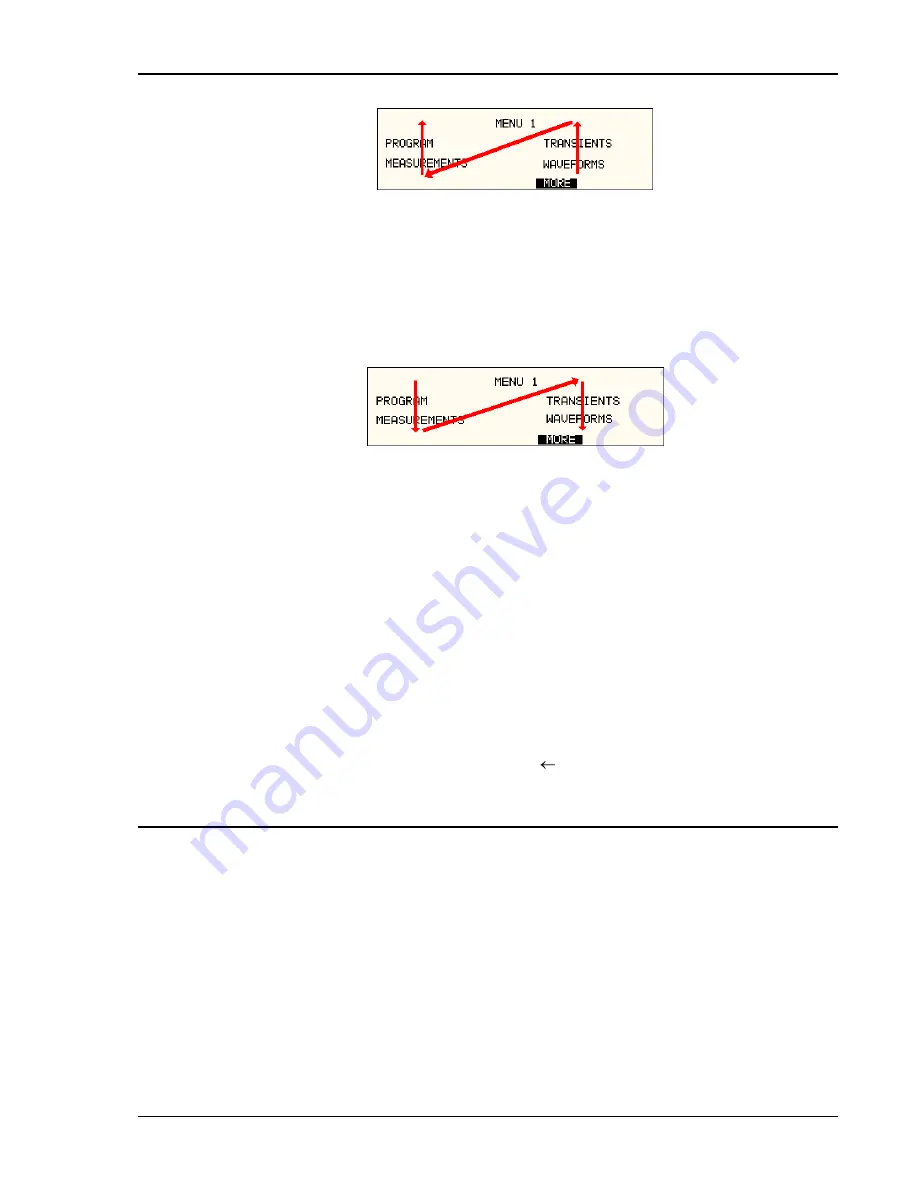
CURSOR DOWN
The DOWN key moves the cursor position downwards one
position to the next available cursor position. If the present
cursor position is at the bottom of the left hand column, the
cursor is moved to the top position of the right hand column. If
the present cursor is at the bottom of the right hand column, the
cursor is moved to the top of the left hand column. Figure 4-5
depicts the cursor movement through a two column menu.
Figure 4-5: Cursor DOWN key movement
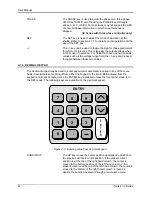
The decimal keypad can be used at any time in lieu of the shuttle knob to change output
parameters. Direct data entry is often faster to effect large changes in values than using the
shuttle knob. Note that pressing the ENTER key while in SET mode of operation will cause the
AC source to revert back to IMMEDIATE mode. Thus, to change all parameters in SET mode,
enter a value for each field and then proceed to the next field without pressing the ENTER key.
0 through 9
The numeric keys provide all decimal number for entry of
parameters.
DECIMAL POINT
The decimal point key is used to enter fractional parts of values
for fields that have a resolution less than 1. The amount of
resolution for each menu field is normally visible on the LCD. If
more digits are entered after the decimal point than can be
accepted by a field, the value is automatically rounded to the
available resolution when the ENTER key is pressed.
BACKSPACE
The BACKSPACE (
) key can be used to erase one digit at a
time if you make a data entry error.
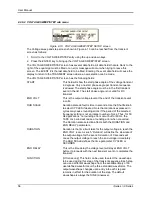
4.1.7 LCD Display
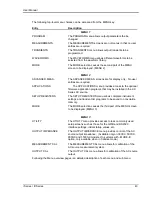
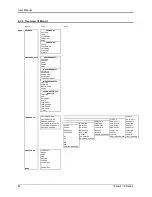
The LCD display of the i and iX Series AC power source provides information on instrument
settings and also guides the user through the various menus. To ease reading of the displayed
information, most screens are widely spaced. A sample of the main menu 1 screen that appears
when the i Series AC source is powered up is shown in Figure 4-6. Due to the amount of space
available on each screen, some menus have been split into parts. The MORE selection located
at the bottom right hand side provides access to menu choices at the same level that did not fit
on a single screen. Thus, to access MENU 2, the cursor should be placed on the „MORE‟
selection followed by pressing the „ENTER‟ key. Alternatively, the MENU key may be pressed to
move to the MENU 2 screen.
The present cursor position is always shown with a inverse bar. The cursor is located on the
„MORE‟ selection in Figure 4-6. Pressing ENTER would cause MENU 2 to be displayed.
Содержание 10001i
Страница 2: ......
Страница 3: ......
Страница 6: ...ii This page intentionally left blank...
Страница 25: ...User Manual i Series iX Series 11 Parameter Specification Shock Designed to meet NSTA 1A transportation levels...
Страница 38: ...User Manual 24 i Series iX Series Figure 3 5 Rear Panel View for the 3001i 3001iX...
Страница 39: ...User Manual i Series iX Series 25 Figure 3 6 Rear Panel View for the 5001i 5001iX...
Страница 42: ...User Manual 28 i Series iX Series Figure 3 7 Connection For Single Power Source 5001iX i 3001iX i...
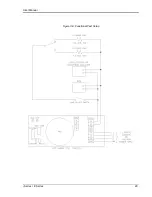
Страница 43: ...User Manual i Series iX Series 29 Figure 3 8 Functional Test Setup...
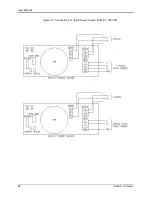
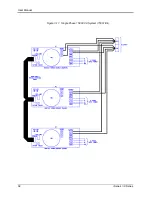
Страница 44: ...User Manual 30 i Series iX Series Figure 3 9 Single Phase 10000 VA System 10001iX i...
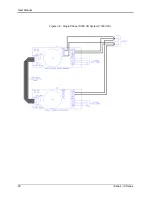
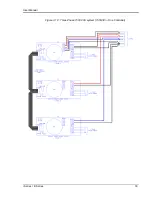
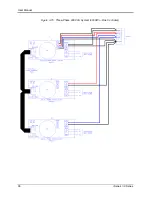
Страница 45: ...User Manual i Series iX Series 31 Figure 3 10 Three Phase 15000 VA System 15003iX i LK Three Controllers...
Страница 46: ...User Manual 32 i Series iX Series Figure 3 11 Single Phase 15000 VA System 15001iX i...
Страница 47: ...User Manual i Series iX Series 33 Figure 3 12 Three Phase 15000 VA system 15003iX i One Controller...
Страница 48: ...User Manual 34 i Series iX Series Figure 3 13 Connection With MODE Option...
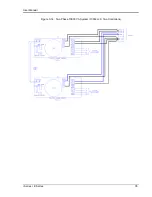
Страница 49: ...User Manual i Series iX Series 35 Figure 3 14 Two Phase 10000 VA System 10002i LK Two Controllers...
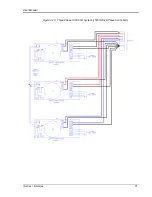
Страница 50: ...User Manual 36 i Series iX Series Figure 3 15 Three Phase 9000 VA System 9003iX i One Controller...
Страница 118: ...User Manual 104 i Series iX Series Figure 5 2 Power Source Module Block Diagram...
Страница 121: ...User Manual i Series iX Series 107 Figure 5 3 5001i Internal Layout...
Страница 122: ...User Manual 108 i Series iX Series Figure 5 4 Logic Board LED s...
Страница 124: ...User Manual 110 i Series iX Series Figure 5 5 AC Power Stage Layout...
Страница 125: ...User Manual i Series iX Series 111 Figure 5 6 AC Control Logic Block Diagram...
Страница 132: ...User Manual 118 i Series iX Series Figure 6 2 Test Equipment Hook up for Measurement Calibration...
Страница 138: ...User Manual 124 i Series iX Series Figure 6 3 Adjustment Location...
Страница 152: ...User Manual 138 i Series iX Series Figure 9 4 Voltage Modulation...
Страница 219: ...User Manual i Series iX Series 205 Figure 9 36 Example Connection With 5001iX and EOS 1...
Страница 220: ...User Manual 206 i Series iX Series Figure 9 37 Example Connection With Compliance Test System and EOS 1...
Страница 221: ...User Manual i Series iX Series 207 Figure 9 38 15003iX CTS EOS3 LR3...
Страница 222: ...User Manual 208 i Series iX Series Figure 9 39 15003iX 3 EOS3...
Страница 226: ...User Manual 212 i Series iX Series Figure 9 40 EOS3 Location of 70 80 Taps for each phase Lug 3 70 Lug 5 80...
Страница 233: ...User Manual i Series iX Series 219 Figure 9 41 Example Connection With MODE iX...
Страница 240: ...User Manual 226 i Series iX Series Figure 9 42 Example Connections With OMNI 1 18i...
Страница 241: ...User Manual i Series iX Series 227 Figure 9 43 Example Connections With OMNI 3 18i...
Страница 242: ...User Manual 228 i Series iX Series Figure 9 44 Schematic Showing OMNI 1 37i and1 37iJ Connected to 5001iX System...
Страница 243: ...User Manual i Series iX Series 229 Figure 9 45 Schematic Showing OMNI 3 37i Connected to 30003iX System...
Страница 249: ...User Manual i Series iX Series 235 9 7 4 Mechanical Dimensions Figure 9 49 XLS Module Dimensions...

