background image

Specialized Concentrated Focused 

30

Menu Functions 


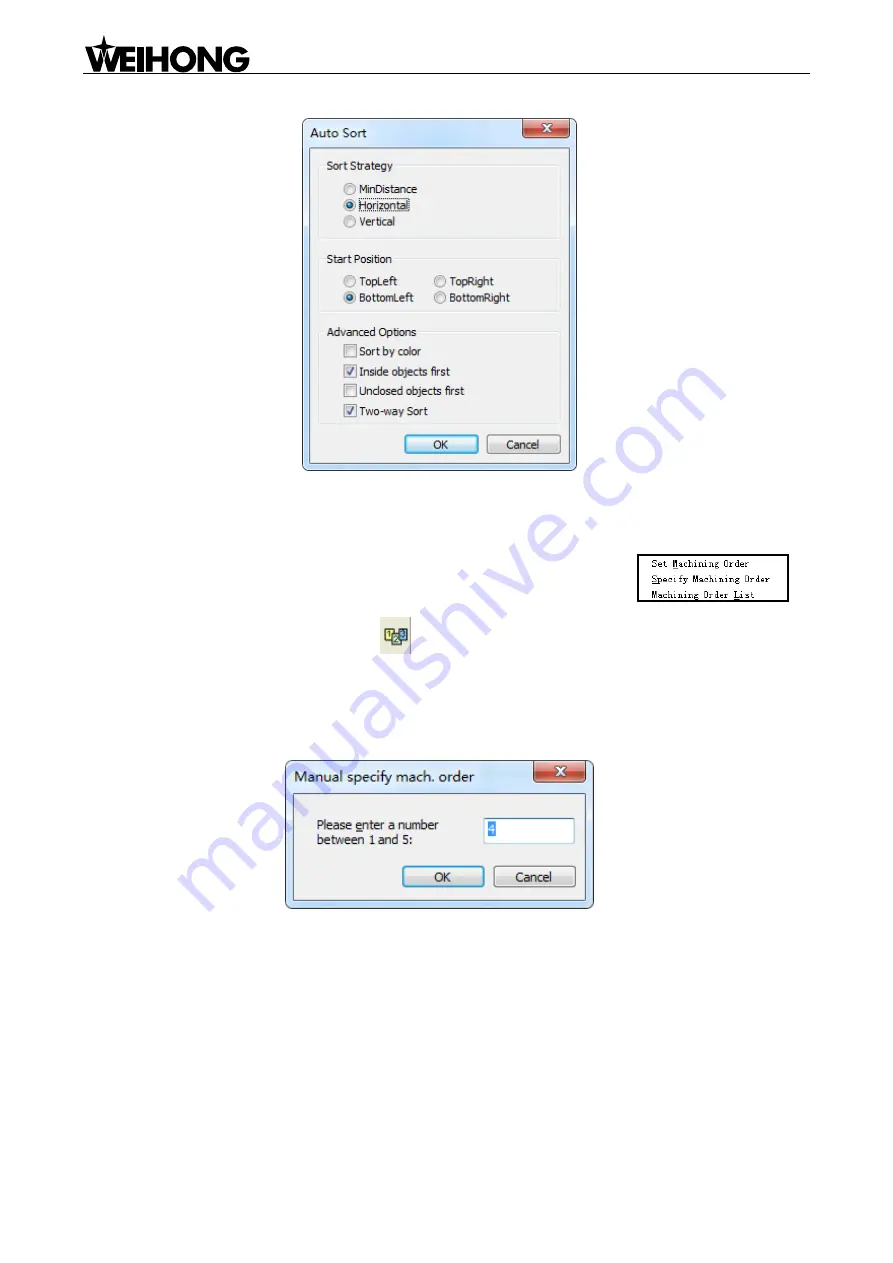
Fig. 4-14 Sort 


[Manual Set Machining Order] 

Under [Manual Set Machining Order] menu item, included sub-menu items are 

After 

―Set Machining Order‖ or the button 

  on the drawing toolbar is selected, +

  is added near 

the cursor. At this time, clicking on any object will make its machining order become 1, while the order 

of left objects will change to 2, 3,

… sequentially according to the original order. 

If 

―Specify Machining Order‖ is selected, a dialog as shown in Fig. 4-15 will pop up. 


Fig. 4-15 Manually set machining order 

In the above dialog, the machining order of the currently selected object can be set. Note that an error 

message as Fig. 4-16 will be displayed if more than one object is selected. 

Summary of Contents for NcEditor V12

Page 1: ...NcEditor V12 Plasma Cutting CNC System Users Manual 4th Edition Weihong Electronic Technology Co Ltd ...

Page 2: ...ble data or other information contained in this manual may not be reproduced transferred or translated without any prior written permission of Weihong Company The information contained in this manual is constantly being updated You can login to the official website of Weihong Company www en weihong com cn to download the latest PDF edition for free ...

Page 3: ...part focuses on the advantageous functions including screw error compensation leapfrog etc 4 Appendix part including chapter 7 and 8 The former lists all the system parameters shortcut keys while the latter is the software license agreement Contact Us You can contact us by the following info for technical support and pre sales after sales service Company Name Weihong Electronic Technology Co Ltd H...

Page 4: ...s should be transported properly in terms of the weight An excess of specified quantity of stacking products is prohibited Climbing standing or placing heavy loads on the products is prohibited Dragging or carrying the products via cables or devices connected to them is prohibited 2 Precautions Related to Installation Only when this equipment installed in the qualified electricity cabinet can it b...

Page 5: ...ce should be less than 4 ohm Neutral line is absolutely not allowed to replace earth wire Otherwise it may result in malfunction of the device due to the interference Wiring should be firm and steady or mis operation may occur Voltage values and positive negative polarity of any connection plug should be in accordance with specifications set forth in the manual or it may result in breakdowns such ...

Page 6: ...ulated in the manuals issued by the machine manufacturer are prior to those in this manual This manual assumes all the optional functions are available which you must confirm through manuals issued by the machine manufacturer Please refer to manuals issued by the machine manufacturer for the instructions of machine tools Functions and software interfaces vary with the system and the version of sof...

Page 7: ... Display Features 2 2 Software Interface 3 2 1 Drawing Toolbar 3 2 2 Editing Space 3 2 3 Report 4 2 4 Warnings 4 2 5 Status Bar 5 3 Machine Control Bar 6 3 1 Coordinate Display Area 6 3 2 Manual Settings Area 7 3 3 Machining Operation Area 8 3 4 Process Control Area 10 4 Menu Functions 12 4 1 File Menu 12 4 2 Edit Menu 17 4 3 View Menu 21 4 4 Draw Menu 23 4 5 Object Menu 27 4 6 Mach Menu 45 4 7 He...

Page 8: ... Direction Setting 59 5 4 3 Machine Origin Setting 60 5 4 4 Worktable Stroke Range 60 5 5 Speed Setting 60 5 5 1 Single Axis Acceleration 61 5 5 2 Cornering Acceleration 61 5 5 3 Maximum Speed of Reference Circle 62 5 5 4 Minimum Speed of Reference Circle 62 5 6 Machine Setup Detection 63 5 6 1 Check Electronic Gear Ratio and Pulse Equivalent 63 5 6 2 Examine If Any Pulse Is Lost 63 5 6 3 Plasma T...

Page 9: ...s Handwheel 82 7 2 Wiring Diagram of Terminal Board 83 7 2 1 Wiring Diagram of Auto H 6B EX1D7 83 7 2 2 Wiring Diagram of Cylinder 6B EX1D7 85 7 2 3 Wiring Diagram of Terminal Board EX22A2 in 1Y 86 7 2 4 Wiring Diagram of Terminal Board EX22A2 in 2Y 89 7 2 5 Wiring Diagram of Terminal Board EX22A2 in YrevB 91 7 3 Wiring Diagram of Servo Driver 93 7 3 1 Wiring Diagram of WISE Servo Driver 93 7 3 2 ...

Page 10: ...HI MR E Servo Driver 109 7 4 8 Parameter Setting of DELTA ASDA A Servo Driver 111 7 4 9 Parameter Setting of DELTA ASDA A2 Servo Driver 113 7 4 10 Parameter Setting of DELTA ASDA B Servo Driver 114 7 4 11 Parameter Setting of DELTA ASDA B2 Servo Driver 116 7 4 12 Parameter Setting of SANYO PY Servo Driver 117 7 4 13 Parameter Setting of SANYO R Servo Driver 119 7 4 14 Parameter Setting of SANYO Q ...

Page 11: ...editing a file of other format into currently loaded file 1 2 Graph Manipulation Features Supporting object change function including translation rotation mirror image zoom combination and break up of objects Supporting view grid and ruler displaying function Supporting grid catch function Supporting multi object alignment including align right align left align top align bottom align vertical midl...

Page 12: ... setting for a single object distinguished by color and parameters setting Supporting auto sorting according to start point end point and manual sorting which can optimize cutting jobs that require thoroughness Supporting display of machining object type and display modification of object name Supporting analog machining function Supporting editing of ports and delay in a layer Supporting load and...

Page 13: ...Editing space Drawing toolbar Status bar Fig 2 1 Main interface 2 1 Drawing Toolbar In Drawing toolbar there are drawing tools dot straight line circle polyline rectangle etc graph manipulation bar array mirror add bridge lead in out line kerf compensation etc and layer manager some of which have their counterparts under Object menu 2 2 Editing Space Object Editor Space corresponds to the range of...

Page 14: ...g column To charge for a machining file after machining finishes select the file and click the Charging button to calculate the machining fees in terms of the holes cut and total cut length See Fig 2 2 After entering unit price of holes and cut length click Calculate to automatically count the total fees Fig 2 2 Statistical information of machining 2 4 Warnings In Warnings error message and warnin...

Page 15: ...d Software Interface 5 2 5 Status Bar Status bar is at the bottom of NcEditor as shown below Generally it displays the info of current object such as steps and meanings to draw an object whether current operation is successful or not ...

Page 16: ... in Fig 3 1 When the cursor is on a button the software will prompt the button function accordingly Manual setting area Process control area Machining operation area Coordinate display area Fig 3 1 Machine control bar 3 1 Coordinate Display Area As it displays current workpiece coordinates or machine coordinates of each axis ...

Page 17: ...ormula is value feed Rated override feedrate Current rate feed Current The least unit of feedrate override scale is 1 Current feedrate override is displayed beneath F Three ways can be used to revise the feedrate override click on the sliding axle drag the slide block click the slide block to choose it then press PageUp PageDown key when PageUp or PageDown key is pressed once the feedrate override...

Page 18: ...ill move the custom step length with each press of X or Y axis manual button The lower limit of customized step is 0 01mm when the set value is smaller than 0 01mm the system will take 0 01mm instead automatically Set WorkOrg F5 As clicking this button will set current coordinates as workpiece origin Generally the start point of workpiece machining workpiece origin is set for the sake of workpiece...

Page 19: ...pended position automatically and enter into Running state Pause F10 As after this Pause button is clicked the machine tool will suspend machining and lift its gun and then enter into pausing state So as to continue machining press Start button or select the relative menu item Stop F11 As this button is valid during machining Clicking this button will make the machine tool stop working and enter i...

Page 20: ...g under the running of a machining program Go Forward Backward F4 F3 As this button is used for forward motion or reverse motion during machining If the user wants to go back to a previous machining position selecting Go Backward i e the left arrow will make the system reverse along the original path The user can set the distance of forward motion or reverse motion according to his own needs After...

Page 21: ...triking normal machining can be started Auto H After is clicked the system will open auto height gauge and adjust the distance between cutter head and the part Fall After is clicked the system will send a signal of falling and the cutter will descend automatically Clicking it again stops it from falling Rise After is clicked the system will send a signal of rising and the cutter will lift up autom...

Page 22: ...zone of the system Then the parsing engine will parse buffered data into instructions and transfer these instructions to CNC card Import File Ctrl I This menu item is used to open files of all other formats supported by the system like G NC DXF ENG PLT This function will overwrite all previously loaded files and perform auto combination and deleting points for the currently loaded file After this ...

Page 23: ...Insert File The function of this menu item is to add machining objects of a supported format file to the loaded file instead of overwriting the loaded file Nest This function is used to nest parts Clicking it will eject the dialog box shown as below Fig 4 2 Nest dialog box ...

Page 24: ...aterials the system provides two methods including make new materials and import materials New clicked users can custom the name width height and number of the material And through Import users can load dxf and dwg format material from local Nest algorithm consists of remnant rectangle and true shape Remnant rectangle is mainly used in nesting regular figures such as rectangle while true shape whi...

Page 25: ... shown in Fig 4 5 Clicking Save sheet users can save the nested parts to the local file folder in dxf or nce format Remnant clicked a dialog box as Fig 4 6 ejects Remnant refers to the remaining part of the nested materials and users can click Save As Dxf to save it Fig 4 4 Nesting result Fig 4 5 View sheet ...

Page 26: ...tion is to select part of objects in the currently loaded file as a separate machining file Recent Nce Files This function can be used to view the recently loaded NCE files and open them Make Param Backup Installer This function selected users can backup the software to the default directory D Weihong Setup quickly It provides great convenient to save the preset parameters Make Param Backup After ...

Page 27: ...2 Edit Menu Edit menu includes such menu items as Undo Redo Select All etc which are introduced as follows Undo Redo Ctrl Z Ctrl Y In possession of strong redo and undo functions this software can redo or undo several previous operations sequentially until the user is satisfied Operation method is after execution of an operation clicking on the undo button on the toolbar will undo this operation s...

Page 28: ... this mode an object to be selected just needs to contact with the region rectangle When several objects are selected simultaneously size and coordinates of the general circumscribed rectangle will be displayed on the toolbar as following X Y coordinates of left bottom vertex of the general circumscribed rectangle W H width and height of the general circumscribed rectangle Clicking the icon can de...

Page 29: ...selected objects of a certain type directly click on the corresponding For example to delete the two rectangles in Fig 4 8 directly click on the after Rectangle 2 Select Invert Ctrl Shift A This item deselects the objects previously selected while selecting previously unselected objects The contrast between before Select Invert and after Select Invert is as shown in Fig 4 9 and Fig 4 10 Fig 4 9 Be...

Page 30: ...ditor Space Copy Ctrl C Used for copying selected objects in Object Editor Space Paste Ctrl V Used for pasting objects in the clipboard into Object Editor Space After selecting this item click on Object Editor Space to decide the paste position The click position is where the left bottom vertex of circumscribed rectangle of objects to be pasted locates Paste As Group When there are two or more cop...

Page 31: ...e drawing toolbar Then hold down the left mouse button in the Object Editor Space while dragging the mouse to the aimed position and then release the mouse Zoom CAUTION The user can zoom in and zoom out a figure by menu mouse or drawing toolbar mouse the actual size of the figure won t change only the view will be enlarged or minified Method one open View menu select the option Zoom Method two sel...

Page 32: ...g order of current objects Method one open View menu select the option Show Order Method two select the button on the toolbar Show Start Point This option is to display hide start point of machining Show Direction This item corresponding to the button on the toolbar is to display hide machining direction Show Lead in out Line This item corresponding to the button on the toolbar is to display hide ...

Page 33: ...nates or by mouse For the method to set workpiece origin by mouse the software is available of catch function to help the user set workpiece origin on the exactly desired position The advantages of setting origin are as follows The position of machining objects in WCS can be positioned more precisely After a file is loaded the position of workpiece in WCS can be fixed more precisely It is more con...

Page 34: ...curately Arc If the user wants to draw an arc he can select Arc under Draw or single click icon NcEditor ensures the position and size of an arc by radius arc center beginning angle and central angle After selecting an arc the user can accurately position and redraw it by inputting its circle center coordinates required radius beginning angle and central angle in the following dialog CAUTION 1 rad...

Page 35: ...cle center After selecting a circle the user can accurately position and redraw it by inputting its circle center coordinates and radius in the following dialog Ellipse If the user wants to draw an ellipse he can select Ellipse under Draw or single click icon NcEditor ensures the position and size of an ellipse by circle center angle of inclination LongR major semi axis and ShortR minor semi axis ...

Page 36: ... of a star by circumscribed radius inscribed radius center X center Y and angle of inclination etc After selecting a star the user can accurately position and redraw it by inputting the related values the following dialog Text If the user wants to write a section of text he can select Text under Draw or single click icon After selecting Text left click in Object Editor Space and drag a text input ...

Page 37: ...or using this method can accurately position the end point of translation vector Method two mouse method Click on an object the current point on the object the start point of translation vector hold down the mouse and drag the object the point where the mouse is released the end point of translation vector Rotate To rotate an object there are two methods Method one after selection of an object cli...

Page 38: ...of that of the general circumscribed rectangle of selected objects Align Right Right edges of selected objects are aligned on the basis of that of the general circumscribed rectangle of selected objects Align Top Top edges of selected objects are aligned on the basis of that of the general circumscribed rectangle of selected objects Align Bottom Bottom edges of selected objects are aligned on the ...

Page 39: ...as a group Break Group This option dismisses a selected group into multiple objects Combine Ctrl J This option combines multiple objects which should be unclosed like lines arcs ellipse arcs and unclosed polylines into one single path object to realize integrated operations It is recommended to open Catch before using Combine In combination objects are combined following a certain criterion so com...

Page 40: ...t this time clicking on any object will make its machining order become 1 while the order of left objects will change to 2 3 sequentially according to the original order If Specify Machining Order is selected a dialog as shown in Fig 4 15 will pop up Fig 4 15 Manually set machining order In the above dialog the machining order of the currently selected object can be set Note that an error message ...

Page 41: ...ist In the above dialog move down or up objects to set machining order Shape Check Ctrl T This option is used to check selected objects in the currently loaded machining file to tell whether current path is normal and where are the abnormalities As shown in Fig 4 18 Shape Check includes Closed Check Self cross Check Intersection Check and Overlap Check any of which checked is about to be performed...

Page 42: ... of abnormalities their abnormal type will be showed and abnormal objects can be set as being selected after check Measure This option is used to measure a certain distance Click on this option then left click to choose the start point of measurement and then move the mouse in the lower part of the cursor displayed are the distance between current point and the start point X Y offset and the inclu...

Page 43: ...ameters click OK to execute these pre processes on objects If Apply when import is checked objects will be pre processed automatically when a machining file is loaded At this time there is no need to manually select objects and open this dialog Fig 4 20 Pre processing Clip Overlaps The same as Delete Overlap in Shape Pre Processing Delete Shorties i e delete dots mini circles and mini curves Smoot...

Page 44: ...t to polylines Start Cut Point Ctrl Q This item sets the start point of lead in out line manually Fill With this menu item inside of object is preserved while outside is abandoned after machining Unfill With this menu item outside of object is preserved while inside is milled after machining Auto Set Fill If this item is selected Fill or Unfill will be selected automatically by the system accordin...

Page 45: ... of a negative value under cut will appear i e this is a cut out lead in out line In case of a positive value over cut will appear i e this is a seal lead in out line Cut Mode fill unfill and changeless with no change to current cut mode are available in cut mode Seg No there are probable N straight lines N is a natural number on the selected object Segment No refers to the sequence number of the ...

Page 46: ...ersecting line in the tool path After this option is selected a dialog will pop up as shown in Fig 4 23 Fig 4 23 Set intersecting line Diameter of steel tube and cut precision can be set in the above dialog CAUTION Diameter of steel tube must be larger than maximum height of selected shape Set Kerf Compensation Ctrl R Kerf compensation is the amount of cutting path offset required to compensate fo...

Page 47: ...outside of workpiece is to be reserved select compensation type as Shrink if inside or workpiece is to be reserved select compensation type as Expand When transfer type is selected as Line various compensation results are as follows texts should be changed to polylines before setting kerf compensation Fig 4 25 Shrink compensation Fig 4 26 Expand compensation ...

Page 48: ...or closes catch options corresponding to the button on the toolbar Catch Options Catch Options is used to find the object feature points more precisely during drawing so that they can be easily caught when approached Selecting Catch Options under Object menu or clicking the button on the toolbar will eject the Catch Options dialog as shown in Fig 4 29 ...

Page 49: ...enter 4 The feature point of a rectangle four vertexes 5 The feature point of a circle four quadrant points and a circle center 6 The feature point of an ellipse four quadrant points and a circle center 7 The feature point of an arc a start point an end point a midpoint and a circle center Advantages of opening Catch Options The user can directly use the cursor to position to an above mentioned fe...

Page 50: ...o be drawn moves anticlockwise near 45 degree each time with the positive X axis as the start direction Layer Parameters There are altogether 8 numbered colors for selection in the color window with each color corresponding to different values of such machining parameters as speed power etc In 2D mode NcEditor software considers machining objects in the same color as sharing the same values of mac...

Page 51: ...iting clicking Insert Delay will insert a delay action before current action The delay time can be modified with default value as 100ms Clicking Insert Port will insert a port action with modifiable attribute before current action The material library function is added for the convenience of directly calling the set parameters of machining materials This function can save N groups of parameters Af...

Page 52: ...d Add Bridge Pipe Cutting For more details see chapter 5 8 Instant Setting For more details see chapter 6 5 Besides the following introduces Rect Array Circle Array Vertical Mirror Horizontal Mirror and Add Bridge which are on the drawing tool bar Rect Array Select one or multiple objects or groups objects in different groups should be set as a group first in Object Editor Space choose the button ...

Page 53: ...the button Circle Array on the drawing toolbar input center coordinates of rotation array counts and array angle into the pop up dialog as shown in Fig 4 33 Fig 4 33 Circle array dialog Vertical Mirror Select one or multiple objects or groups in Object Editor Space objects in different groups should be set as a group first choose the button Vertical Mirror on the drawing toolbar to flip currently ...

Page 54: ...d Bridge is divided into Bridge automatically and Bridge manually and it is only available for a single object unavailable for a group Currently Add Bridge is available for a circle an arc a rectangle a straight line an ellipse an ellipse arc and a polyline Bridge automatically Select an object and then select the button on the drawing toolbar to eject a dialog as shown in Fig 4 34 Fig 4 34 Bridge...

Page 55: ...s Setting etc which will be introduced as following Machine Control Bar This item is to display or hide the machine control bar in the main interface After the menu item is clicked a appears in front of Machine Control Bar and the machine tool control bar is displayed in the main interface System Parameters Ctrl P This option is to open system parameters including operator parameters manufacturer ...

Page 56: ...y to home all axes manually or automatically CAUTION The necessity of homing Only after homing can the following functions be enabled like software limit and set fixed point Go Home can be divided into All Go Home X Go Home and Y Go Home After one of them is selected a dialog as shown in Fig 4 37 will pop up to prompt confirmation for homing Fig 4 37 Prompt box for homing After homing is performed...

Page 57: ...t the coordinates of the fixed point in advance so when plasma head is damaged or plasma head change is necessary after this function is executed the system will uplift the spindle and back to fixed point automatically Then the user can complete other relative operations Set Directly When the user can ensure that current position is consistent with machine coordinates and the machine tool does not...

Page 58: ...y constructing a line perpendicular to line O A through O Three point positioning take the left bottom of workpiece as the temporary origin of new WCS set a point A and B in the positive direction of X axis to confirm the new X axis and then set a point C in Y axis the software automatically confirming the new Y axis by constructing a line perpendicular to line AB through point C The foot of perpe...

Page 59: ...oordinates of O and A to the default Manually move coordinates in Jog or Incremental step mode Number keys 4 6 2 and 8 on the keyboard are respectively corresponding to X X Y and Y Combination key can also be used For instance when 0 and 4 are pressed simultaneously the spindle moves towards the negative direction of X axis at rapid jogging speed However when 4 is pressed the spindle moves toward ...

Page 60: ...fter load of a machining file clicking on this menu item will make the system move around along the circumscribed rectangle of the machining file to decide the machining range Frame check is optional Teaching For the convenience of editing special shaped tool path the software is equipped with teaching function so as to help the user draw a machining path manually according to the shape and contou...

Page 61: ...to complete this path 3 During drawing if the user needs to delete the selected point 2 he can click Back 1 Point But when an arc is confirmed after clicking Point 3 the user has to click Back 1 Node to delete the current third point because now the third point is a node and Back 1 Point is invalid Back 1 Node cancels the third and second drawn point with the first point remained To cancel the fir...

Page 62: ...rtcut Key Information F1 After this item is selected the shortcut key information window will pop up For details see Appendix of Shortcut Keys User Manual This submenu clicked users can view the users manual Daily Tips This function introduces each function and its user guide briefly in the sequence of software operation Click Prev and Next to view the tips in order Show daily tips on startup chec...

Page 63: ...ister function is used for limiting the system usage time When the usage time is used out the user can write down the Card No and send it to his manufacturer to get a registration code Then click on the button Register to eject the registration code input box as shown in Fig 4 42 And then input the received code into the following dialog and click OK to finish register Input the code received from...

Page 64: ...yer Parameters window are appropriate like time sequence and delay of plasma auto high and rise and whether voltage change of the plasma power control port SVC correlates with plasma generator power change Check whether Weihong plasma cutting system is all complete One software CD if customized none One control card and one terminal board Two cables one 37 pin the other 50 pin One 50 core riser ca...

Page 65: ...m One MPG flat cable FC16 DB15F 35cm with rail block for connecting MPG optional A handwheel of NK MPG 05 or NK MPG 06 optional 5 1 2 Installation of Control Card 1 Insert the software CD into the CD driver of computer and then double click setup exe for installation of the software until finished 2 Power off the computer then open the computer chassis and then insert the control card into a PCI s...

Page 66: ...cates the origin signals have been sent to the terminal board If the origin switch connected is normally open LEDs should be usually out and by artificially touching the switch LEDs should become light which shows the origin signals have been sent to the terminal board The same method can be taken to test other input ports to ensure the correctness of the wiring between the terminal board and the ...

Page 67: ... of electrical circuitry and signals polarity If electrical circuitry is correct alter the corresponding signal polarity to ensure the dots in front of the above mentioned signals show in red 2 Press the button Start and observe whether the dot color of program start signal changes When the button is being pressed the dot color should show in green and in red after released If there is no change t...

Page 68: ...o driver CLR alarm clearance releasing alarm signals only effective for the alarms that can be cleared P P pulse PULS differential output signals D D direction DIR differential output signals A A B B C C three phase input signals of encoder for detecting encoder zero For wiring diagram of a specific driver see Chapter 7 3 5 3 2 Common Driver Parameter Settings Regarding parameter setting of such s...

Page 69: ... is ncstudio The smaller the pulse equivalent is the higher the resolution will be The value of pulse equivalent will affect the maximum feed speed Generally speaking regarding the pulse equivalent of mold machines 0 001mm p the corresponding maximum feed rate is 9600mm min or 0 0005mm p the corresponding maximum feed rate is 4800mm min can be taken into consideration for users who are not very cr...

Page 70: ...witch etc Due to the limit of these switches on precision and repetition in positioning the X Y axis is unable to return to machine origin exactly in coarse positioning thus fine positioning is compulsory 3 Fine positioning with various methods is used to make each axis return to machine origin exactly by regarding encoder origin as fine positioning switch i e the axis is searching for machine ori...

Page 71: ...he efficiency will be Generally for servo motor systems the value is between 400 and 1200 Set the value smaller at the beginning make the machine tool perform various typical movements for a period of time and carefully observe it if there is no abnormal situation increase the value gradually otherwise decrease the value and reserve 50 100 insurance allowance 5 5 2 Cornering Acceleration It is use...

Page 72: ...he formula 10 2 r mm 1800 min v mm Thus centripetal acceleration a can be calculated when other arcs are processed this centripetal acceleration is the maximum allowable centripetal acceleration Arc speed will be limited if it is too large causing centripetal acceleration larger than a calculated in this formula 5 5 4 Minimum Speed of Reference Circle Minimum speed of reference circle also corresp...

Page 73: ...o is UN00C regulate the servo driver to display the lower 4 bits with L before the count value in count value hexadecimal system set workpiece origin and then write down the pulse count value at this time then repeatedly dry run a procedure then back to workpiece origin and see whether the pulse count value at this time is the same with the original value For YASKAWA servo as long as the value dif...

Page 74: ... freely the displacement of lead screw corresponding to one pulse sent by host controller Frequency reduplication can be used to amplify the frequency of pulse issued by mater controller Electronic gear ratio encoder resolution command unit mechanical deceleration ratio pitch Please see the servo motor label plate and then refer to the corresponding driver manual to confirm its encoder resolution ...

Page 75: ...ectronic gear ratio 5 7 3 Computing Method of Electronic Gear Ratio The setting of electronic gear ratio should be in accordance with the specification of equipment Electronic gear ratio B A M Input Command Pulses SGDM Servo Unit SGDM H Servo Unit Fig 5 6 Schematic diagram of electronic gear ratio function n m axle bearing of revolution per movement of Amount 4 Pulses Encoder Pn203 Pn202 A B Ratio...

Page 76: ... 6000 4 2048 A B Ratio Gear Electronic Note for YASKAWA servo 4 should be multiplied by the numerator Table 1 Parameters setting value Parameters PN202 PN203 Setting Value 8192 6000 Sample Two Command unit 0 1 Deceleration ratio 3 1 Bearing axle 13 bit incremental encoder Round Table Fig 5 8 Sample of round table Pulses generated per revolution of motor 213 22 2048 Angle of rotation per revolution...

Page 77: ...o Gear Electronic CAUTION If the calculation result is out of setting range both the numerator and denominator should be divided by their common divisor Table 3 Parameters setting value Parameters PN202 PN203 Setting Value 131072 15700 5 8 Settings of Round Tube Cutting Currently existing intersectional cutting equipment with simple functions is complex to operate and cannot meet the demands of ac...

Page 78: ...stem parameter Rotation Diameter Auxiliary Dia the diameter of auxiliary pipe like d in the above picture Manually enter the auxiliary diameter which must be less than or equal to primary diameter when cutting the primary pipe Distance the offset between central line of primary pipe and central line of auxiliary pipe like e in the above picture 2 Dia Auxiliary Dia Primary Distance Angle the tilt a...

Page 79: ... angle Y axis rotates in rapid traverse with respect to the first cut hole while value of X means the length X axis moves i e to the next cut position in rapid traverse with respect to the first cut hole The trajectory of cutting several circular holes is as shown below Fig 5 12 The trajectory to cut several circular holes on a primary tube 5 8 2 Rect Cutting Rect rectangle cutting is similar to c...

Page 80: ...e central line of round tube which can be used to cut multiple rectangle holes on different parts of round tube at different angles If Tilted Angle is positive value tilt goes CCW if negative title goes CW Other parameters are the same as those of circle cutting The trajectory to cut several rectangle holes on a primary tube is as shown below Fig 5 14 The trajectory to cut several rectangle holes ...

Page 81: ... in the system parameter Rotation Diameter Angle the angle 5 175 included by cutting face and pipe central line like A in the below picture Fig 5 15 Truncated cutting of round tube After all the above parameters are set the system will generate a motion trajectory automatically as shown in Fig 5 16 Fig 5 16 Motion trajectory of pipe tilted cutting ...

Page 82: ...t Set Intersecting Line under Object menu or under right click menu Setting Intersecting Line for each object is also ok but too tedious A dialog as following pops up Fig 5 18 Setting intersecting line In the above picture Rev Axis consistent with current rotary table configuration Pipe Dia the diameter of current pipe which must be larger than the max height of all objects or an error prompt will...

Page 83: ...setting the above parameters click OK to automatically generate the motion trajectory as following Fig 5 19 Path of pipe multi cutting After all above operations finished the system will cut the required object holes on the round tube according to the motion trajectory ...

Page 84: ...rresponding Nominal value actual moving curve deviating from the ideal one and their difference is called error i e Error nominal mechanical coordinate actual mechanical coordinate A Sketch of lead screw B Moving curve Reference point 0 5 1 Ideal move without screw error S nominal value 2 Actual move with screw error L actual value Fig 6 1 Screw error principle illustration Backlash Error Hysteres...

Page 85: ...nd will execute error compensation automatically based on the error data in the file after the backward error and forward error of the corresponding nominal coordinates of each coordinate axis are listed into the lead screw error compensation file Lead Screw Error Compensation File The name of lead screw error compensation file is axeserr dat found under Tools folder of the installation directory ...

Page 86: ...ample C Program Files Weihong after software installation The main interface of AxesErrEditor exe is as shown in Fig 6 3 Fig 6 3 Main interface of AxesErrEditor exe Generally the value of lead screw error compensation can be measured by a laser interferometer with two ways for compensation 1 File compensation Select Import File under File menu choose the compensation data recorded by a laser inter...

Page 87: ...ure the red line indicates the path of positive motion the blue line the path of reverse motion the middle gray line the ideal path Currently this tool can save the lead screw error compensation file as two versions V9 and V12 which can be switched under Settings menu V9 version supports X Y and Z axes while V12 version its interface as shown in Fig 6 3 supports X and Y axes 6 1 3 Effect of Lead S...

Page 88: ...ower Failure Resume Given the problem of sudden power failure our system holds power failure resume which can avoid damaging system files due to sudden power failure Owing to breakpoint resume and accurately returning to machine origin etc it is reliable to recover machining site to improve machining efficiency and reduce losses 6 2 2 Usage of Power Failure Resume 1 Home all axes before machining ...

Page 89: ...At the moment frog leaping function only exists in Double Y configuration Check FrogLeaping in the Layer Parameters dialog indicating enabling frog leaping function in the cutting process If not checked the cutting head moves up following the parameters set in the current layer 6 4 Instant Setting Function Instant setting function under Object menu is added to reduce operation steps In the Instant...

Page 90: ...ulfill machining actions accurately in the shortest time which gives the user a feel of freely mastering the software 6 5 2 Usage of Shortcut Keys The operation method of shortcut keys for example after the software opened pressing Ctrl I will eject Open dialog to import a file And then select a machining file Another example is to manually draw a circle press Alt D to choose Draw menu then press ...

Page 91: ...tails of Shortcut Keys F1 Help show shortcut key information F2 E stop F3 Go backward F4 Go forward F5 Set workpiece origin F6 Back to workpiece origin F7 Frame check F8 Simulation F9 Start F10 Pause F11 Stop F12 Clear track For more shortcut keys refer to Chapter 7 7 ...

Page 92: ...g to the default prompts and it s better not to install it to Program Files directory 2 After installation open XHCV9 exe under its installation folder 3 After run this program will be registered into registry as a startup autorun object If there is firewall allow the register 4 This handwheel can be only inserted into its customized USB controller to work normally 7 1 3 Introduction to Wireless H...

Page 93: ...the following wiring diagram takes the EX23A3 as an example SVC GND SPIN 24V COM POWER AVI ACM DC SPCOOL Y 0 Z 0 COM X 0 ZD ZD ZP ZP 5V X Stepping Interface COM START CUT STOP ESTOP Power Status Indicator OIL GREEN RED YD YD YP YP 5V Y Stepping Interface Y Driver XD XD XP XP 5V Z Stepping Interface X Driver Operation Input Terminals GND Terminal Y Limit X Limit X Limit E stop Home Input Terminals ...

Page 94: ...ive limit of Y axis Binary input signal active low connecting the positive limit switch of Y axis START Negative limit of X axis Binary input signal active low connecting the negative limit switch of X axis Z0 Arc feedback signal When it opens the system will execute arc feedback detection Y0 Y origin negative limit Binary input signal active low connecting the zero switch or negative limit switch...

Page 95: ...a Power Voltage GND 24V Power Input PM52C Control Card Plasm Gate Z axis Cylinder Green Lamp Red Lamp Negative Limit of Axis Y EX23A3 Axis Y Zero DC DB37 Socket Output Relay Area Fig 7 2 Wiring diagram of terminal board EX23A3 in Cylinder Table 5 Pin signals of terminal board EX23A3 in Cylinder Silk printed Name Signal Remarks 24V DC 24V power DC 24V power supply current 3A all 24V ports on termin...

Page 96: ...xis X0 X origin Binary input signal active low connecting the zero switch of X axis GREEN Green light On when machine tool in normal work status RED Red light On when E stop occurs or when machining finishes OIL Z axis cylinder External connection with the cylinder switch SPIN Plasma gate External connection with the plasma power 7 2 3 Wiring Diagram of Terminal Board EX22A2 in 1Y The basic wiring...

Page 97: ...TTING COM ZUP COM ZDOWN COM ABRASIVE COM BOOSTER COM H P COM Plasm Gate H L COM Yellow Lamp RED COM Red Lamp GREEN COM Green Lamp COM Feed Speed Down Feed Speed Up Axis Y Negative Manual Moving Axis Y Positive Manual Moving Axis X Negative Manual Moving Axis X Positive Manual Moving Breakpoint Resume Auto H Thick Plate Perforate Home X X Limit X Limit Cutting Head Collide Alarm Cutting Head Alarm ...

Page 98: ...rgency stop External connection with an E stop switch OILCK Program pause Binary input F Feed speed External connection with reset switches F Feed speed Y Manual motion along Y axis Y Manual motion along Y axis X Manual motion along X axis X Manual motion along X axis SVC Analog voltage Connection with plasma supply power to control plasma generator output power GND Analog voltage GREEN Green ligh...

Page 99: ...op Estop Program Pause F Z SET0 F COOL COM CUTTING COM ZUP COM ZDOWN COM ABRASIVE COM BOOSTER COM H P COM Plasm Gate H L COM Yellow Lamp RED COM Red Lamp GREEN COM Green Lamp COM Feed Speed Down Feed Speed Up Axis Y Negative Manual Moving Axis Y Positive Manual Moving Axis X Negative Manual Moving Axis X Positive Manual Moving Breakpoint Resume Auto H Thick Plate Perforate Home X X Limit X Limit C...

Page 100: ... Feed speed External connection with reset switches F Feed speed Y Manual motion along Y axis Y Manual motion along Y axis X Manual motion along X axis X Manual motion along X axis SVC Analog voltage Connection with plasma supply power to control plasma generator output power GND Analog voltage GREEN Green light Binary signal no voltage output RED Red light H L Yellow light H P Plasma BOOSTER Thic...

Page 101: ... Lamp GREEN COM Green Lamp COM Feed Speed Down Feed Speed Up Axis Y Negative Manual Moving Axis Y Positive Manual Moving Axis X Negative Manual Moving Axis X Positive Manual Moving Breakpoint Resume Thick Plate Perforate Home X X Limit X Limit Axis Z Negative Manual Moving Axis Z Negative Manual Moving SVC GND COM Operation Inputs Y2 Servo Interface Y1 Servo Interface DB15 Socket DB15 Socket Z Ser...

Page 102: ... Manual motion along Z axis Y Manual motion along Y axis Y Manual motion along Y axis X Manual motion along X axis X Manual motion along X axis SVC Analog voltage Connection with plasma supply power to control plasma generator output power GND Analog voltage GREEN Green light Binary signal no voltage output RED Red light H L Yellow light H P Plasma gate BOOSTER Thick plate punch signal COOL Blow n...

Page 103: ...B 3 B 4 C 5 C 7 24VIN 47 SRV ON 40 ALM 31 A CLR 44 GND 1 ALM 32 PULS 7 PULS 8 SIGN 11 SIGN 12 PAO 33 PAO 34 PBO 35 PBO 36 PCO 19 PCO 20 Weihong DB15 Driver Interface WISE Servo CN2 50P HD Plug 24V 6 ALM 8 SON 9 CLR 10 GND 15 PUL 11 PUL 12 DIR 13 DIR 14 A 1 A 2 B 3 B 4 C 5 C 7 24VIN 47 SRV ON 40 ALM 31 A CLR 44 GND 1 ALM 32 PULS 7 PULS 8 SIGN 11 SIGN 12 PAO 33 PAO 34 PBO 35 PBO 36 PCO 19 PCO 20 BK ...

Page 104: ... BK 30 Red Black Z axis brake line Figure 1 Signal Pin PA0 33 PA0 34 PB0 35 PB0 36 PC0 19 PC0 20 Signal Pin A 1 A 2 B 3 B 4 C 5 C 7 24V 6 ALM 8 SON 9 CLR 10 GND 15 PUL 11 PUL 12 DIR 13 DIR 14 PULS 7 PULS 8 SIGN 11 SIGN 12 24V 47 ALM 31 S ON 40 ALM RST 44 ALM 32 SG 1 S RDY BK 29 S RDY BK 30 Signal Pin PA0 33 PA0 34 PB0 35 PB0 36 PC0 19 PC0 20 PULS 7 PULS 8 SIGN 11 SIGN 12 24V 47 ALM 31 S ON 40 ALM ...

Page 105: ...6 SIGN2 47 COM 7 ALM 37 SRV ON 29 A CLR 31 COM 41 ALM 36 BRKOFF 11 BRKOFF 10 FG 50 Red Black Z axis Brake Line 7 3 4 Wiring Diagram of MITSUBISHI MR JE Servo Driver Signal Pin A 1 A 2 B 3 B 4 C 5 C 7 24V 6 ALM 8 SON 9 CLR 10 GND 15 PUL 11 PUL 12 DIR 13 DIR 14 Signal LA LAR LB LBR LZ LZR Pin 4 5 6 7 8 9 PP PG NP NG 10 11 35 36 DICOM ALM SON RES DOCOM 20 48 15 19 46 42 43 44 47 EMG LSP LSN DOCOM Mit...

Page 106: ...RK Weihong DB15 Driver interface Mitsubishi MR JE CN1 50P HD Plug Figure 2 with brake lines Note twisted pair for differential signals 7 3 5 Wiring Diagram of MITSUBISHI MR E Servo Driver Signal Pin A 1 A 2 B 3 B 4 C 5 C 7 24V 6 ALM 8 SON 9 CLR 10 GND 15 PUL 11 PUL 12 DIR 13 DIR 14 Signal VIN ALM SON RES SG EMG Pin 1 9 4 3 13 8 OPC 2 LA LAR LB LBR 15 16 17 18 LZ LZR 19 20 PP PG NP 23 22 25 24 12 1...

Page 107: ... OB 25 OB 23 OZ 50 OZ 24 Signal Pin A 1 A 2 B 3 B 4 C 5 C 7 24V 6 ALM 8 SON 9 CLR 10 GND 15 PUL 11 PUL 12 DIR 13 DIR 14 PULSE 43 PULSE 41 SIGN 36 SIGN 37 COM 11 DO5 ALRM 28 DI1 SON 9 DI5 ARST 33 COM 45 DI8 EMGS 30 DO5 27 COM 47 DO4 1 DO4 26 Red Black Z axis Brake Line Weihong DB15 Driver Interface DELTA ASDA A Servo 50P Figure 1 Signal Pin COM 4 DI1 SON 17 DO3 ALM 1 DI2 ARST 18 COM 13 Signal Pin 2...

Page 108: ...re 3 Note twisted pair cable used for differential signals Signal Pin COM 4 DI1 SON 17 DO3 ALM 1 DI2 ARST 18 COM 13 Signal Pin 24V 6 ALM 8 SON 9 CLR 10 GND 15 PUL 11 PUL 12 DIR 13 DIR 14 A 1 A 2 B 3 B 4 C 5 C 7 PULSE 22 PULSE 21 SIGN 20 SIGN 19 OA 10 OA 23 OB 12 OB 11 OZ 24 OZ 25 DO1 16 COM 13 Signal Pin COM 4 DI1 SON 17 DO3 ALM 1 DI2 ARST 18 COM 13 PULSE 22 PULSE 21 SIGN 20 SIGN 19 OA 10 OA 23 OB...

Page 109: ...N 42 ALM 43 SON 37 RST 30 COM 24 COM 25 SG 12 SG 48 SG 47 Z axis Brake Line Weihong DB15 Driver Interface SANYO PY DB50 HD Plug 7 3 8 Wiring Diagram of SANYO R Servo Driver OA 3 OA 4 OB 5 OB 6 OC 7 OC 8 Signal Pin Signal Pin A 1 A 2 B 3 B 4 C 5 C 7 24V 6 ALM 8 SON 9 CLR 10 GND 15 PUL 11 PUL 12 DIR 13 DIR 14 PPC 28 PPC 29 NPC 26 NPC 27 COM 50 COM 49 HBON 42 OUT 46 SON 37 RST 15 COM 24 SG 25 SG 48 S...

Page 110: ... 9 LA 3 LAR 8 LB 4 LBR 9 LZ 2 LZR 7 Weihong DB15 Driver Interface KT 270 Series Servo 7 3 10 Wiring Diagram of FUJI Servo Driver Signal Pin 24V 6 ALM 8 SON 9 CLR 10 GND 15 PUL 11 PUL 12 DIR 13 DIR 14 A 1 A 2 B 3 B 4 C 5 C 7 Signal Pin P24 1 OUT1 15 CONT1 RUN 2 CONT2 RST 3 M24 14 FFA 9 FFA 10 FFB 11 FFB 12 FFZ 23 FFZ 24 CA 7 CA 8 CB 20 CB 21 Note twisted pair for differential signals Brake unavaila...

Page 111: ...gnal Pin Input signal anode common port 7 Fault signal output 22 Servo enable input 23 Alarm clear signal input 8 Fault signal output 6 Signal Pin 24V 6 ALM 8 SON 9 CLR 10 GND 15 PUL 11 PUL 12 DIR 13 DIR 14 A 1 A 2 B 3 B 4 C 5 C 7 Pulse command signal input 12 Pulse command signal input 27 Direction pulse command input 13 Direction pulse command input 28 Signal differential output 33 Signal differ...

Page 112: ... PN 15 DP 16 DN 17 PA 35 PA 36 PB 37 PB 38 BI 20 DG 47 FG 50 PZ 40 PZ 39 BK BK Weihong DB15 Driver Interface TECO TSDA Series Servo 50P With a towline 7 3 14 Wiring Diagram of TECO ESDA Servo Driver DN SON CLR PN Signal Pin 24V 6 ALM 8 SON 9 CLR 10 GND 15 Signal Pin 24V 10 ALM 14 1 N24 22 2 PUL 11 PUL 12 DIR 13 DIR 14 PP 4 5 DP 6 7 A 1 A 2 B 3 B 4 C 5 C 7 FG 25 PZ 20 PZ 21 PB 19 PB 18 PA 17 PA 16 ...

Page 113: ...value pitch 5 mm encoder resolution 10000 deceleration ratio 1 1 pulse equivalent 0 001 mm Pr009 10000 Pr010 pitch 5mm pulse equivalent 0 001mm 5000 Pr009 Pr010 10000 5000 2 1 Pr010 Denominator of command pulse frequency division multiplic ation Need calculation 0 230 Pr100 1st position loop gain 480 default Unit 0 1 s Set it according to the actual situation Pr101 1st velocity loop gain 270 defau...

Page 114: ...ergone in terms of the setting values of Pr009 and Pr010 7 4 2 Parameter Setting of YASKAWA Σ Ⅱ Servo Driver Para No Function Value Description Fn010 Set password to prevent arbitrary modification to parameters 0000 Set 0000 modification to user parameters PnXXX and part of auxiliary function parameters FnXXX permitted Set 0001 modification to user parameters PnXXX and part of auxiliary function p...

Page 115: ...om CN1 29 CN1 30 to control 24V relay for brake Pn50E Selection function 0211 Set it when servo motor with brakes To avoid of CN1 29 and CN1 30 being used for other function and leading to brake ineffective 3 is not allowed to appear in the 4 digits Pn506 Servo off time delay of brake when motor stops Depended Set it when motor with brakes Default setting is 0 setting unit is 10ms Pn202 Electronic...

Page 116: ...OT prohibited Pn50B Input signal selection 2 6548 Bit 0 Set 8 negative rotation not used and signal input N OT prohibited Pn50F Output signal selection 2 0300 Set it when servo motor with brakes Bit 2 Set 3 brake interlock signal BK is output from CN1 29 CN1 30 to control 24V relay used for brake Pn50E Output signal selection 1 0211 Set it when servo motor with brakes To avoid of CN1 29 and CN1 30...

Page 117: ...ulse direction negative logic Pr48 1st numerator of command pulse frequency multiplication Need calculation Range 1 10000 Typical value pitch 5 mm encoder resolution 10000 shaft coupling direct drag pulse equivalent 0 001 mm Pr48 10000 Pr4B pitch 5mm pulse equivalent 0 001mm 5000 Pr48 Pr4B 10000 5000 2 1 Pr4B Denominator of command pulse frequency multiplication Need calculation Range 1 10000 7 4 ...

Page 118: ...hen the value of Pr0 08 is not 0 it can be calculated in terms of the following formula 5000 mm 001 0 mm 5 equivalent Pulse pitch Screw circle motor per No pulse Command p When screw pitch is 5mm and pulse equivalent 0 001 the value of Pr0 08 is 5000 Attached List the relationship among parameters Pr0 08 Pr0 09 and Pr0 10 Pr0 08 Pr0 09 Pr0 10 Description 0 220 no influence no influence Command Pul...

Page 119: ...n at power on This is used to select a status display shown at power on 00 cumulative feedback pulses 01 servo motor speed 02 droop pulses 03 cumulative command pulses 04 command pulse frequency PA13 PLSS Command pulse input form 0011 Set command pulse input form pulse train sign negative logic PD03 DI1L Input assignation to CN1 15 pin XX02 _ _xx select SON under position control mode 7 4 7 Parame...

Page 120: ...tia When the parameter is set 3 monitor if the number of sent and received pulse is correct by setting this parameter In Weihong control system the correct quantity of pulse sent by control card is detected by pulse inspection to determine if there is electrical interference 21 OP3 Function selection 3 command pulse format selection 0001 Set pulse command input form pulse train sign negative logic...

Page 121: ...otation CCW in terms of load Y 1 the rotation direction is reversed X1X0 00 position control mode P1 32 Motor stop mode selection YX 00 Y 0 when there is no servo enabled motor dynamic brake occurs Y 1 motor is free X 0 motor stops instantly X 1 motor stops with deceleration P1 44 Electronic Gear Ratio Numerator N1 1 32767 Need calculation N1 M encoder pulses 4 pulse equivalent mechanical decelera...

Page 122: ... Function setting for digital output pin DO4 X2X1X0 108 DO4 corresponds to pin 1 pin 26 used as clamping position brake signal of Z axis X2 1 set DO4 output as NO normally open a contact point X2 0 set DO4 output as NC normally closed b contact point X1X0 08 set pin 1 and pin 26 as BK and BK respectively P2 22 Function setting for digital output pin DO5 X2X1X0 007 DO5 corresponds to pin 28 pin 27 ...

Page 123: ...tation CCW X1X0 00 position control mode P1 44 Electronic Gear Ratio Numerator N1 1 32767 Need calculation N1 M mechanical deceleration ratio 4 encoder pulses pulse equivalent pitch Representative value encoder pulses 2500 pitch 5mm pulse equivalent 0 001 deceleration ratio 1 calculation as below N1 M 2500 4 0 001 5 2 1 N1 2 M 1 When the multi electronic gear ratio is not used P2 60 P2 62 are not ...

Page 124: ...pin DO5 X2X1X0 007 DO5 corresponds to pin 28 pin 27 used as servo alarm signal X2 0 set DO5 output as NC b contact point X1X0 07 set pin 28 and pin 27 as ALRM and ALRM respectively 7 4 10 Parameter Setting of DELTA ASDA B Servo Driver Para No Function Format Range Value Description P0 02 Driver status display 02 Monitor if the number of sent and received pulse is correct by setting this parameter ...

Page 125: ...ed calculation P2 10 Digital Input Pin 1 DI1 X2X1X0 101 X1X0 01 digital input DI1 SON corresponds to 17th pin of CN1 X2 1 set DI1 input as NO normally open a contact point P2 15 Function setting for digital input pin DI6 X2X1X0 100 Default factory setting of DI6 is NC normally closed limit signal input driver can t run without being connected to pin 32 and pin 31 of CN1 X2 1 set DI6 input as NO a ...

Page 126: ...tion is reversed X1X0 00 position control mode P1 44 Electronic Gear Ratio Numerator N1 1 32767 Need calculation N1 M mechanical deceleration ratio 4 encoder pulses pulse equivalent pitch Representative value encoder pulses 40000 pitch 5mm pulse equivalent 0 001 deceleration ratio 1 calculation as below N1 M 40000 4 0 001 5 32 1 N1 32 M 1 When the multi electronic gear ratio is not used P2 60 P2 6...

Page 127: ...ctively P2 22 Function setting for digital output pin DO5 X2X1X0 007 DO5 corresponds to pin 28 pin 27 used as servo alarm signal X2 0 set DO5 output as NC b contact point X1X0 07 set pin 28 and pin 27 as ALRM and ALRM respectively 7 4 12 Parameter Setting of SANYO PY Servo Driver Para No Abbr Name Standard Value Setting Range Unit Remark 1 2 EGER Electronic gear ratio 4 1 1 32767 to 32767 1 Depend...

Page 128: ...000P R Absolute encoder 2048P R 500 to 65535 P R 2 0 PMOD Pulse format of position command Our system uses direction pulse format the parameters are shown as following PMOD 7 6 5 4 3 2 1 0 Bit 1 0 0 1 1 Bit 0 0 1 0 1 Command Pulse Input Digital Filter Min Pulse Width 0 8µs 0 2µs 0 4µs 1 6µs When bit 7 0 Bit 1 0 0 1 1 Bit 0 0 1 0 1 Command Pulse Input Digital Filter Min Pulse Width 3 2µs 0 8µs 1 6µ...

Page 129: ...e Set Value Remarks Group 0 parameter setting of tuning mode 00 Setting of the tuning mode 00 Set as auto tuning mode Group 8 setting of the control parameters 00 Polarity of position input 00 Position command mode forward rotation effective 11 Input command mode 02 Pulse negative logic 15 Setting of electronic gear 8 5 It depends on the resolution of specific encoder E G incremental encoder 2000 ...

Page 130: ...hong control card is 0 001mm p it needs 1000 pulses to move 1mm along line in other words if the screw pitch is 5 so to move 5mm along line needs 5000 pulses so F 8000 5000 8 5 GER2 Electronic gear ratio 2 1 1 This setting is the same as that of electronic gear ratio 1 and activated during electronic gear switching Group 4 PA400 Command pulse selection 00H Set position command pulse as pulse direc...

Page 131: ...pression 4 C N G P P pulse amount of the input command G electronic gear ratio G ratio numerator ratio denominator N circle number that the motor rotates C each circle line number of photoelectric encoder C of our system 2500 E G input 6000 command pulses to make the servo motor rotate one circle 3 5 6000 4 2500 1 4 P C N G So set PA12 as 5 and PA13 as 3 The recommended range of electronic gear ra...

Page 132: ...SN is in driving of forward rotation and reverse rotation are both allowed Simultaneously even if LSP and LSN are both disconnected abnormal alarming of driving prohibited NO 7 will not occur 2 Invalid stroke end of LSP LSN forward rotation reverse rotation and SON is forced to be effective Note SON forcedly effective is only used for motor debugging In normal use we suggest controlling the state ...

Page 133: ...ction symbol that is pulse direction 04 Direction of rotation switch 0 or 1 Set 0 Positive direction Forward rotation CCW Set1 Positive direction Reverse rotation CW 10 CONT1 signal distribution 1 CONT1 is distributed as RUN i e SON if not distributed CONT1 will be auto ON if there is no alarming when powered 11 CONT2 signal distribution 2 CONT2 is distributed as RST i e servo alarming clearance C...

Page 134: ...rms of parameter setting of F3b and control the rotation direction by the direction keystroke and 4 Torque mode make sure the value and direction of motor torque according to the external analog 10V 10V signal of CN2 43 1 5 10 Mixed mode select mode according to the port input status of CN2 24 F00 Value 5 6 7 8 9 10 ON Mode Two External Speed Running Mode Internal Speed Running Mode Torque Mode Ex...

Page 135: ... 1 Value Function 0 Input positive order motor rotates anti clockwise 1 Input positive order motor rotates clockwise Pn021 Electronic gear ratio numerator Need calculation The input pulse amount will be multiplied by this ratio before output Ratio range of parameter 21 to 22 1 127 parameter 21 parameter 22 127 Pn022 Electronic gear ratio denominator Need calculation Pn011 4 Set the value of Pin20 ...

Page 136: ...e 1 Immediately X speed in coarse positioning 0 06 9000 mm min 1800 Immediately Y speed in coarse positioning 0 06 9000 mm min 1800 Immediately Z speed in coarse positioning 0 06 9000 mm min 1800 Immediately X speed in precision positioning 0 06 6000 mm min 60 Immediately Y speed in precision positioning 0 06 6000 mm min 60 Immediately Z speed in precision positioning 0 06 6000 mm min 60 Immediate...

Page 137: ...ble No Disable Yes After restart Lower limit of worktable stroke 999999 Upper limit mm 1000 After restart Upper limit of worktable stroke Lower limit 999999 mm 1000 After restart Starting speed 0 Max speed mm min 0 After restart Max speed 0 Max speed supported by hardware mm min 9000 Immediately Max acceleration 0 100000 mm s2 400 After restart Max jerk 0 100000 mm s3 10000 Immediately Compensatio...

Page 138: ... high speed connection 0 180 deg 90 Immediately During machining if the angle of two adjacent segments are larger than Max angle of high speed connection the speed of machining joint is 0 if smaller than Max angle of high speed connection an appropriate connection speed will be calculated according to the connection angle Interpolation algorithm 0 2 2 Immediately 0 straight line for acceleration t...

Page 139: ... deg 175 Immediately The position where the corner is larger than the value of this parameter will not be performed closed angle smoothing Precision of arc transition 0 001 10 mm 0 01 Immediately The precision for closed angle smoothing i e the length of OD shown in Fig 7 7 The larger the value is the larger the angle of round fillet is the larger the error will be while the smaller the value is t...

Page 140: ...Order Set Origin Manually X X Y Y Set Workpiece Origin Back to Workpiece Origin Simulate Dry Run Check Range Simulate Dry run Frame check Check Ports Control Control Auto Machining Start Stop Pause Resume Forward Backward Check Machining Results Display machining info like machining speed G00 time machining speed machining file name etc Set Tech Parameter Layer technology parameter setting Set lea...

Page 141: ...check F7 Frame check Ctrl G Gallery F8 Simulation Ctrl P System parameters F9 Start Ctrl I Import file F10 Pause Ctrl J Combine F11 Stop Ctrl N New F12 Clear Track Ctrl O Open file Alt 0 Show Ports window Ctrl S Save file Alt 1 Arc striking Ctrl Z Undo Alt 2 Auto high Ctrl Y Redo Alt 3 Fall Ctrl A Select all Alt 4 Rise Ctrl Shift A Select invert Num Zoom in Ctrl X Cut Num Zoom out Ctrl C Copy Num ...

Page 142: ...hat the third party accepts the terms and conditions stated in this agreement with prior express permission from Weihong Company 4 When transfer confirmed you shall transfer all the copies of the original documents and the supplementary documents to the third party or destroy all the copies un transferred 5 You can use the Software Product on a network server or intranet server only if it is stipu...

Page 143: ...antee made above the Software Product does not enjoy any other form of after sale guarantee Limitation of Liability The above guarantee whether made explicitly or by implication constitutes the entire contents of the guarantee including guarantee for the commerciality and applicability of special application aim Whether you follow other terms in this agreement or not Weihong Company as well as its...

Reviews: