


92
Watkiss DigiVAC Service Manual - Issue 2 - 29/11/04
Electronics & Software
•
Software - GUI Control Panel
4.4.3.2 Updating the DigiVAC Software Via an RS232 Cable
Make sure the DigiVAC software has self-extracted to the C:\GUI folder (see
Section 4.4.1.1). Once the RS232 connection is established (see Section
4.4.3.1), follow this procedure to update the DigiVAC software.
Procedure
1. Type
S
in the Hyperterminal window, press return and then press ‘Y’. The
DigiVAC is now ready to accept the software update.
2. To send the software update to the DigiVAC, select the Transfer drop-
down menu and select send file.
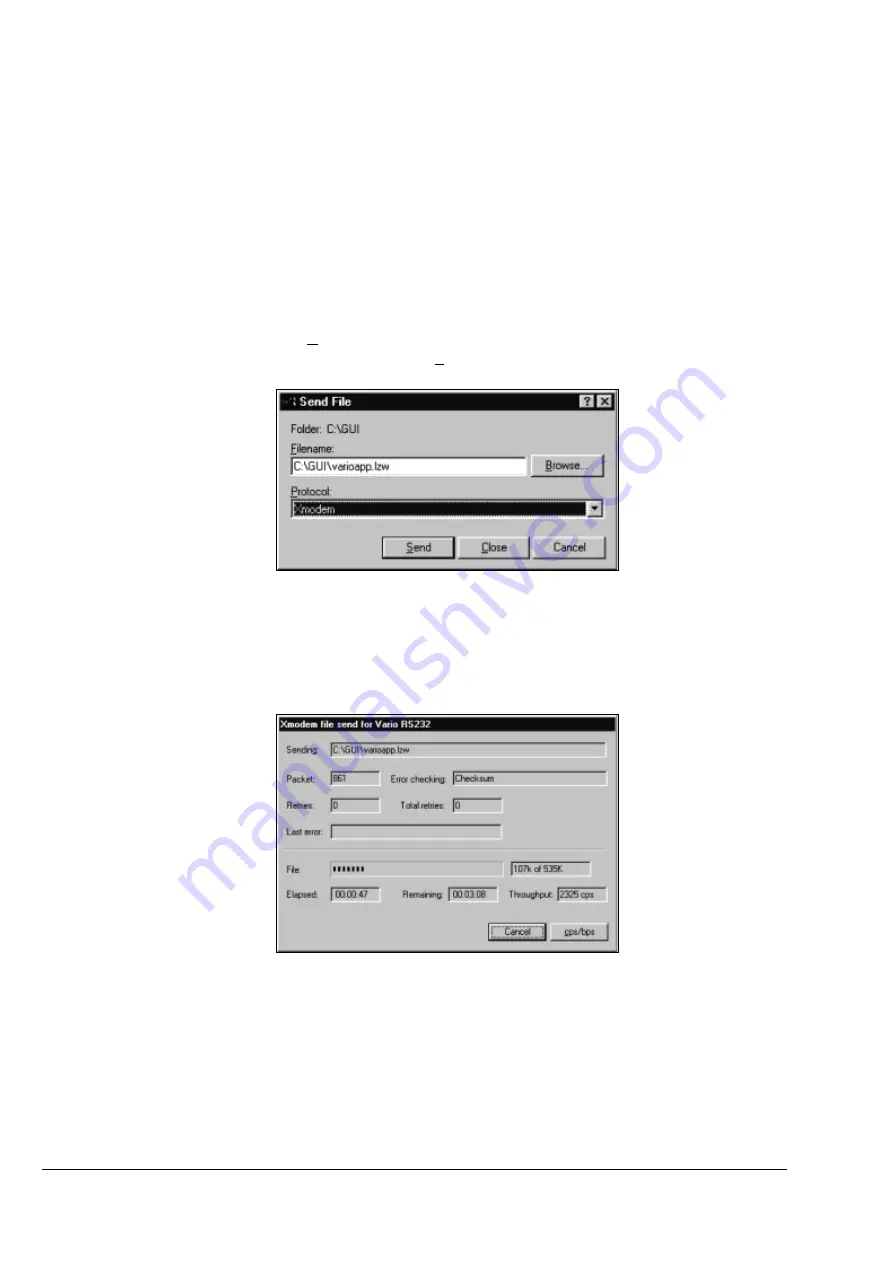
3. In the window that appears, type in the name and path of the software (nor-
mally
Varioapp.lzw
) or locate the file on your computer using the
‘Browse...’ button. Select Xmodem on the protocol menu (see Figure
4:16). Click on the ‘Send’ button.
Figure 4:16 Hyperterminal ‘Send File’ Settings.
4. The software will now be transferred to the DigiVAC’s download cache.
A window will appear that shows the progress of the transfer, and the time
remaining (see Figure 4:17). You do NOT need to click on any further but-
tons to start the transfer.
Figure 4:17 Transfer Display Window.
5. When the transfer is complete, this window will close. In the
Hyperterminal dialogue box, type
+++Y
at the prompt. The message
Serial Xmodem success
should appear. This means that the software is currently stored in the Di-
giVAC’s download cache.
6. Type
P
and press return to transfer the software to the flash memory.


