


Electronics & Software
•
Software - GUI Control Panel
Watkiss DigiVAC Service Manual - Issue 2 - 29/11/04
91
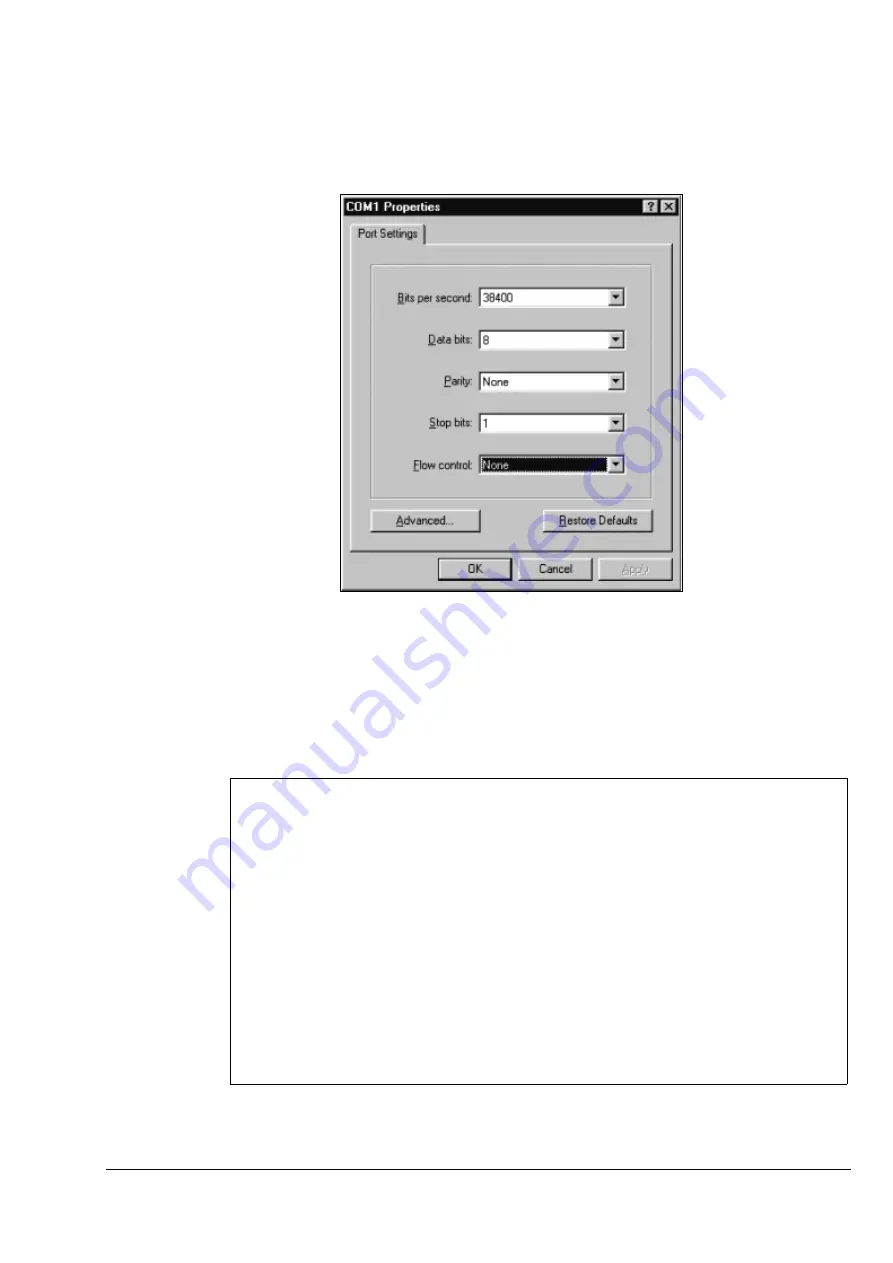
6. Select the connection properties in the next window, using the drag-down
menus. These settings are displayed on the cover of the GUI CPU, and are
shown in Figure 4:14. Click on the OK button, a blank dialogue window
will appear.
Figure 4:14 Connection Properties.
7. Switch on the DigiVAC Mains On/Off Switch and during the startup
beeps, open the rear door or press the space bar on the computer’s key-
board (this puts the DigiVAC into ‘boot mode’). When the beeps have
stopped, close the rear door.
8. Type
h
in the Hyperterminal window and press return to display the Di-
giVAC boot firmware’s help menu (see Figure 4:15) .
Figure 4:15 GUI Boot Firmware Help Menu.
Boot F/W : WALBOOT | WATKISS AUTOMATION LTD - MPC823_4MB
Version : V0.4c | Xmodem / 4+16MB SDRAM / AMD or ST FLASH
Build Date: Dec 18 2000 20:44:57 FLASH: 2MB SDRAM: 4MB
MachineName: DigiVAC CPU_SerNo: P3500002 MAC= 00:22:33:44:55:02
IP Address: 192.009.200.151 Mask: 255.255.255.000 GateW: 000.000.000.000
----------------------------------------------------------------------------
[S] Serial download (XMODEM via RS232) FDM file into Download cache
[L] Load SFM contents (FDM or LZW file) into Download cache
[D]__Download FDM file into Download cache via Ethernet using TFTP
[C] Check version of FDM file in download cache
[R] Run download FDM file in download cache
[P]__Program FLASH memory from download cache
[F] Display version of FDM in FLASH memory
[I] Inquire contents of SFM memory module
[N]__Ethernet Network settings (NOVRAM)
[Z] Reboot/Reset system!
[WALBOOT]


