9C-7 Combination Meter / Fuel Meter / Horn:
3) Move a screwdriver back and forth across the pick-
up surface of the speed sensor. The voltage
readings should cycle as follows (0 V
→
12 V or 12 V
→
0 V). If the voltage reading does not change,
replace the speed sensor with a new one.
NOTE
While testing, the highest voltage reading
should be the same as the battery voltage (12
V).
Ignition Switch Inspection
B931H29306012
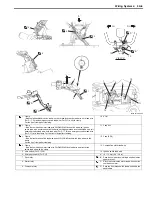
Inspect the ignition switch in the following procedures:
1) Remove the left inner fender. Refer to
“Front Side
Exterior Parts Removal and Installation: in
Section 9D”
.
2) Disconnect the ignition switch coupler (1).
3) Inspect the ignition switch for continuity with a tester.
If any abnormality is found, replace the ignition
switch with a new one.
Special tool
: 09900–25008 (Multi-circuit tester set)
Tester knob indication
Continuity (
)
4) After finishing the ignition switch inspection, reinstall
the removed parts.
Ignition Switch Removal and Installation
B931H29306013
Refer to
“Ignition Switch Removal and Installation: in
Section 1H”
.
Horn Inspection (For P-17, 24)
B931H29306014
NOTE
If the horn sound condition is normal, it is not
necessary to inspect the horn button
continuity.
Horn Button Inspection
1) Disconnect the horn couplers as shown in the wiring
harness routing diagram. Refer to
“Wiring Harness
Routing Diagram: in Section 9A”
.
2) Inspect the horn button for continuity with a tester.
If any abnormality is found, replace the horn button
with a new one.
Refer to
“Handlebars Removal and Installation: in
Section 6B”
.
Special tool
: 09900–25008 (Multi-circuit tester set)
Tester knob indication
Continuity (
)
3) Connect the horn couplers.
Horn Inspection
1) Disconnect the horn couplers as shown in the wiring
harness routing diagram. Refer to
“Wiring Harness
Routing Diagram: in Section 9A”
.
2) Connect a 12 V battery to terminal and terminal. If
the sound is not heard from the horn, replace the
horn with a new one.
3) Connect the horn couplers.
I831G1930022-01
1
I931H1930015-01
Color
Position
R
O
Gr
B/Y
B/W
ON
OFF
I931H1930016-01
Color
Position
G
B/W
PUSH
I831G1930024-03
I931H1930017-02
Summary of Contents for 2009 LT-A500XP
Page 2: ......
Page 4: ......
Page 14: ...00 9 Precautions ...
Page 224: ...1E 3 Engine Lubrication System EXHAUST SIDE INTAKE SIDE I931H1150003 02 ...
Page 304: ...1K 4 Exhaust System ...
Page 346: ...2D 5 Wheels and Tires ...
Page 438: ...3D 26 Propeller Shafts ...
Page 482: ...4D 6 Parking Brake ...
Page 512: ...5A 28 Automatic Transmission ...
Page 624: ...Prepared by December 2008 Part No 99500 44080 03E Printed in U S A 624 ...


