RADWIN
5000
HPMP
User
Manual
Release
3.5.70
8
‐
52
Changing
the
Sector
Band
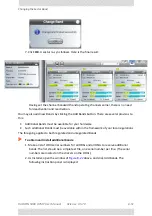
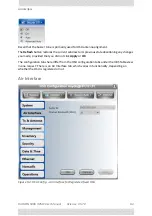
Figure
8
‐
24:
Add
Bands
Instructions
Panel
The
serial
numbers
displayed
relate
to
the
ODUs
in
the
sector.
Click
Copy
to
Clip
‐
board
.
3.
This
step
applies
only
if
you
have
additional
un
‐
installed
units:
Before
proceeding
to
step
2
in
open
your
own
list
in
a
plain
text
editor.
If
the
displayed
serial
numbers
are
in
the
list,
select
your
list
and
copy
it
all
to
the
clip
‐
board.
Otherwise
append
the
clipboard
contents
to
your
list.
Select
the
whole
list
and
save
it
to
the
clipboard.
4.
Now
carry
out
steps
2
to
5
in
.
Step
2
will
take
you
to
a
Web
page,
which
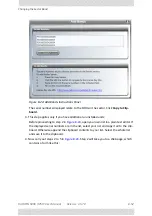
contains
a
form
like
this:
Summary of Contents for 5000 HPMP
Page 1: ...USER MANUAL RADWIN 5000 POINT TO MULTIPOINT BROADBAND WIRELESS Release 3 5 70...
Page 21: ...Part 1 Basic Installation Release 3 5 70...
Page 69: ...Part 2 Sector Installation Release 3 5 70...
Page 155: ...Part 3 Sector Management Release 3 5 70...
Page 197: ...RADWIN 5000 HPMP User Manual Release 3 5 70 8 42 Nomadic...
Page 252: ...RADWIN 5000 HPMP User Manual Release 3 5 70 11 8 Registering HMUs 3 Open the Air Interface tab...
Page 290: ...Part 4 Site Synchronization Release 3 5 70...
Page 319: ...RADWIN 5000 HPMP User Manual Release 3 5 70 16 7 Configuring the GSU...
Page 320: ...Part 5 Advanced Installation Topics Release 3 5 70...
Page 354: ...Part 6 Field Installation Topics Release 3 5 70...
Page 396: ...Part 7 Product Reference Release 3 5 70...
Page 517: ......

