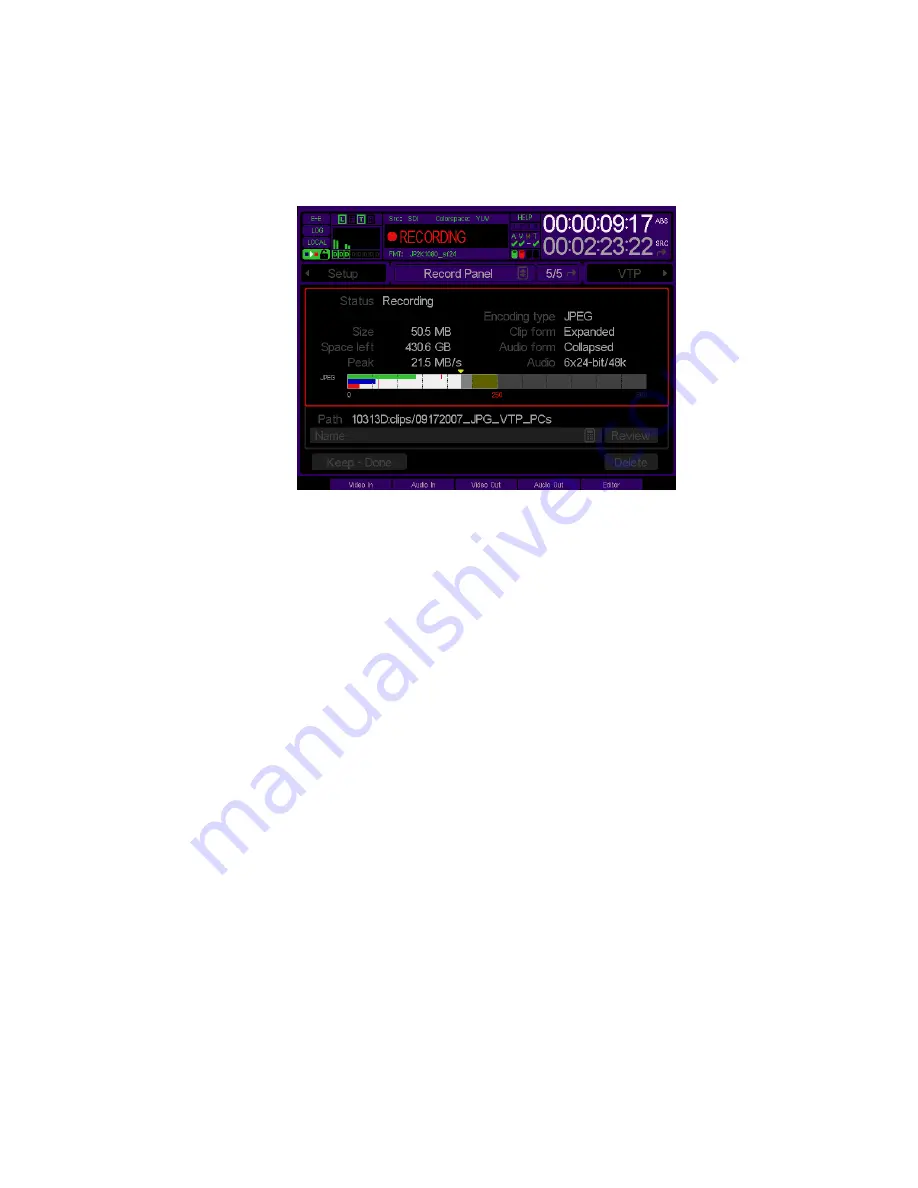
RECORD PANEL (5/5) menu page
This is the actual “recording in progress” screen. It appears when you press
REC + PLAY
(or if you navigate
directly to Record 5/5). If a recording is
not
in progress, it will appear inactive.
The upper and lower halves of the screen activate to display “live recording” and “after recording” controls and data.
In the upper section or box are the record status display, Record summary settings, and the data rate meter. The
lower section includes the clip name display, where you save or rename the recorded clip to a name of your
choosing, and the after-record options. One of these sections is always active and outlined in red during either the
recording process or when naming of a just-recorded clip.
The dashboard and the record status displays show real-time information about the properties for the clip during
recording. Afterward, the bottom half of the screen highlights, prompting you to save the clip under its default name,
provide a new name, or delete the clip if there was an error during record.
Several displays on this menu page are informational only. If you wish to change a setting, you must go to the
appropriate record menu page for that function and make the change there. For example, to change the directory
where new clips are stored you must go to Record Video (1/5) and change the
Destination
setting prior to recording.
Component-based data rate meter
The data rate meter provides a data rate bar for each 4:2:2/4:4:4 color component as well as the composite data
rate, which is shown in white. This allows the operator controlling the record session with the necessary feedback to
determine if any of the components are too “hot” which may lead to data clipping or the softening of the image when
the record fail-safe’s are activated.
Note:
If a video component clips, its corresponding component bar flashes red and the frame(s) in question are
noted in the system log.
Recording a clip
To record a clip, press
REC+PLAY
. The top half of the display will show real-time data during recording until you
press
STOP
.
QuVIS Acuity
™
Page 101
QSR Version 3.3
Summary of Contents for Acuity
Page 1: ......
Page 152: ...Keyboard Hotkeys Description ENTER Complete current edit QuVIS Acuity Page 151 QSR Version 3 3...
Page 190: ...QuVIS Acuity Page 189 QSR Version 3 1...
Page 200: ......


