ScreenWorks Software Overview
64
0112-0109 H
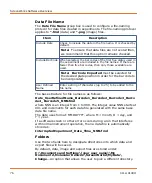
Define Camera Parameters Dialog Box
When
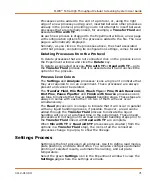
Read Plate
is identified as the
Plate Type
in the
Define Basic
Plate Parameters
dialog, the
Finish
button is enabled. Prior to
selecting
Finish
, a read plate with 10
-8
M fluorescein should be placed
in the read position. Once selected, the instrument will read the plate
and define a plate mask to the plate definition created. If a plate is
present, but no mask can be defined, the plate definition will be saved
as a source plate.
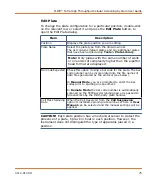
Item
Description
Plate Name
Enter the name you want assigned to the new plate
(maximum number of characters is 50).
Plate Type
Select
Source Plate
or
Read Plate
for the new plate.
Source Plate
—Creates a plate that does not include a
plate mask. These plates are typically used for compound
storage.
Read Plate
—Use for all plates that are read in the read
position and require a plate mask.
Plate
Specifications
Area for entry of physical plate dimensions. Refer to the
diagram in the upper-right corner of the dialog.
For best results, obtain the plate dimensions from the
plate manufacturer.
Note:
Molecular Devices is not responsible for
instrument malfunctions if plate specifications are
not correct.
Rows
—Enter the number of rows on the plate.
Columns
—Enter the number of columns on the plate.
Well Shape
—Select the appropriate shape from the
drop-down list.
Well Volume (
μ
L)
—Enter the maximum well volume in
microliters.
X (mm)
—Enter the distance (in mm) from the left side of
the plate to the center of well A1.
Y (mm)
—Enter the distance (in mm) from the top of the
plate to the center of well A1.
Bottom (mm)
—Enter the distance (in mm) from the
bottom of the plate skirt to the inside of the well.
Top (mm)
—Enter the distance (in mm) from the bottom
of the plate skirt to the top of the well.
Well Offset (mm)
—Enter the distance (in mm) from the
center of one well to the center of adjacent well.
Summary of Contents for FLIPR Tetra
Page 1: ...FLIPR Tetra High Throughput Cellular Screening System User Guide 0112 0109 H December 2011...
Page 12: ...Contents 12 0112 0109 H...
Page 16: ...System Overview 16 0112 0109 H...
Page 40: ...System Hardware Features 40 0112 0109 H...
Page 148: ...Exchanging Hardware 148 0112 0109 H...
Page 156: ...Calibration and Signal Test 156 0112 0109 H...
Page 196: ...Running an Experiment 196 0112 0109 H...
Page 232: ...Robotic Integration 232 0112 0109 H The following drawings illustrate these requirements...
Page 282: ...Data Processing Algorithms 282 0112 0109 H...
Page 294: ...Consumables and Accessories 294 0112 0109 H...
Page 298: ...Using AquaMax Sterilant 298 0112 0109 H...
Page 302: ...Electromagnetic Compatibility EMC 302 0112 0109 H...

