Setup Guide for the RadioRA Chronos System Bridge
28
Section 3 - Button Programming
Step 2
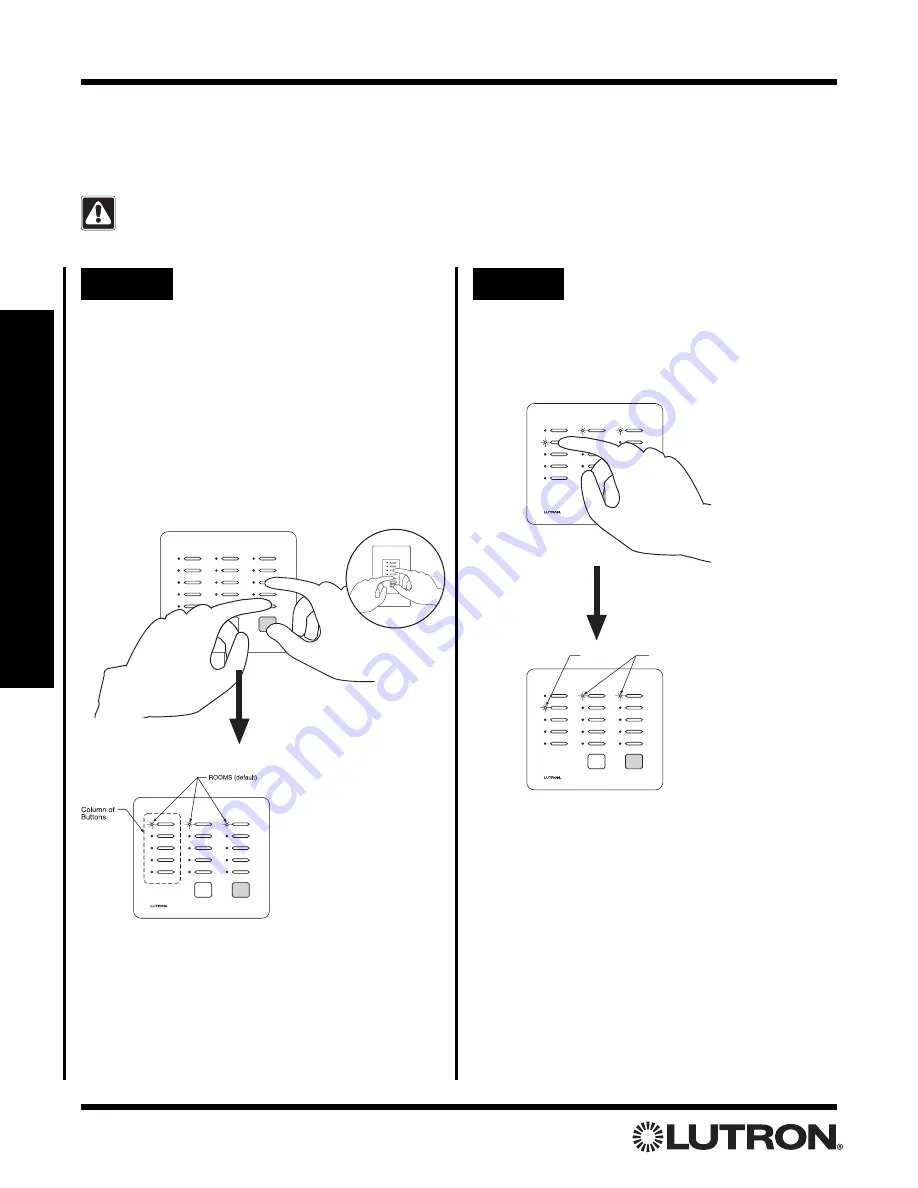
Changing ROOM/SCENE
assignments
Press the 1st button in a column to make that
column a ROOM column, or press the 2nd
button to make it a SCENE column.
ALL OFF
ALL ON
ROOMS
SCENES
Shown: Setting
left most column
as SCENE
buttons.
Assigning a Column of Buttons as ROOMS or SCENES
Each column of buttons on a Master Control can be programmed to be either ROOM or SCENE buttons. All
button columns are factory set as ROOM buttons. Refer to Rooms and Scenes Overview (page 26) for an expla-
nation of Rooms and Scenes. For an overview of the Master Control programming process, refer to page 25.
Changing a column assignment from ROOM to SCENE (or vice versa) will delete all previous
programming in that column of buttons.
If the first LED in a
column is flashing, the
buttons in that column
are set as ROOM but-
tons.
If the second LED in a
column is flashing, the
buttons in that column
are set as SCENE but-
tons.
Note:
The bottom row of LED s will flash when exter-
nal control is enabled. This feature needs to be
enabled for Whole-home buttons to function.
Step 1
Begin ROOM/SCENE
assignment
Simultaneously press and hold the 3rd, 5th,
and ALL OFF buttons in the right most column
until an LED in each column of the Master
Control which you are programming begins to
flash (approximately 3 seconds).
Note:
On a 5 button Raise/Lower Wall Master,
press and hold the 3rd, 5th, and Lower but-
tons.
Tabletop Master
Wall Master
OR
Local Button Programming


