crystal User Manual
Version: 6.6.0/2
32/459
5. Installation
2.
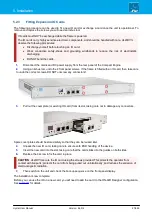
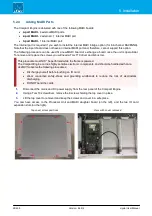
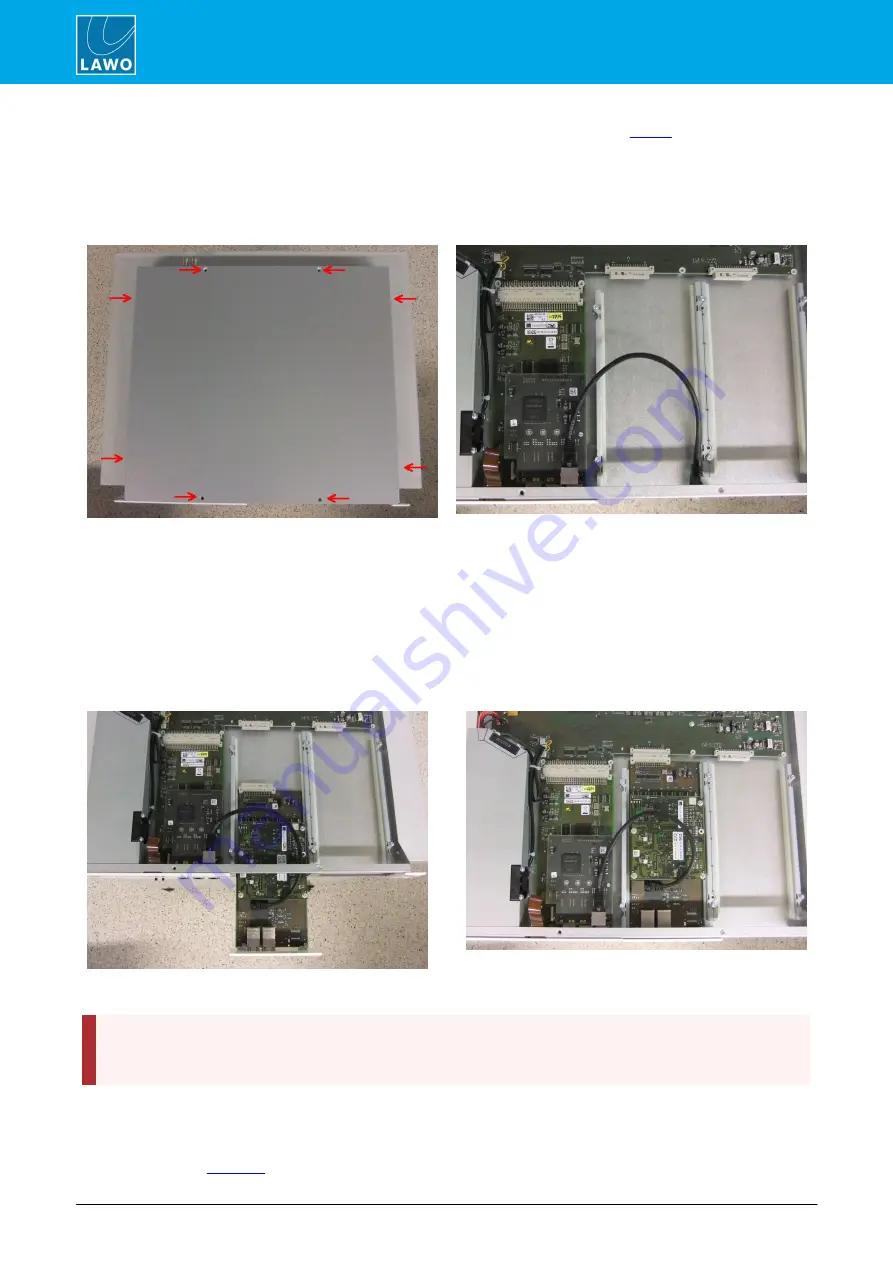
Fit either a 0-port or 2-port MADI board to the Processor Unit as described
If a compatible board is already installed, then simply remove the top cover.
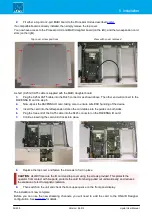
You now have access to the Processor Unit and MADI daughter board (on the left), and the two expansion card
slots (on the right).
Top cover screw positions
View with cover removed
A short (0.25m) CAT5 cable is supplied with the MADI daughter board.
3.
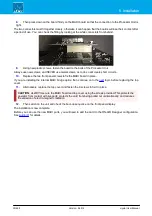
Plug the 0.25m CAT5 cable into the RJ45 connector as shown above. The other end will connect to the
RAVENNA IO card in step 6.
4.
Now unpack the RAVENNA IO card, taking care to ensure safe ESD handling of the device.
5.
Insert the card into the left expansion slot so the card slides into the guides on both sides.
6.
Plug the free end of the CAT5 cable into the RJ45 connector on the RAVENNA IO card.
7.
Continue inserting the card until it locks into place.
8.
Replace the top cover and fasten the 8 screws to fix it in place.
CAUTION
:
ALWAYS
secure the IO card and top cover using the screws provided. This protects the
operator from contact with live parts; protects the card from being pulled out unintentionally; and reduces
the emission of electro-magnetic radiation.
9.
Then switch on the unit and check the boot-up sequence on the front panel display.
The installation is now complete.
Before you can use the new streaming channels, you will need to add the card to the ON-AIR Designer
configuration. See
for details.

