5-25
Operation on the Machine > Sending
Specifying Destination
Select the destination using either of the following methods:
•
Choosing from the Address Book (page 5-25)
•
Choosing from the One Touch Key (page 5-27)
•
Choosing from the Speed Dial (page 5-28)
•
Entering a New E-mail Address (page 5-28)
•
Specifying a New PC Folder (page 5-30)
Choosing from the Address Book
Select a destination registered in the Address Book.
For more information about how to register destinations in the Address Book, refer to
Registering Destinations in the
Address Book on page 3-40
.
1
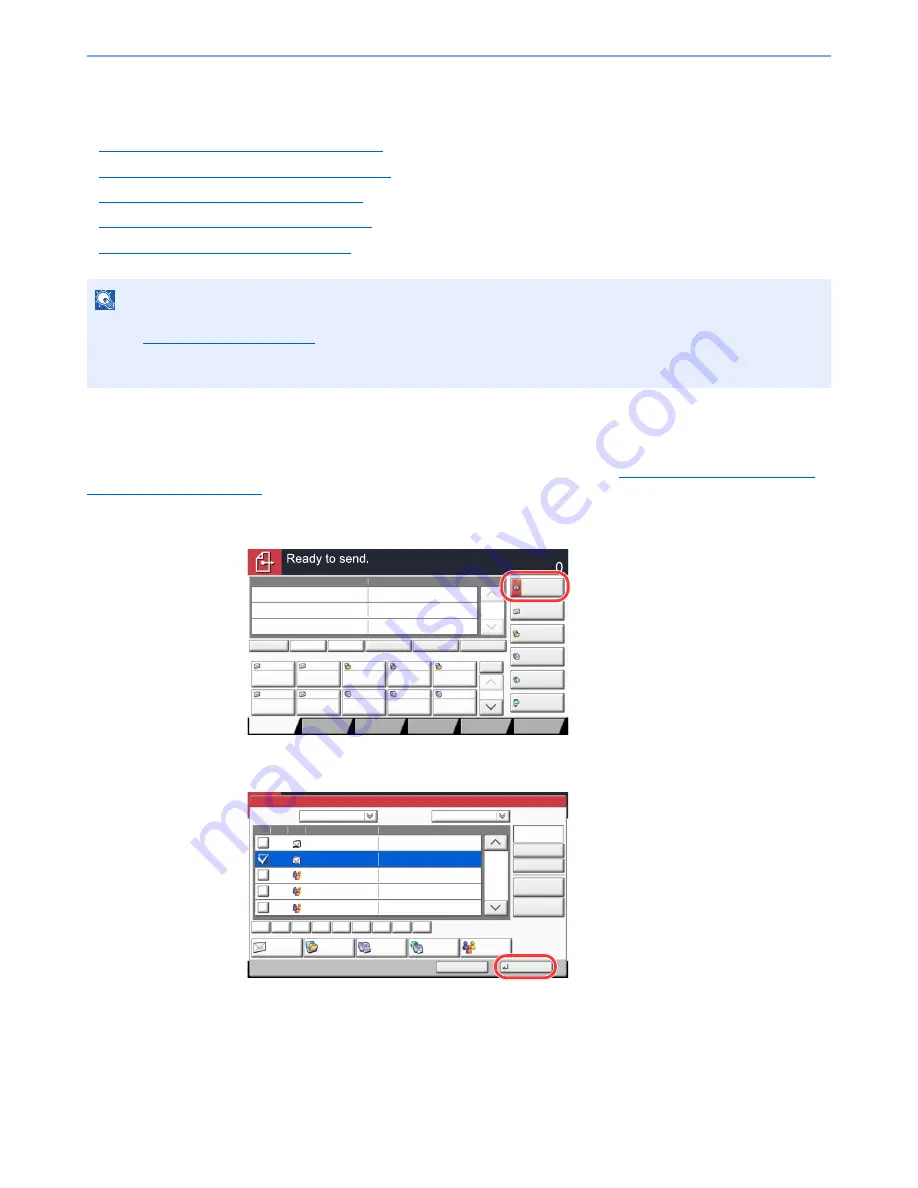
In the basic screen for sending, press [Address Book].
2
Select the destinations.
Press the checkbox to select the desired destination from the list. You may choose multiple
destinations. The selected destinations are indicated by a checkmark in the check box. To use
an address book on the LDAP server, select [Ext Address Book] from the "Addr Book" pull-
down menu.
You can change the order in which the destinations are listed by selecting [Name] or [No.] from
the "Sort".
NOTE
You can set the machine up so that the address book screen appears when you press the [
Send
] key. For details,
refer to
Default Screen on page 8-9
.
When the optional fax kit has been installed, you can specify the fax destination. Enter the other party number using
the numeric keypad.
Destination
Detail
㪘㪻㪻㫉㪼㫊㫊
㪙㫆㫆㫂
Folder Path
Entry
㪜㪄㫄㪸㫀㫃
㪘㪻㪻㫉㩷㪜㫅㫋㫉㫐
No.
1/100
AAA
BBB
CCC
DDD
FFF
GGG
HHH
III
JJJ
0004
0003
0005
0001
0002
0006
0007
0008
0009
0010
1/1
i-FAX
Addr Entry
㪝㪘㪯㩷㪥㫆㪅
㪜㫅㫋㫉㫐
WSD Scan
/DSM Scan
Destination
EEE
Detail/Edit
Delete
Recall
Chain
Direct
On Hook
Org./Sending
Data Format
㪨㫌㫀㪺㫂㩷㪪㪼㫋㫌㫇
㪛㪼㫊㫋㫀㫅㪸㫋㫀㫆㫅
㪚㫆㫃㫆㫉㪆
㪠㫄㪸㪾㪼㩷㪨㫌㪸㫃㫀㫋㫐
㪘㪻㫍㪸㫅㪺㪼㪻
㪪㪼㫋㫌㫇
㪧㫉㫆㪾㫉㪸㫄
On Hook
Address Book
Cancel
OK
Group
Dest.
Search(Name)
Search(No.)
No.
Type
Name
Detail
Folder
Detail
Address Book
Sort
Addr Book
0001
0002
0005
0004
0003
ABCD
TUVW
Group1
Group2
Group3
Name
Add/Edit
Address Book
1/2
i-FAX
FAX
ABC
DEF
JKL
MNO
PQRS
TUV
WXYZ
GHI
0-9
Summary of Contents for TASKalfa 3010i
Page 1: ...OPERATION GUIDE 3010i 3510i ...
Page 22: ...xxi ...
Page 42: ...xli Menu Map ...
Page 60: ...1 18 Legal and Safety Information Notice ...
Page 114: ...2 54 Installing and Setting up the Machine Transferring data from our other products ...
Page 164: ...3 50 Preparation before Use Registering Destinations in the Address Book ...
Page 176: ...4 12 Printing from PC Printing Data Saved on the Printer ...
Page 250: ...5 74 Operation on the Machine Manual Staple ...
Page 314: ...6 64 Using Various Functions Functions ...
Page 392: ...8 60 System Menu Default Setting on the Machine System Menu ...
Page 434: ...9 42 User Authentication and Accounting User Login Job Accounting Unknown ID Job ...
Page 438: ...10 4 Troubleshooting Regular Maintenance DP 772 1 2 3 4 ...
Page 439: ...10 5 Troubleshooting Regular Maintenance DP 773 1 2 ...
Page 441: ...10 7 Troubleshooting Regular Maintenance 3 4 5 6 ...
Page 471: ...10 37 Troubleshooting Troubleshooting Cassette 2 1 2 ...
Page 473: ...10 39 Troubleshooting Troubleshooting Large Capacity Feeder 1 500 sheet x 2 1 2 3 B1 B2 ...
Page 474: ...10 40 Troubleshooting Troubleshooting Multi Purpose Tray 1 2 3 4 ...
Page 475: ...10 41 Troubleshooting Troubleshooting Duplex unit 1 2 ...
Page 476: ...10 42 Troubleshooting Troubleshooting Inner Tray Fixing unit 1 2 3 ...
Page 480: ...10 46 Troubleshooting Troubleshooting Job Separator 1 2 3 Bridge Unit Option 1 2 ...
Page 481: ...10 47 Troubleshooting Troubleshooting 1 000 Sheet Finisher Option 1 2 3 D1 D2 2 1 D3 ...
Page 484: ...10 50 Troubleshooting Troubleshooting Tray B 1 2 3 D2 D3 ...
Page 485: ...10 51 Troubleshooting Troubleshooting Conveyor 1 2 Mailbox Option 1 D2 D3 1 2 ...
Page 488: ...10 54 Troubleshooting Troubleshooting ...
Page 529: ......
Page 532: ...First edition 2013 7 2NLKDEN100 ...


