Contact Mode Imaging
5
Keysight 5500 SPM User’s Guide
5-10
without placing unnecessary force on the tip. A good method for setting
the Setpoint is as follows:
1
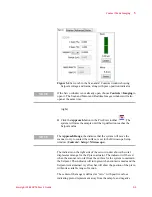
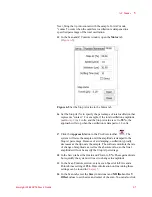
With the cursor in the Setpoint box, press the
Down
arrow on the
keyboard to make the Setpoint more negative. At some point, the
Setpoint voltage will drop so low that the tip will leave contact with
the sample—when it breaks free, the indicator in the Servo window
will change from green to red and the yellow indicator bar will move
to the top.
2
Press the
Up
arrow on your keyboard to then raise the Setpoint until
the tip just regains contact with the sample and begins to accurately
follow the sample surface. This is the lowest possible force that will
keep the tip and sample in contact.
3
During the scan, you may choose to raise the Setpoint to improve
tracking of the topography. Some iteration may be required to reach
the optimal value.
Gains
The I and P gains in the Servo window dictate how quickly the feedback
system reacts to changes in deflection. Typically the I (Integral) and P
(Proportional) gains are set to the same value; the I gain setting has a
much greater effect on imaging than the P gain.
When the gains are set too high, the system will overcompensate to
correct changes in tip deflection which will lead to “ringing” at the
leading and trailing edges of features. When the gains are too low, the
system will not adjust the tip quickly enough for that scan speed,
blurring the topography.
The following procedure is a useful way to adjust the gains:
1
Begin imaging with
I Gain
and
P Gain
set fairly low (0.50-1.00).
2
Increase the
I Gain
in steps of one or two to increase the contrast and
detail of the image.
3
Increase the
I Gain
until oscillations appear in the scan lines, then
decrease until the oscillations cease.
4
Adjust the
P Gain
to increase image quality. P Gain is typically close
to the same value as the I Gain.


