Scanner Maintenance
Carriages, static drain wire and tracks
3.
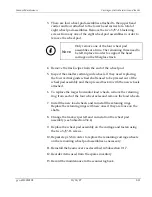
There are four wheel pad assemblies attached to the upper head
carrier and four attached to the lower head carrier for a total of
eight wheel pad assemblies. Remove the two 3/8"-16 fastening
screws from any one of the eight wheel pad assemblies in order to
remove the wheel pad.
i
N
OTE
:
Only remove one of the four wheel pad
assemblies at a time. The remaining three need to
be left in place in order to support the head
carriage on the fiberglass track.
4.
Remove the track wiper from the end of the wheel pad.
5.
Inspect the smaller vertical guide wheels. If they need replacing,
the four vertical guide wheel shafts need to be pressed out of the
wheel pad assembly and then pressed back in with the new wheels
attached.
6.
To replace the larger horizontal load wheels, remove the retaining
ring from each of the four wheel axles and remove the load wheels.
7.
Install the new load wheels and re-install the retaining rings.
Replace the retaining rings with new ones if they are loose on the
shafts.
8.
Change the track wiper felt and re-install on the wheel pad
assembly (see Subsection 9.4.4).
9.
Replace the wheel pad assembly on the carriage and fasten using
the two 3/8"-16 screws.
10.
Repeat steps 3-8 in order to replace the remaining carriage wheels
on the remaining wheel pad assemblies as necessary.
11.
Reinstall the beam covers as described in Subsection 9.1.7.
12.
Reorder items used from the spares inventory.
13.
Record the maintenance in the scanner logbook.
p/n 6510020208
10/18/07
9-13
Summary of Contents for 4022
Page 1: ...Precision Platform 4022 Scanner System Manual 6510020208 ...
Page 2: ......
Page 3: ...Precision Platform 4022 Scanner October 2007 ...
Page 22: ......
Page 72: ......
Page 94: ......
Page 126: ......
Page 162: ......
Page 170: ......
Page 234: ......
Page 239: ...Glossary p n 6510020208 10 18 07 11 5 VIO Virtual Input Output ...


