PowerVault ML6000 Maintenance Guide
69
6
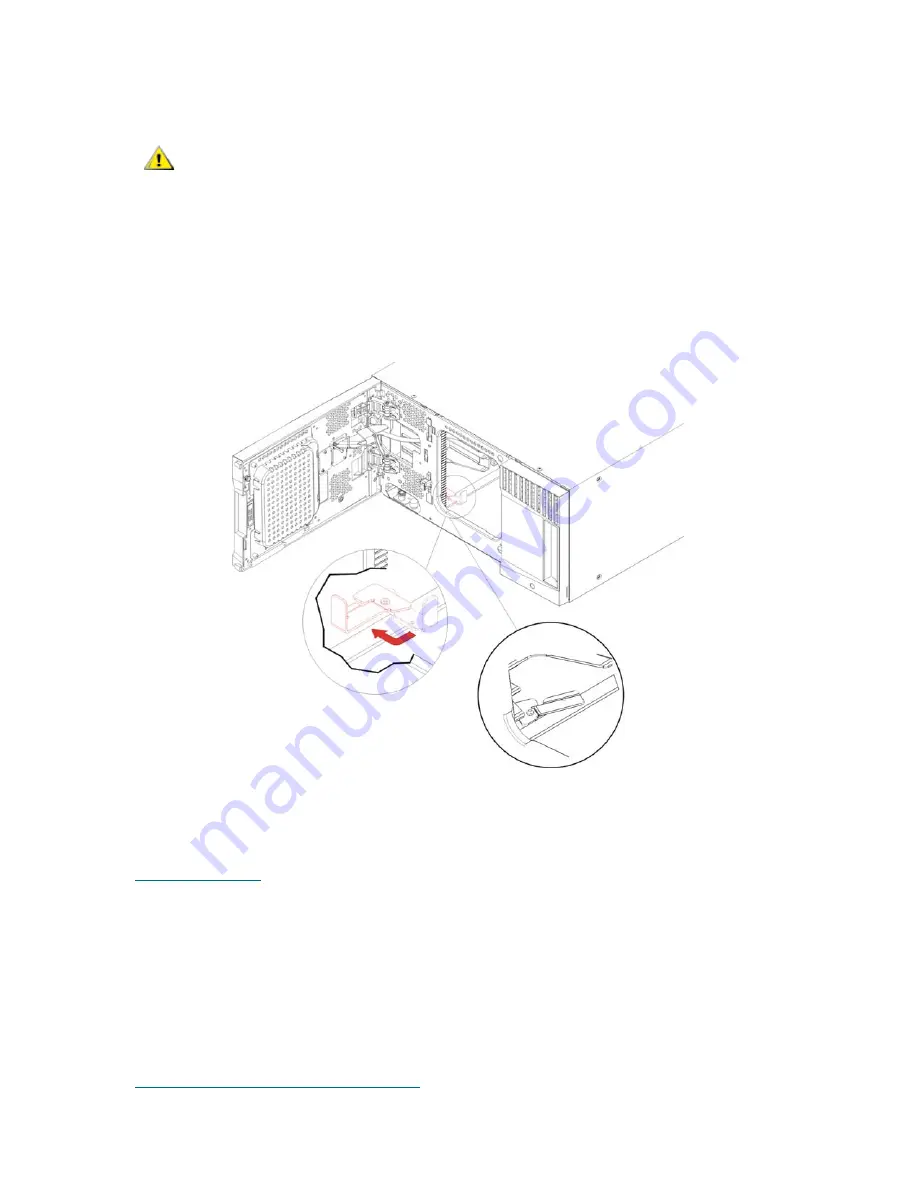
Unpark the robot assembly.
a. Gently raise the robot assembly so that it no longer rests on the parking tab.
b. With your free hand, move the parking tab to the "unparked" position so that it is removed
completely from the interior of the module (
Model 1 parking tab:
swivel the parking tab away
from you;
Model 2 parking tab
: move in a clockwise direction). When replaced correctly, the
parking tab will not accidentally swivel into the path of the robot.
c. Gently release the robot assembly. It will lower to the bottom module of the library.
7
Connect all power cords, network data cables, and module-to-module cables. Make sure the module
terminators are installed at the top and bottom of the stack of modules. For cabling instructions, see
Cabling the Library
on page 22.
8
Power on the library.
9
Reconfigure the library, including applying the new COD license key, using the operator panel or Web
client.
10
Recreate any partitions you deleted prior to installing the module.
11
Add the tape cartridges to the library’s modules using the I/E station commands from the operator panel
or Web client.
12
Open the host application and reinventory to synchronize its logical inventory with the physical inventory
of the library. Due to the way the library logically addresses its tape drives and slots internally (see
Understanding Logical Element Addressing
on page 543), adding an expansion module will change the
CAUTION
Support the robot assembly by holding onto the broad metal X-axis
base plate. Lifting the robot by the thin metal rod will bend the rod.
Lifting the robot by the black plastic picker body can damage the
robot.
Model 2 tab
Model 1 tab
Summary of Contents for PowerVault ML6000
Page 1: ...w w w d e l l c o m s u p p o r t d e l l c o m MaintenanceGuide Dell PowerVault ML6000 ...
Page 14: ...xiv Tables ...
Page 18: ...xviii Figures ...
Page 452: ...434 Troubleshooting the Tape Library ...
Page 456: ...438 Library Drawings Library Rear View Figure 32 ML6020 Rear View ...
Page 468: ...450 Library Drawings Power Supplies Figure 49 Power Supplies ...
Page 477: ...PowerVault ML6000 Maintenance Guide 459 Figure 58 Electrical System 5U Library Control Module ...
Page 478: ...460 Library Drawings Figure 59 LCB Functions ...
Page 479: ...PowerVault ML6000 Maintenance Guide 461 ...
Page 482: ...464 Library Drawings Figure 64 Fan Control Board ...
Page 483: ...PowerVault ML6000 Maintenance Guide 465 Figure 65 Library Cables ...
Page 484: ...466 Library Drawings Figure 66 Library System Grounding ...
Page 485: ...PowerVault ML6000 Maintenance Guide 467 Figure 67 Library Power System ...
Page 486: ...468 Library Drawings ...
Page 494: ...476 Glossary Y axis Y position The vertical position of the library s robotic arm ...


