PowerVault ML6000 Maintenance Guide
175
5
While supporting the center of the robot tray, slowly lower the robot until the top of the Y-climber front
shelf mount is even with the front gear rack on the Y-rail. You may need to exert slight downward
pressure on the robot to engage the gears in the gear rack and begin lowering the robot.
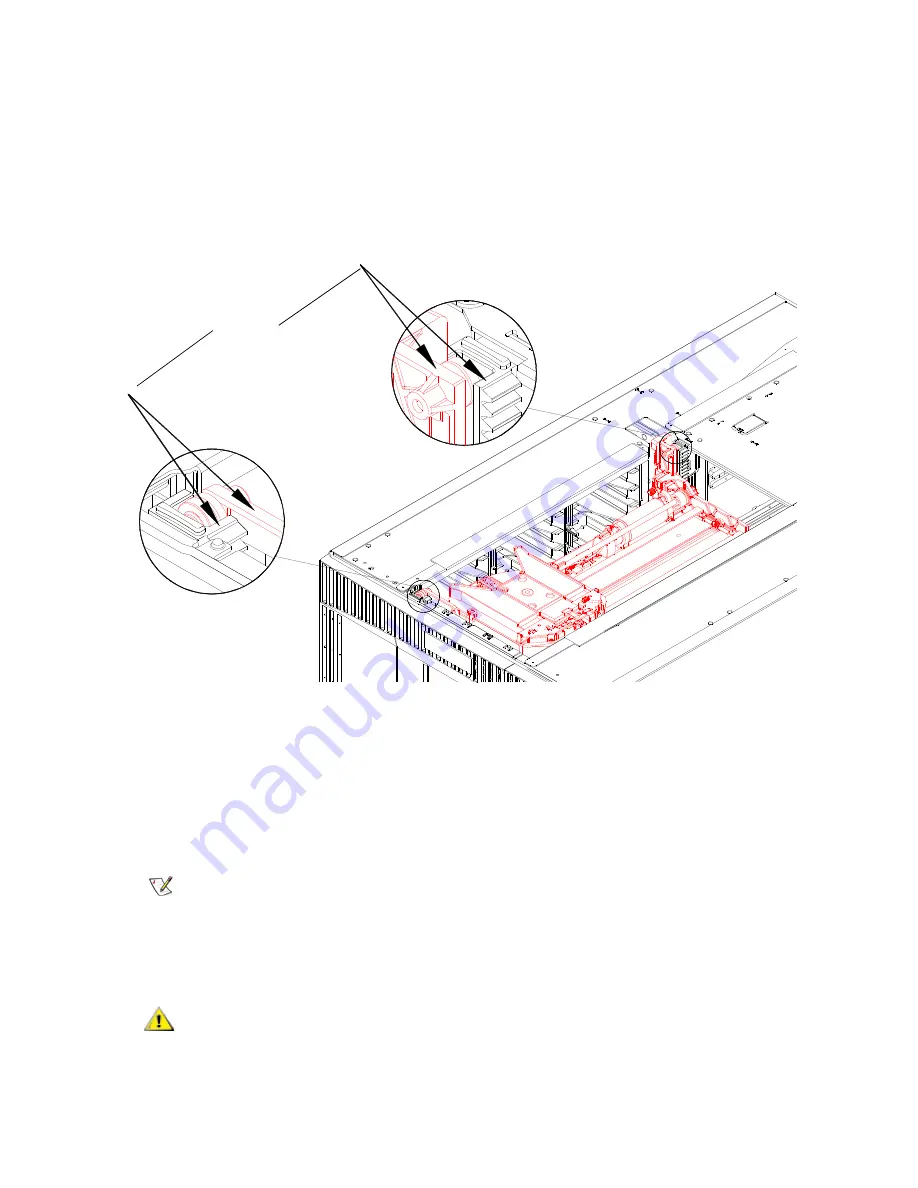
While continuing to hold the robot level, verify that the Y climber rear shelf mount is level with the rear
gear rack on the Y-rail. Check both places indicated in the figure below. If it is level, continue to the next
step.
If it is off by more than 2 mm, the robot is NOT LEVEL. Disengage the robot from the gear
rack and repeat the previous step.
6
After you have verified that the front and rear shelf mounts are level with the Y racks, lower the robot so
that it rests on the parking tab. (If your library consists of a single 5U Library Control Module, release
the robot so that it rests on the bottom of the unit.)
7
Replace the top cover.
8
Re-stack the library modules as necessary.
9
Unpark the robot assembly. (If your library consists of a single 5U Library Control Module, skip this
step.)
a. Gently raise the robot assembly so that it no longer rests on the parking tab.
Note
If your library is rack-mounted, you will need to perform additional steps to
add the modules to the rack.
CAUTION
Support the robot assembly by holding onto the broad metal X-axis
base plate. Lifting the robot by the thin metal rod will bend the rod.
Lifting the robot by the black plastic picker body can damage the
robot.
Check
both
places
Summary of Contents for PowerVault ML6000
Page 1: ...w w w d e l l c o m s u p p o r t d e l l c o m MaintenanceGuide Dell PowerVault ML6000 ...
Page 14: ...xiv Tables ...
Page 18: ...xviii Figures ...
Page 452: ...434 Troubleshooting the Tape Library ...
Page 456: ...438 Library Drawings Library Rear View Figure 32 ML6020 Rear View ...
Page 468: ...450 Library Drawings Power Supplies Figure 49 Power Supplies ...
Page 477: ...PowerVault ML6000 Maintenance Guide 459 Figure 58 Electrical System 5U Library Control Module ...
Page 478: ...460 Library Drawings Figure 59 LCB Functions ...
Page 479: ...PowerVault ML6000 Maintenance Guide 461 ...
Page 482: ...464 Library Drawings Figure 64 Fan Control Board ...
Page 483: ...PowerVault ML6000 Maintenance Guide 465 Figure 65 Library Cables ...
Page 484: ...466 Library Drawings Figure 66 Library System Grounding ...
Page 485: ...PowerVault ML6000 Maintenance Guide 467 Figure 67 Library Power System ...
Page 486: ...468 Library Drawings ...
Page 494: ...476 Glossary Y axis Y position The vertical position of the library s robotic arm ...


