PowerVault ML6000 Maintenance Guide
101
10
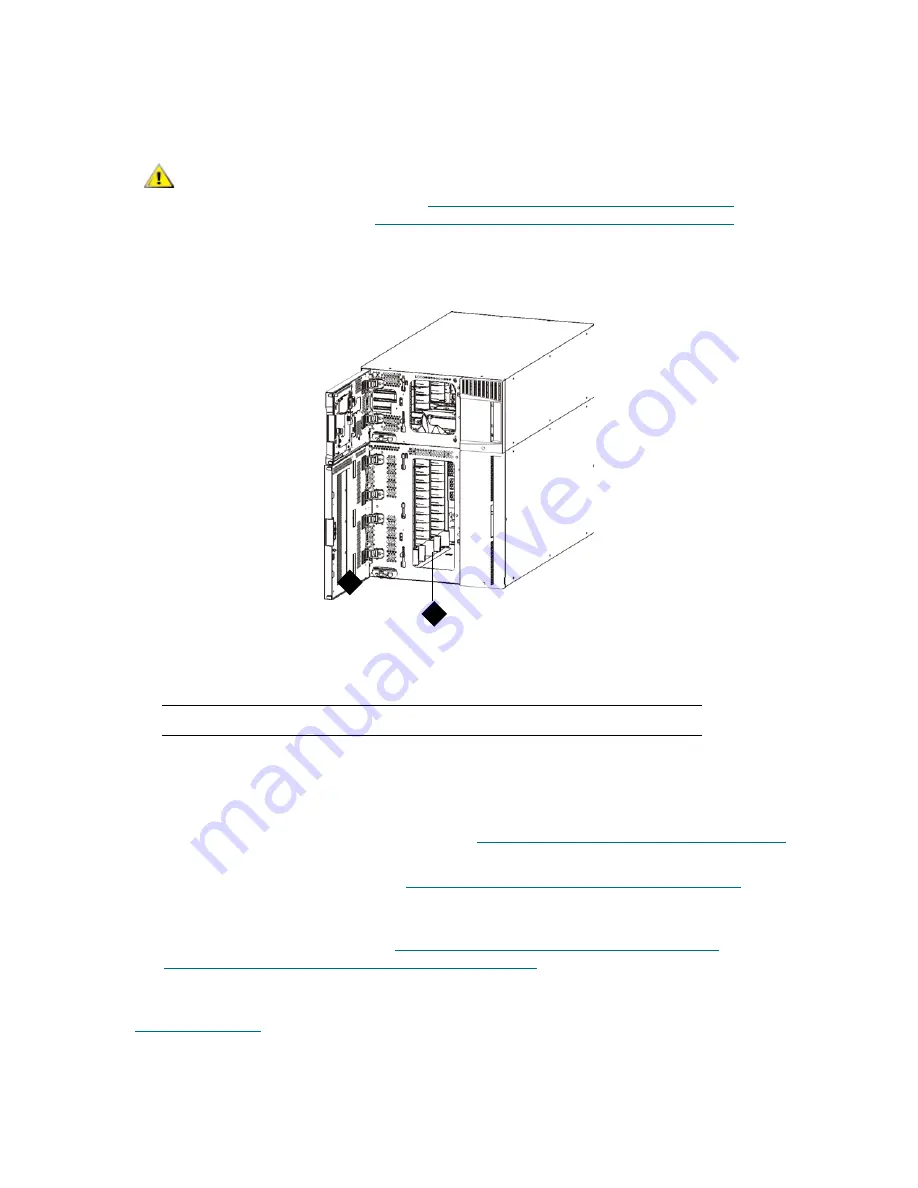
If required, install the tape blockers in the bottom two rows of the library configuration. The tape blockers
block slots in the bottom two rows of the library. You can insert the tape blockers through the open
access door.
Preparing to Use the 9U Expansion Module
1
Close the library’s I/E station and access doors.
2
Add the tape drives to the modules. For details, see
Adding, Removing, and Replacing Tape Drives
on
page 127.
3
Add the power supplies. For details, see
Adding, Removing, and Replacing Power Supplies
on page
106.
4
If your library contains FC I/O blades, install both the I/O blades and the accompanying fan blades in
the expansion module. For details, see
Adding, Removing, and Replacing FC I/O Blades
on page 130
and
Adding, Removing, and Replacing the FC I/O Fan Blade
on page 137.
5
Connect all power cords, network data cables, and module-to-module cables. Make sure the module
terminators are installed at the top and bottom of the stack of modules. For cabling instructions, see
Cabling the Library
on page 22.
6
Power on the library.
7
Re-create partitions, cleaning slots, and I/E station slots as desired.
CAUTION
Libraries that have a Model 2 robot installed no longer use tape blockers. If
your library contains a Model 2 robot, do NOT install tape blockers. For
more information, see
Removing and Replacing the Robot Assembly
on
page 164 and
How to Determine Which Robot Your Library Contains
on
page 165.
1
access door
2
tape blockers (installed)
1
2
Summary of Contents for PowerVault ML6000
Page 1: ...w w w d e l l c o m s u p p o r t d e l l c o m MaintenanceGuide Dell PowerVault ML6000 ...
Page 14: ...xiv Tables ...
Page 18: ...xviii Figures ...
Page 452: ...434 Troubleshooting the Tape Library ...
Page 456: ...438 Library Drawings Library Rear View Figure 32 ML6020 Rear View ...
Page 468: ...450 Library Drawings Power Supplies Figure 49 Power Supplies ...
Page 477: ...PowerVault ML6000 Maintenance Guide 459 Figure 58 Electrical System 5U Library Control Module ...
Page 478: ...460 Library Drawings Figure 59 LCB Functions ...
Page 479: ...PowerVault ML6000 Maintenance Guide 461 ...
Page 482: ...464 Library Drawings Figure 64 Fan Control Board ...
Page 483: ...PowerVault ML6000 Maintenance Guide 465 Figure 65 Library Cables ...
Page 484: ...466 Library Drawings Figure 66 Library System Grounding ...
Page 485: ...PowerVault ML6000 Maintenance Guide 467 Figure 67 Library Power System ...
Page 486: ...468 Library Drawings ...
Page 494: ...476 Glossary Y axis Y position The vertical position of the library s robotic arm ...


