PowerVault ML6000 Maintenance Guide
65
3
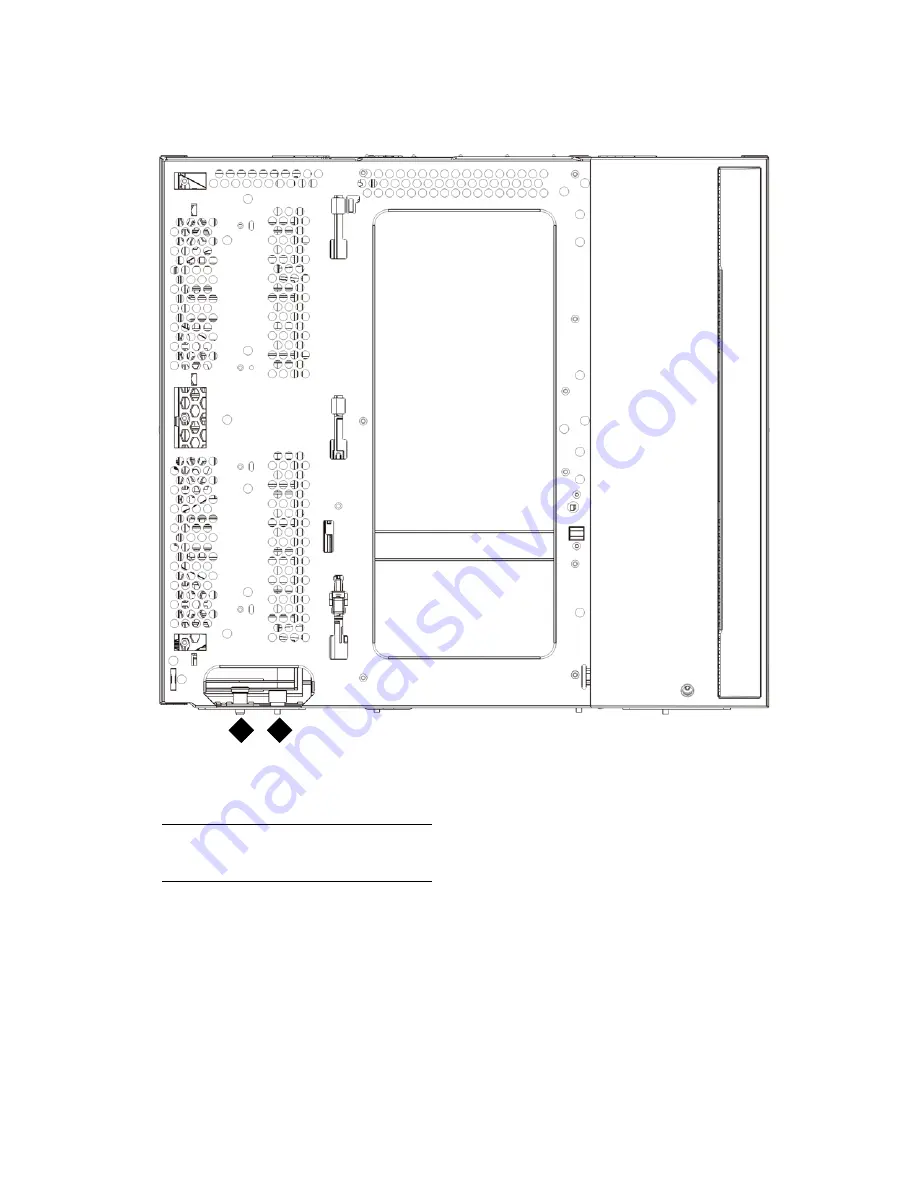
Open the 9U Expansion Module’s access door and raise the guide pin by pulling it up and turning it
slightly, as if it were a screw. Otherwise, the guide pin may scratch the front doors of the module on
which you are stacking it.
4
Lift the new 9U Expansion Module and, from the front of the library, place it in the desired location.
5
If there is already a module installed, secure the two modules together by tightening the two
thumbscrews at the base of the front of the module and the two thumbscrews located at the base of the
back of the module. Then lower the module’s guide pin (located at the base of the front of the module)
by turning it and pushing it down.
6
Tighten all thumbscrews located at the base of the front and back of the modules.
7
Fasten the module to the rack with rack ears.
1
Guide pin
2
Thumbscrew
2
1
Summary of Contents for PowerVault ML6000
Page 1: ...w w w d e l l c o m s u p p o r t d e l l c o m MaintenanceGuide Dell PowerVault ML6000 ...
Page 14: ...xiv Tables ...
Page 18: ...xviii Figures ...
Page 452: ...434 Troubleshooting the Tape Library ...
Page 456: ...438 Library Drawings Library Rear View Figure 32 ML6020 Rear View ...
Page 468: ...450 Library Drawings Power Supplies Figure 49 Power Supplies ...
Page 477: ...PowerVault ML6000 Maintenance Guide 459 Figure 58 Electrical System 5U Library Control Module ...
Page 478: ...460 Library Drawings Figure 59 LCB Functions ...
Page 479: ...PowerVault ML6000 Maintenance Guide 461 ...
Page 482: ...464 Library Drawings Figure 64 Fan Control Board ...
Page 483: ...PowerVault ML6000 Maintenance Guide 465 Figure 65 Library Cables ...
Page 484: ...466 Library Drawings Figure 66 Library System Grounding ...
Page 485: ...PowerVault ML6000 Maintenance Guide 467 Figure 67 Library Power System ...
Page 486: ...468 Library Drawings ...
Page 494: ...476 Glossary Y axis Y position The vertical position of the library s robotic arm ...


