Addressing Memory Configurations
If you are using a 32-bit operating system such as Microsoft
®
Windows
®
Vista
®
, your computer will support a maximum of 4 GB of memory. If you are using a
64-bit operating system, your computer will support a maximum of 8 GB (2-GB DIMMs in each of the four slots) of memory.
Installing Memory Module (s)
1.
Follow the procedures in
Working on Your Computer
.
2.
Remove the computer cover (see "Removing the Computer Cover" for your specific computer).
3.
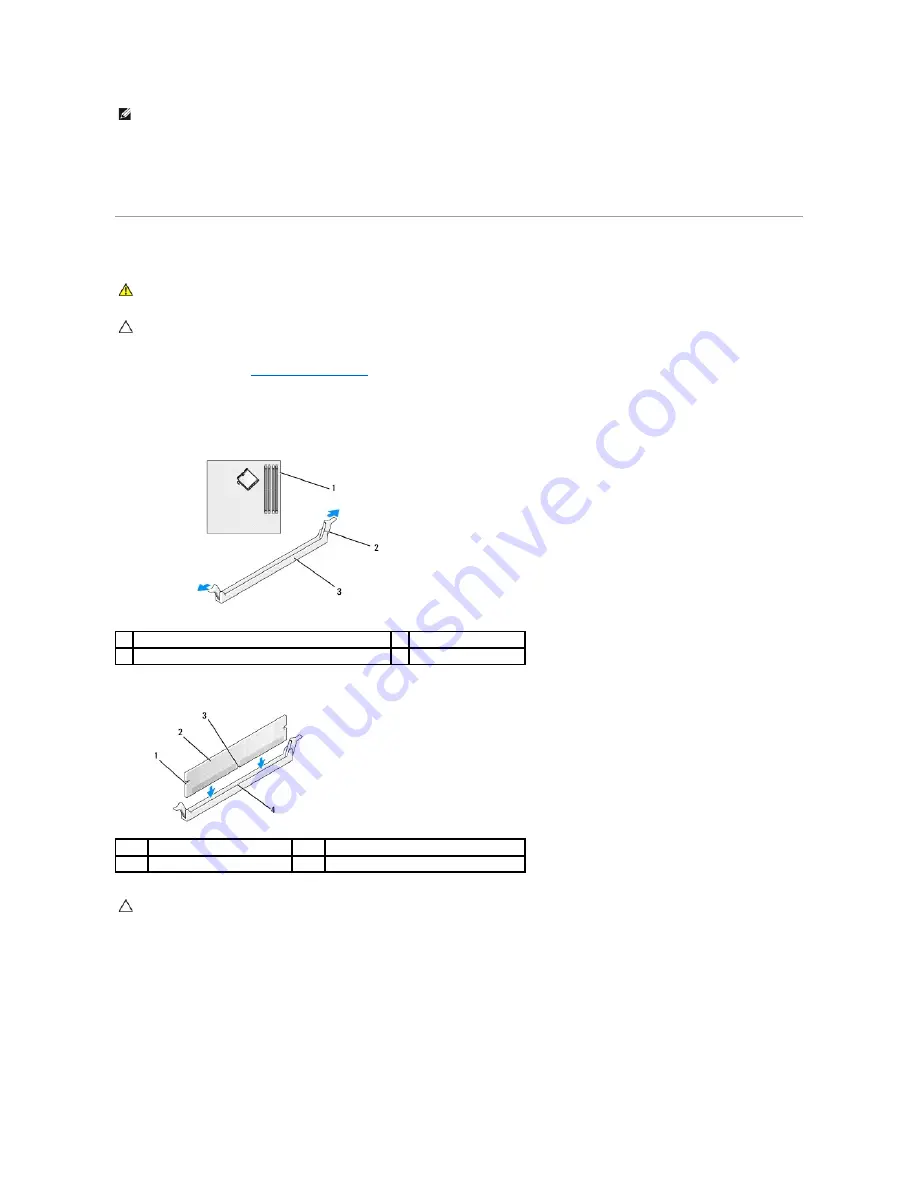
Press out the securing clip at each end of the memory module connector.
4.
Align the notch on the bottom of the module with the crossbar in the connector.
5.
Insert the module into the connector until the module snaps into position.
If you insert the module correctly, the securing clips snap into the cutouts at each end of the module.
NOTE:
Memory purchased from Dell is covered under your computer warranty.
WARNING:
Before working inside your computer, read the safety information that shipped with your computer. For additional safety best
practices information, see the Regulatory Compliance Homepage at www.dell.com/regulatory_compliance.
CAUTION:
To avoid electrostatic discharge and damage to internal components, ground yourself by using a wrist grounding strap or by
periodically touching an unpainted metal surface on the computer chassis.
1
memory connector closest to processor
2
securing clips (2)
3
memory connector
1
cutouts (2)
2
memory module
3
notch
4
crossbar
CAUTION:
To avoid damage to the memory module, press the module straight down into the connector while you apply equal force to each end of
the module.
Summary of Contents for OptiPlex 760
Page 29: ......
Page 48: ......
Page 101: ......
Page 106: ...Back to Contents Page 1 release knob ...
Page 140: ...5 Replace the computer cover 6 Turn on power to the computer Back to Contents Page ...
Page 143: ...Back to Contents Page 19 fan connector FAN_CPU ...
Page 146: ...Desktop System Board Screws Small Form Factor System Board Screws 1 screws 9 1 screws 9 ...
Page 148: ...Back to Contents Page ...
Page 157: ...Mini Tower Desktop Small Form Factor Ultra Small Form Factor ...
Page 194: ...7 Replace the cable cover if used Back to Contents Page ...
Page 196: ...Back to Contents Page ...
Page 199: ...5 Replace the computer cover 6 Turn on power to the computer Back to Contents Page ...


