


Back to Contents Page
Dell™ OptiPlex™ 760 Service Manual
Drives
Drives
Your computer supports:
l
One serial ATA (SATA) hard drive
l
One 3.5-inch drive bay (to support a floppy drive or a media card reader)
l
One SATA optical drive
General Drive Installation Guidelines
SATA connectors on the system board are labeled SATA0 and SATA1. Hard drives must be connected to the lower-numbered SATA connectors. Any other SATA
device (like an optical drive) must be connected to the remaining SATA connectors numbered higher than the one that the hard drive is connected to. For
example, if you have a SATA hard drive and a SATA optical drive, connect the hard drive to the SATA0 connector and connect the SATA optical drive to the
SATA1 connector (see
System Board Components
for the location of the SATA connectors on the system board).
Connecting Drive Cables
When you install a drive, you connect two cables
—
a DC power cable and a data interface cable
—
to the back of the drive.
Data Interface Connectors
NOTE:
Due to the limited number of drive bays and controllers on this computer, you will not be able to connect all supported devices at once.
NOTE:
If you will be operating your computer without an optical drive or a 3.5-inch device (floppy drive or media card reader) installed, the appropriate
drive bay insert must be installed in place of the drive. Contact Dell if you need a drive bay insert.
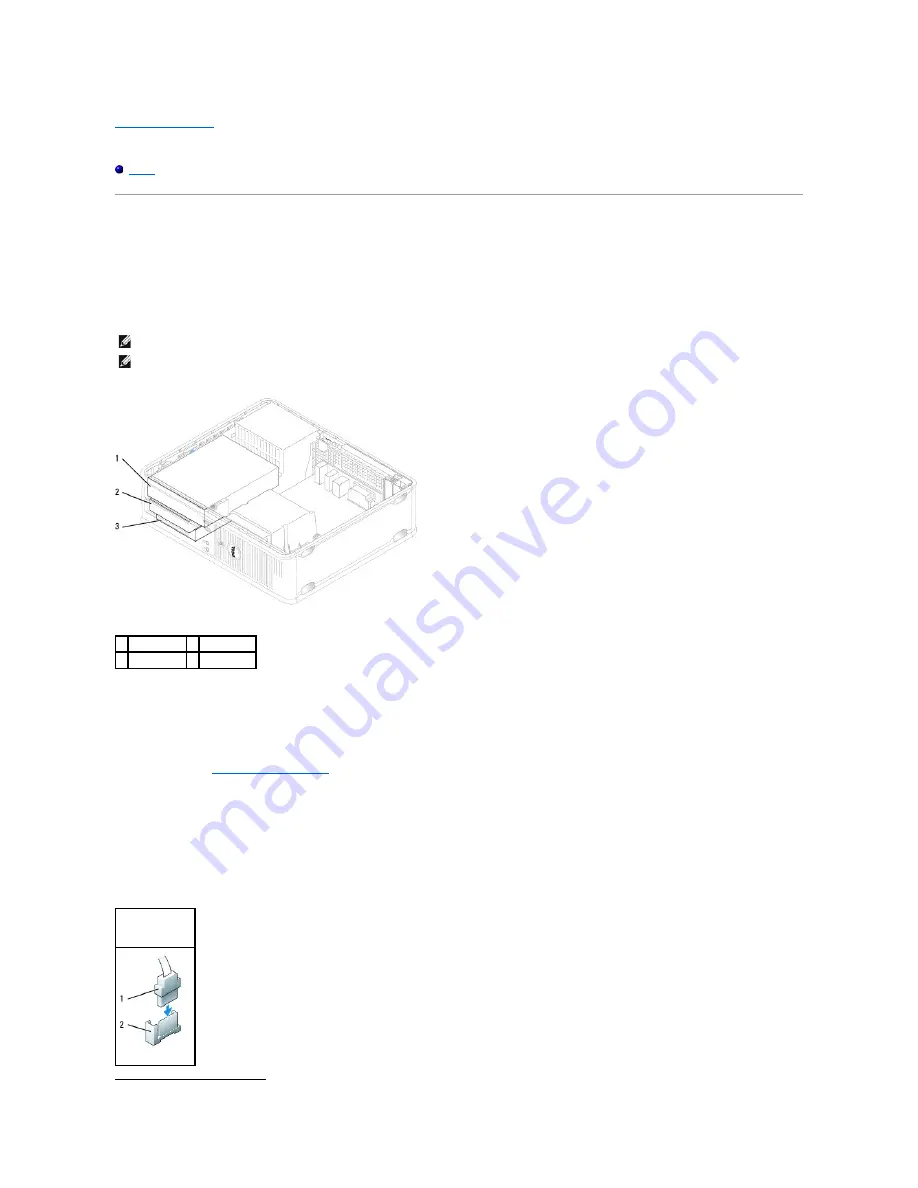
1 optical drive 2 floppy drive
3 hard drive
SATA Connector
Summary of Contents for OptiPlex 760
Page 29: ......
Page 48: ......
Page 101: ......
Page 106: ...Back to Contents Page 1 release knob ...
Page 140: ...5 Replace the computer cover 6 Turn on power to the computer Back to Contents Page ...
Page 143: ...Back to Contents Page 19 fan connector FAN_CPU ...
Page 146: ...Desktop System Board Screws Small Form Factor System Board Screws 1 screws 9 1 screws 9 ...
Page 148: ...Back to Contents Page ...
Page 157: ...Mini Tower Desktop Small Form Factor Ultra Small Form Factor ...
Page 194: ...7 Replace the cable cover if used Back to Contents Page ...
Page 196: ...Back to Contents Page ...
Page 199: ...5 Replace the computer cover 6 Turn on power to the computer Back to Contents Page ...