Back to Contents Page
Dell™ OptiPlex™ 760 Service Manual
Cards
Cards
Your Dell™ computer supports a PS/2 serial port adapter and provides the following connectors for PCI and PCI Express cards:
l
One low-profile PCI card slot
l
One low-profile PCI Express x16 card slot
PCI Cards
Installing a PCI Card
1.
Follow the procedures in
Working on Your Computer
.
2.
Remove the computer cover (see
Removing the Computer Cover
).
3.
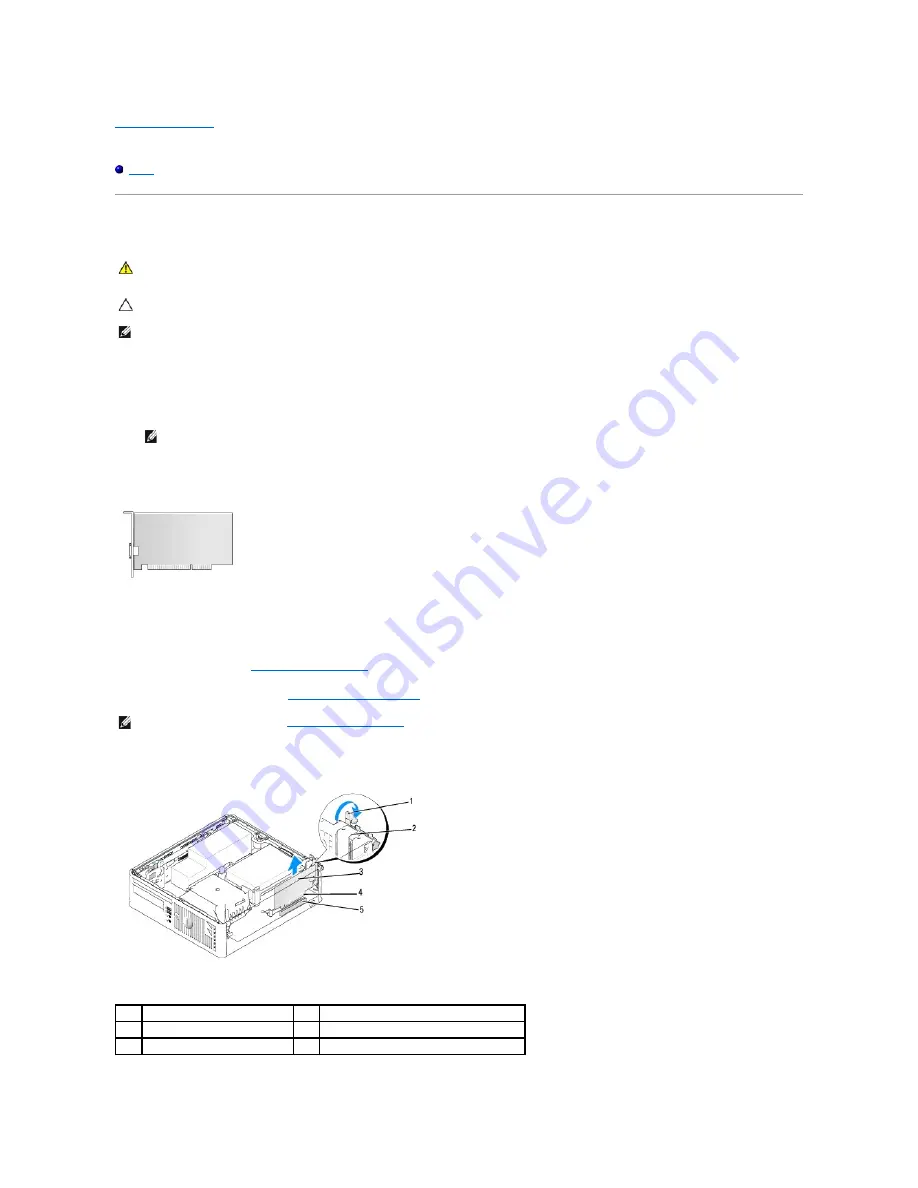
Gently lift the release tab on the card retention latch from the inside and pivot the latch open.
WARNING:
Before working inside your computer, read the safety information that shipped with your computer. For additional safety best
practices information, see the Regulatory Compliance Homepage at www.dell.com/regulatory_compliance.
CAUTION:
To prevent static damage to components inside your computer, discharge static electricity from your body before you touch any of
your computer's electronic components. You can do so by touching an unpainted metal surface on the computer chassis.
NOTE:
Installing filler brackets over empty card-slot openings is necessary to maintain FCC certification of the computer. The brackets keep dust and dirt
out of your computer and maintains the airflow that cools your computer.
NOTE:
Your Dell computer uses only PCI and PCI Express slots. ISA cards are not supported.
NOTE:
For PCI card locations, see
System Board Components
.
1
release tab
2
card retention latch
3
card
4
card-edge connector
5
card connector
Summary of Contents for OptiPlex 760
Page 29: ......
Page 48: ......
Page 101: ......
Page 106: ...Back to Contents Page 1 release knob ...
Page 140: ...5 Replace the computer cover 6 Turn on power to the computer Back to Contents Page ...
Page 143: ...Back to Contents Page 19 fan connector FAN_CPU ...
Page 146: ...Desktop System Board Screws Small Form Factor System Board Screws 1 screws 9 1 screws 9 ...
Page 148: ...Back to Contents Page ...
Page 157: ...Mini Tower Desktop Small Form Factor Ultra Small Form Factor ...
Page 194: ...7 Replace the cable cover if used Back to Contents Page ...
Page 196: ...Back to Contents Page ...
Page 199: ...5 Replace the computer cover 6 Turn on power to the computer Back to Contents Page ...


