4-11
Cisco Network Modules Hardware Installation Guide
OL-2485-20
Chapter 4 Connecting Fast Ethernet-PRI Network Modules
Fast Ethernet-PRI Module LEDs
Step 6
Align the network module with the guides in the chassis and slide it gently into the slot.
Step 7
Push the module into place until you feel its edge connector mate securely with the connector on the
motherboard.
Step 8
Fasten the module captive mounting screws into the holes in the chassis, using the Phillips or flat-blade
screwdriver.
Step 9
If the router was previously running, reinstall the network interface cables and turn on power to the
router.
The following warning applies to routers that use a DC power supply:
Warning
After wiring the DC power supply, remove the tape from the circuit breaker switch handle and
reinstate power by moving the handle of the circuit breaker to the ON position.
Statement 8
Fast Ethernet-PRI Module LEDs
All network modules have an enable (EN) LED. This LED indicates that the module has passed its
self-tests and is available to the router.
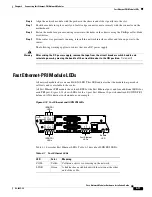
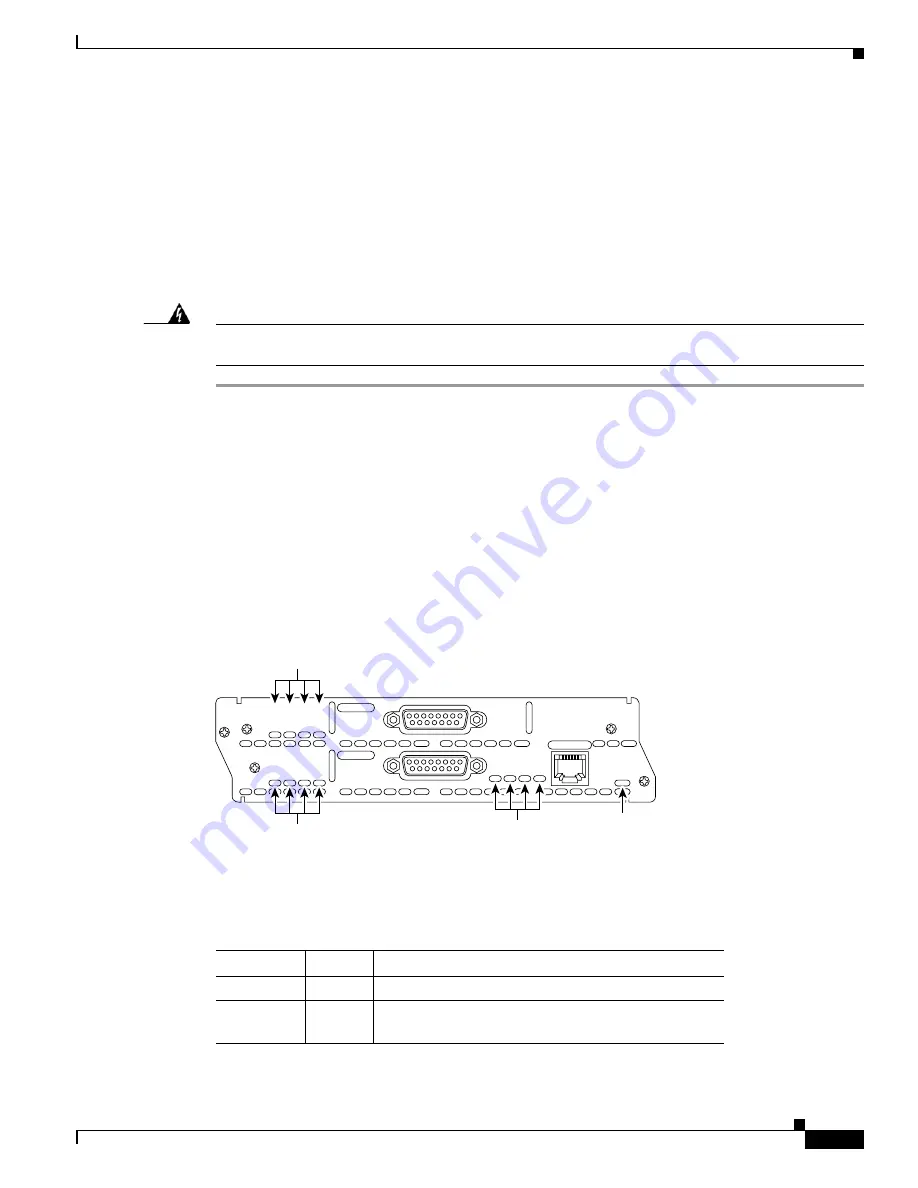
All Fast Ethernet-PRI modules have four LEDS for the Fast Ethernet port, and four additional LEDs for
each PRI port.
Figure 4-18
shows LEDs for the 1-port Fast Ethernet 2-port channelized E1/ISDN PRI
balanced (120-ohm) network module as an example.
Figure 4-18 Fast Ethernet and ISDN PRI LEDs
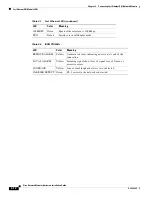
Table 4-1
describes Fast Ethernet LEDs.
Table 4-2
describes ISDN PRI LEDs.
LOOP
BACK
EN
FE-PRI
1FE-2CE1-B/U
15231
LOCAL
ALARM
REMOTE
ALARM
CARRIER
DETECT
LOOP
BACK
CTRLR 1
CTRLR 0
10/100BaseT
LOCAL
ALARM
REMOTE
ALARM
CARRIER
DETECT
COLL
LINK
100Mbps
FDX
Enable
LED
ISDN PRI
LEDs
ISDN PRI
LEDs
Fast Ethernet
LEDs
Table 4-1
Fast Ethernet LEDs
LED Color
Meaning
COLL
Yellow
Collision activity is occurring on the network.
LINK
Green
A link has been established with the station at the other
end of the cable.

