2-20
Cisco Network Modules Hardware Installation Guide
OL-2485-20
Chapter 2 Installing Cisco Network Modules in Cisco Access Routers
Removing or Replacing Cisco Network Modules for Cisco Access Routers
Step 5
Install the appropriate item.
•
(If you are replacing the module) Install a replacement module using the procedures described in the
“Installing Cisco Network Modules in Cisco Access Routers” section on page 2-5
•
(If you are not replacing the module) Install a blank faceplate over the empty slots to ensure proper
airflow. (See the
“Installing and Removing Blank Faceplates” section on page 2-6
.)
Tip
See the
“Where to Go Next” section on page 2-27
for information on locating additional hardware
documentation.
Removing or Replacing Double-Wide and Extended Double-Wide Network
Modules in Cisco Access Routers
To remove or replace a double-wide or extended double-wide network module, perform these steps:
Step 1
Turn off electrical power to the router. Leave the power cable plugged in to channel ESD voltages to
ground.
Step 2
Unplug all network interface cables from the network module.
Timesaver
To make it easier to work with network cables, label the cables or prepare a network cabling diagram
before removing network interface cables from the network module.
Step 3
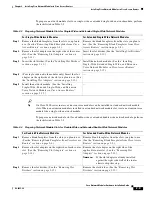
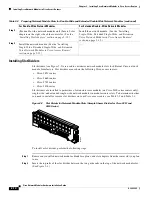
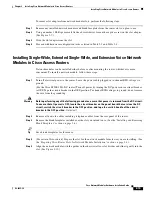
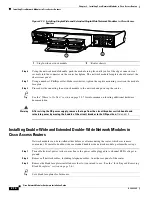
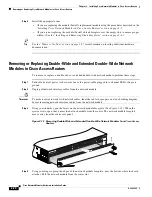
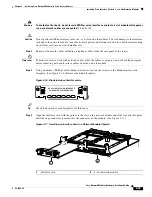
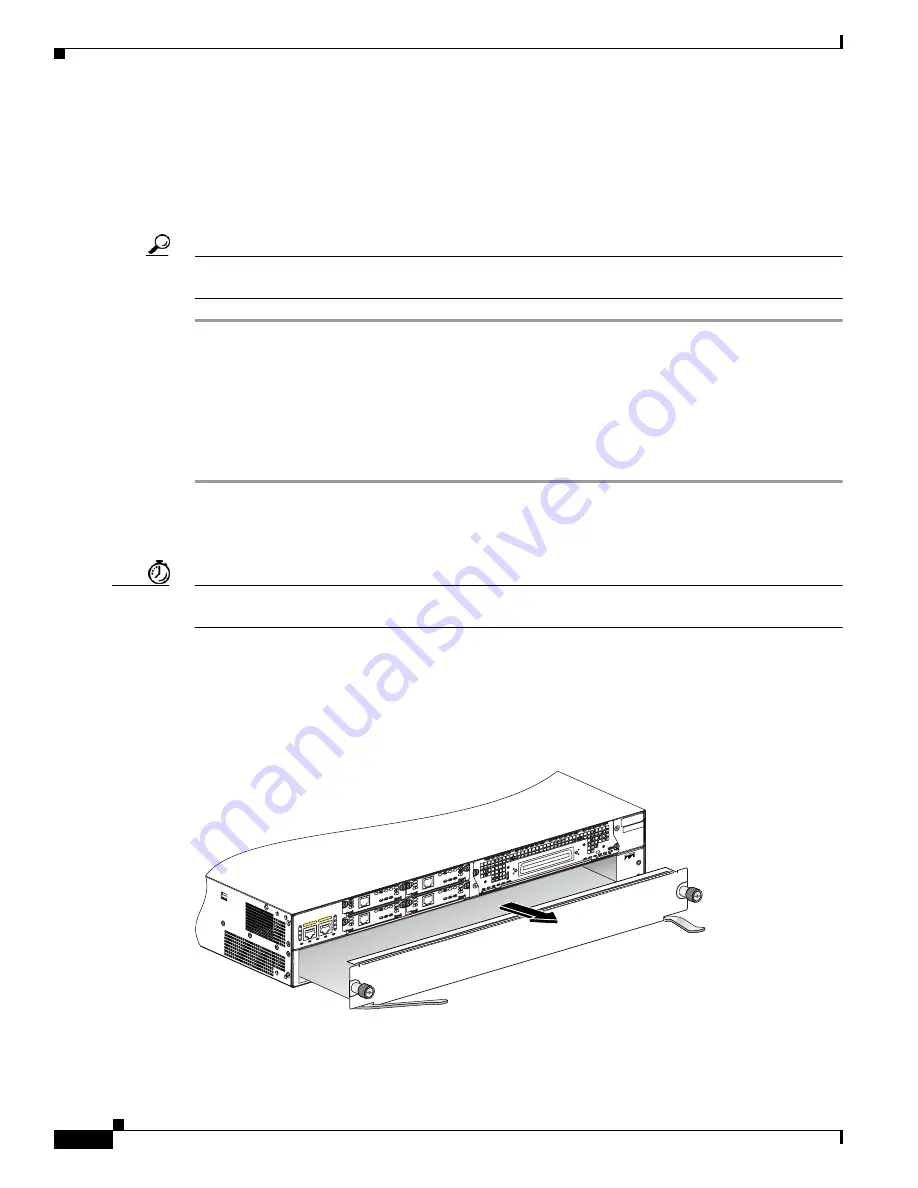
Using your thumbs, open the levers on the network module faceplate. (See
Figure 2-15
.) When the
ejector levers open, they unseat the network module from the router. The network module faceplate
moves away from the router rear panel.
Figure 2-15 Removing Double-Wide and Extended Double-Wide Network Modules from Cisco Access
Routers
Step 4
Using your fingers, grasp the edges of the network module faceplate, near the bottom where the board
attaches. Pull the network module from the router slot.
121472
T
D
M
0
A= A
CT
GE 0
/1
PVD
M2
PVD
M1
PVD
M0
AIM
1
AIM
0
GE 0
/0
S= S
PEE
D
A= F
DX
A= LIN
K
A
F
S
L
A
F
S
L
S
L
O
T
2
S
L
O
T
0
S
L
O
T
3
S
L
O
T
1

