33-11
Cisco Network Modules Hardware Installation Guide
OL-2485-20
Chapter 33 Connecting Cisco IP VSAT Satellite WAN Network Modules
How to Install, Connect, or Replace the NM-1VSAT-GILAT Network Module
Note
If an installation technician has already connected the NM-1VSAT-GILAT to the ODU, then do not
perform this task. Instead, proceed directly to the
“Connecting the NM-1VSAT-GILAT Network Module
to the External Power Supply” section on page 33-12
.
Prerequisites
•
Install the NM-1VSAT-GILAT network module in the router chassis. See the “
Installing Cisco
Network Modules in Cisco Access Routers
” chapter of the
Cisco Network Modules Hardware
Installation Guide
.
•
Make sure that your ODU is installed and connected to RF cables that lead to the area near the
NM-1VSAT-GILAT network module. Contact your satellite service provider for ODU and cable
installation information.
Steps
To connect the NM-1VSAT-GILAT network module to the ODU, follow these steps:
Step 1
Disconnect the power supply from the ODU PWR connector on the NM-1VSAT-GILAT
network module.
Caution
Make sure that the external power supply is disconnected from the NM-1VSAT-GILAT network module
before connecting cables to the RF-IN or RF-OUT connectors. If the external power supply is connected
to the ODU PWR connector while you connect or disconnect cables to the RF-IN or RF-OUT
connectors, you might short-circuit the NM-1VSAT-GILAT network module F connectors. This may
cause the network module to reset itself or lose data.
Step 2
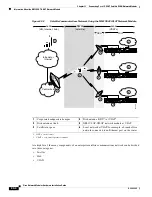
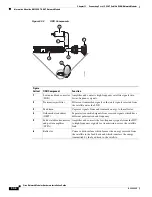
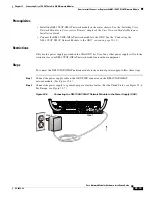
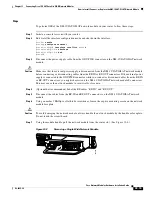
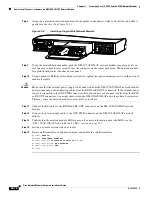
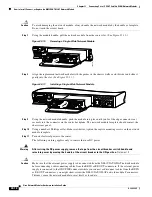
Take the indoor end of the cable that leads to the LNB, and connect it to the RF-IN connector on the
NM-1VSAT-GILAT network module. (See
Figure 33-5
.)
Step 3
Take the indoor end of the cable that leads to the SSPA, and connect it to the RF-OUT connector on the
NM-1VSAT-GILAT network module. (See
Figure 33-5
.)


