


Configure remote assistance
Introduction
Enable and configure remote assistance to give the service organization access to your system.
The service technician is then able to operate your system and provide assistance remotely.
Remote assistance is by default disabled and is limited to 172 hours.
Procedure
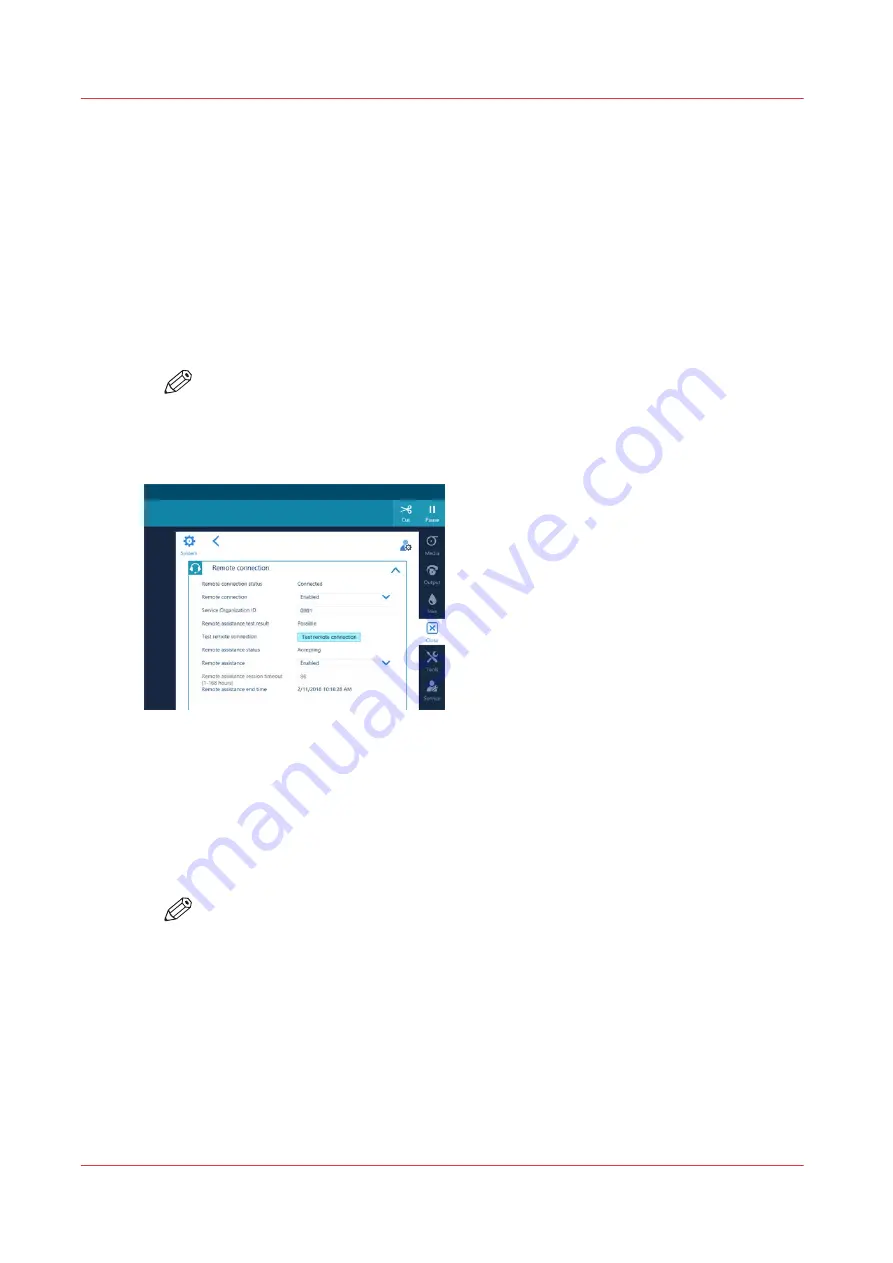
1.
On the operator panel, tap on the [System] icon on the right.
2.
Tap on [Remote services]
→
[Remote connection].
NOTE
You have to log in as System administrator to change some settings. For more
information, see
Log in as a System administrator on page 271
.
3.
Next to [Remote assistance], tap on the arrow and select [Enabled].
4.
Tap on the box next to [Remote assistance session timeout [1-168 hours]] and fill in the time in
hours you want the remote assistance session to automatically end.
5.
Tap on [Save].
6.
Tap on [Remote connection]
→
[Test remote connection].
7.
Next to [Remote assistance test result] you can see whether the connection was successfully
established.
NOTE
• When you cannot connect remote assistance, contact your local Service
representative.
• Since a remote assistance session is established via a point to point connection, only
this specific system and none of the other systems at your site can be reached.
• Disable the remote connection when you want to terminate the connection with the
service organization. Then you are always in control.
Configure remote assistance
270
Chapter 8 - Configure the network and security settings
Summary of Contents for Colorado 1630
Page 1: ...Colorado 1630 Extended operation guide 2021 2022 Canon Production Printing ...
Page 9: ...Chapter 1 Introduction ...
Page 18: ...Optional features 18 Chapter 1 Introduction ...
Page 19: ...Chapter 2 Safety information ...
Page 30: ...Safety System 30 Chapter 2 Safety information ...
Page 31: ...Chapter 3 Explore the system ...
Page 38: ...The components of the printer top cover open 38 Chapter 3 Explore the system ...
Page 39: ...Chapter 4 Handle the media ...
Page 81: ...FLXfinish in the RIP Chapter 4 Handle the media 81 ...
Page 157: ...Chapter 5 Print a job ...
Page 166: ...Use the PRISMAsync Remote Control app 166 Chapter 5 Print a job ...
Page 167: ...Chapter 6 Maintain the system ...
Page 257: ...Chapter 7 Improve quality ...
Page 267: ...Chapter 8 Configure the network and security settings ...
Page 298: ...Enable system installation from USB 298 Chapter 8 Configure the network and security settings ...
Page 299: ...Chapter 9 Troubleshooting and support ...
Page 318: ...Install a license via ORS 318 Chapter 9 Troubleshooting and support ...
Page 372: ...Error codes overview 372 Chapter 9 Troubleshooting and support ...
Page 373: ...Appendix A Regulation Notices ...
Page 387: ......


