R5909934 /00
E2 Lite and EC-40
57
9.
Rename the
settings.xml
file to
settings_backup.xml
.
Make sure that you do not change the file extension.
10.
Copy and paste the entire
EM
folder from your desktop to the root directory of a FAT32-formatted USB
drive.
3.
Import the simulated configuration created offline to the live system:
1.
Insert the USB drive into the USB port on the front of a live Event Master processor.
The live processor must be the same type as the simulated processor. If your simulated processor is an E2
Lite, the live processor must be an E2 Lite; if your simulated processor was an S3
–
4K, your live processor
must be an S3
–
4K. The card setup on the simulated system must match the card setup on the live system,
otherwise Inputs might not match, or Destinations might be created on nonexistent Outputs. Those
Destinations will be grayed out, and you
’
ll have to recreate them.
2.
Navigate on the front-panel display screen to the
System
menu, then to
USB Backup/Restore
, and then
to
Restore XML
, and then hit
Select
.
The system uploads the backup xml folder. When finished, the display screen reads
“
Restore successful.
”
3.
Select
Yes
(
<SEL>
), when the system asks
“
Reset unit now?
”
The unit begins to reset. This takes about two minutes.
4.
Remove the USB drive.
Once the system resets, all the Inputs, Outputs, Destinations Presets, etc. from the simulated unit will have
been transferred to the live unit.
The icons from the simulated unit do not transfer to the live unit and must be recreated.
If the Multiviewer configurations are not transferred, they must be recreated.
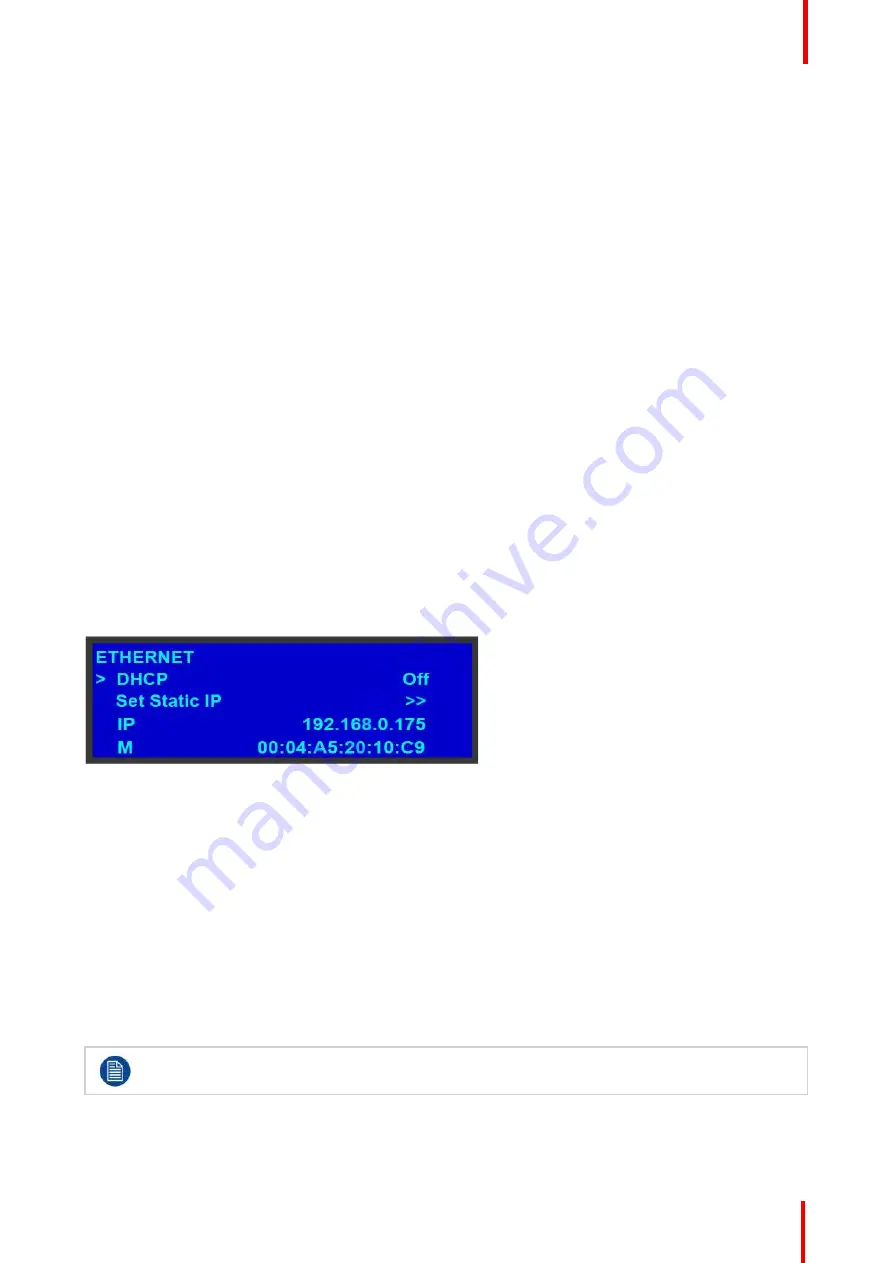
5.9 System menu > Ethernet
General
The
Ethernet
submenu allows the user to view and change certain Ethernet settings.
Image 5-17
Using this menu, you can:
•
Query the DHCP server for a valid IP address, or turn off this feature.
•
Set a static IP address for the Event Master unit, along with a subnet mask and gateway. This feature is
available only if
DHCP
is turned
Off
.
•
View the unit
’
s IP address.
If there is no internet connection, or if a DHCP server has not been found, the IP address is
000.000.000.000. In this case, the system ignores the Ethernet port.
•
View the Media Access Control (MAC) address of the unit
’
s Ethernet port.
Query the DHCP server
In the
Ethernet
submenu, the default setting for
DHCP
is
On
. When
DHCP
is turned on, the system
automatically queries the DHCP server for a valid IP address. If the unit receives an IP address, that address
is displayed in the
Ethernet
submenu.
It can take several seconds to obtain an address from the server. During this time, the
SEL
button
remains lit.
When
DHCP
is off, you can manually enter a static IP address, along with a subnet mask and gateway, in the
Set Static IP
submenu. Consult your network administrator for a valid IP address, subnet mask and gateway.
Summary of Contents for Event Master E2 Lite
Page 1: ...ENABLING BRIGHT OUTCOMES User s Guide E2 Lite and EC 40...
Page 10: ...R5909934 00 E2 Lite and EC 40 10...
Page 14: ...R5909934 00 E2 Lite and EC 40 14 Introduction...
Page 18: ...R5909934 00 E2 Lite and EC 40 18 Safety...
Page 32: ...R5909934 00 E2 Lite and EC 40 32 General...
Page 46: ...R5909934 00 E2 Lite and EC 40 46 Hardware orientation...
Page 168: ...R5909934 00 E2 Lite and EC 40 168 EM GUI orientation...
Page 208: ...R5909934 00 E2 Lite and EC 40 208 Controller Orientation...
Page 214: ...R5909934 00 E2 Lite and EC 40 214 Controller Configuration...
Page 220: ...R5909934 00 E2 Lite and EC 40 220 Controller Operation...
Page 284: ...R5909934 00 E2 Lite and EC 40 284 E2 Lite Maintenance...
Page 289: ...289 R5909934 00 E2 Lite and EC 40 Environmental Information 15...
Page 300: ...R5909934 00 E2 Lite and EC 40 300 Specifications...
Page 316: ...R5909934 00 E2 Lite and EC 40 316 Remote Control Protocol...
Page 317: ...317 R5909934 00 E2 Lite and EC 40 Troubleshooting C...
Page 320: ...R5909934 00 E2 Lite and EC 40 320 Troubleshooting...


