109
remote’s two-line display, it is easier than ever for you to take advantage of the power of macro
commands.
Recording a Macro
To record a macro into the remote’s memory, follow these steps:
1. Press and hold the
REM MENU Button [oval 36]
for about three seconds while the message
HOLD BUTTON FOR 3 SECONDS
appears in the remote’s LCD
Information Display [oval
3]
. Release the button when the red light under the
Set Button [oval 18]
appears.
2. The remote’s
MAIN MENU
message
will appear in the LCD display and the
Set Button [oval
18]
will remain illuminated in red. Press the
▼
/
▲
Navigation Button [oval 16]
three times so
that
MACRO
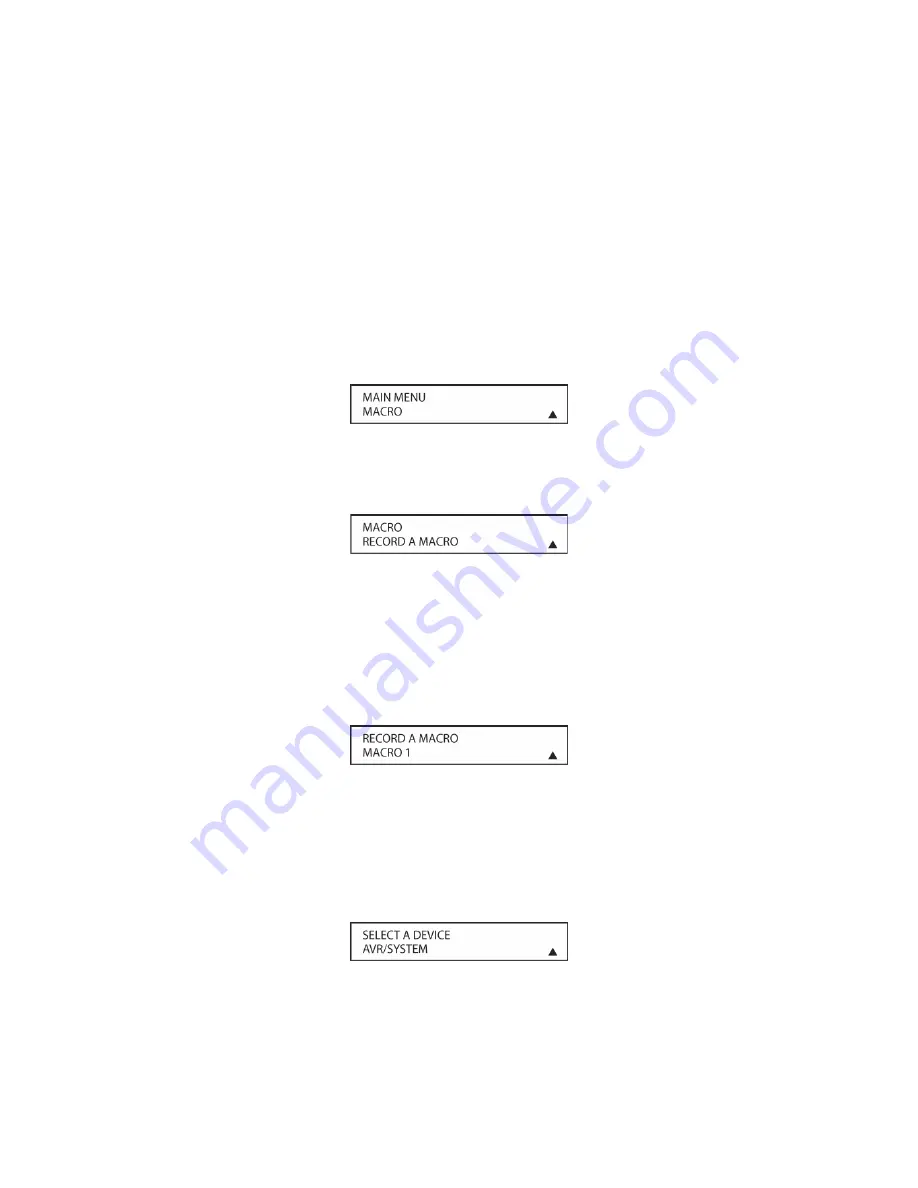
appears on the bottom line of the LCD screen, as shown in
Figure 57
. Press
the
Set Button [oval 18]
to enter the main macro menu branch.
Figure 57
3. At the next menu screen (
Figure 58
) press the
Set Button [oval 18]
to begin recording a
macro.
Figure 58
4. The next display screen (
Figure 59
) is where you select the button that will be used to recall
the macro. The choices are one of the three discrete
Macro Buttons [oval 32].
Press the
▼
/
▲
Navigation Button
[oval 16]
until the name of the button you wish to program the
macro into is shown. For this example we will show how to program a series of commands
that will automatically be sent out every time the
M1 Button [oval 32]
is pressed.
Figure 59
5. The next screen that appears (
Figure 60
) is where you select the device for the first
command that will be sent out as part of the macro. Press the
▼
/
▲
Navigation Button [oval
16]
until the name of the device appears on the left side of the lower line in the LCD display.
For this example, the first button we want to have the macro “press” is the AVR Power On
button, so the AVR is selected. Press the
Set Button [oval 18]
when the desired device
name appears to move to the next programming step.
Figure 60
6. The next display (
Figure 61
) and the subsequent screens are where the actual macro
programming takes place. The words at the left side of the top line of the display show the
Summary of Contents for AVR21EN
Page 1: ...1 INSTALLATION INSTRUCTIONS...
Page 41: ...41 AVR21ENR1 FUNCTION LIST Figure 8 AVR21ENR1 Button Locations...
Page 156: ...156 KP21R ZONE REMOTE FUNCTION LIST Figure 84 KP21R Button Locations...
Page 159: ...159 Figure 86 Typical Three Zone System...
Page 161: ...161 Figure 87 Typical Hub System...
Page 164: ...164 Figure 90 Multiple Hub Power Connections...


