USO
RESTRITO
Serial Port Settings (Serial Port Assign Menu)
647
Knob
Parameter
Adjustment
Setting values
1
Item
Item selection
1 to 16
Block
Byte
Setting item
BLOCK 1 1
HI-BYTE (DEVICE TYPE)
2
LO-BYTE (DEVICE TYPE)
3
HI-BYTE (FRAME) (PREROLL
TIME)
4
LO-BYTE (FRAME) (PREROLL
TIME)
5
EDIT DELAY (FRAME)
6
EE DELAY (FRAME)
7
OVER RUN (FRAME)
8
TRAJECTORY
Ch
a
p
te
r 22
DCU
S
e
tu
p
(
DC
U)
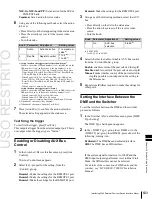
The input device name appears in the device name list.
To return the device name for the selected ID to the
default name
Press [Clear] in the <Name> group.
7
Using any of the following methods, specify the
command to which the response speed setting applies.
•
Press directly on the delay list in the status area.
•
Press the arrow keys to scroll the reverse video
cursor.
•
Turn the knob.
Knob
Parameter
Adjustment
Setting values
2
No
Command
number
selection
1 to 18
8
Turn the knob to set the response speed (in field units) of
the device.
Knob
Parameter
Adjustment
Setting values
3
Delay
Response speed
setting
0 to 60
9
Press [Delay Set].
10
Repeat steps
4
to
9
as required to make the settings for
other commands.
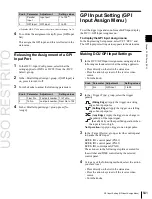
and timecode source appear. In the lower part of the
status area, the VTR constants appear.
4
In the <TC Source> group, select the timecode source
(reference signal for determining the tape position)
from the following.
LTC (Longitudinal Time Code):
Use LTC. When
interpolation data is returned from a VTR, use that
interpolation data.
LTC: VITC (Vertical Interval Time Code):
Normally use LTC, but when the tape is moving at
speeds at which LTC cannot be read, use VITC.
When interpolation data is returned from a VTR,
use that interpolation data.
VITC:
Use VITC.
CTL (Control):
CTL pulses or timer counter pulses
are used. Use this only for a tape on which no
timecode is recorded.
The displayed tape position is based on the reference
signal specified here.
5
Using any of the following methods, specify the VTR
constants.
•
Press directly on the list in the status area.
•
Press the arrow keys to scroll the reverse video
cursor.
•
Turn the knob.
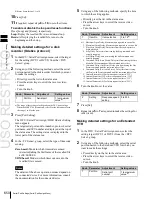
Making detailed settings for a VTR
1
In the <DCU Select> group of the DCU >Serial Port
Assign menu, select the target for the setting (DCU1 or
DCU2).
2
Using any of the following methods, select the serial
port connected to the VTR for which you want to make
the settings.
•
Press directly on the list in the status area.
•
Press the arrow keys to scroll the reverse video
cursor.
•
Turn the knob.
Knob
Parameter
Adjustment
Setting values
1
Port No
Serial port
1 to maximum
value
a)
a) The range of setting values depends on the DCU port setting. When
the MKS-2700 is connected, select 2 for the slot and a value in the
range 1 to 6 for the port.
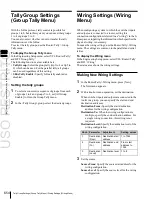
3
Press [Port Setting].
The DCU >Serial Port Assign >VTR Setting menu
appears.
At the top of the status area, the relevant serial port,
slot number, protocol, serial port name, SCU number,
6
Press [Set].
A numeric keypad window for hexadecimal input
appears.
7
Set the VTR constants using values in the range 00 to
FF.
Содержание MVS-8000X SystemMVS-7000X System
Страница 358: ...USO RESTRITO 358 Wipe Pattern List Appendix Volume 1 Enhanced Wipes Rotary Wipes ...
Страница 360: ...USO RESTRITO Random Diamond DustWipes 360 1 w pe PaternLO ...
Страница 362: ...USO RESTRITO 362 DME Wipe Pattern List Appendix Volume 1 Door 2D trans 3D trans ...
Страница 363: ...USO RESTRITO DME Wipe Pattern List 363 Appendix Volume 1 Flip tumble Frame in out Picture in picture ...
Страница 364: ...USO RESTRITO 364 DME Wipe Pattern List Appendix Volume 1 Page turn Page roll ...
Страница 365: ...USO RESTRITO DME Wipe Pattern List 365 Appendix Volume 1 Mirror Sphere Character trail Wave Ripple Split slide ...
Страница 367: ...USO RESTRITO DME Wipe Pattern List 367 Appendix Volume 1 Squeeze 3D trans Picture in picture Page turn ...
Страница 376: ...USO RESTRITO 376 Menu Tree Appendix Volume 1 Frame Memory Menu FRAME MEM button Color Bkgd Menu COLOR BKGD button ...
Страница 377: ...USO RESTRITO Menu Tree 377 Appendix Volume 1 AUX Menu AUX button CCR Menu CCR button ...
Страница 379: ...USO RESTRITO Menu Tree 379 Appendix Volume 1 DME Menu DME button ...
Страница 380: ...USO RESTRITO 380 Menu Tree Appendix Volume 1 Global Effect Menu GLB EFF button Router Menu Device Menu DEV button ...
Страница 381: ...USO RESTRITO Menu Tree 381 Appendix Volume 1 Macro Menu MCRO button ...
Страница 382: ...USO RESTRITO 382 Menu Tree Appendix Volume 1 Key Frame Menu KEY FRAME button ...
Страница 383: ...USO RESTRITO Menu Tree 383 Appendix Volume 1 Effect Menu EFF button ...
Страница 384: ...USO RESTRITO 384 Menu Tree Appendix Volume 1 Snapshot Menu SNAPSHOT button ...
Страница 385: ...USO RESTRITO Menu Tree 385 Appendix Volume 1 Shotbox Menu SHOTBOX button ...
Страница 386: ...USO RESTRITO 386 Menu Tree Appendix Volume 1 File Menu FILE button ...
Страница 388: ...USO RESTRITO 388 Menu Tree Appendix Volume 1 ENG SETUP button to previous page topages after 390 to next page ...
Страница 389: ...USO RESTRITO Menu Tree 389 Appendix Volume 1 ENG SETUP button to page 387 to previous pages to following pages ...
Страница 390: ...USO RESTRITO 390 Menu Tree Appendix Volume 1 ENG SETUP button to previous pages to next page a MVS 7000X only ...
Страница 391: ...USO RESTRITO Menu Tree 391 Appendix Volume 1 ENG SETUP button to previous pages ...
Страница 392: ...USO RESTRITO 392 Menu Tree Appendix Volume 1 User Setup Menu USER SETUP button Diagnostic Menu DIAG button ...
Страница 413: ...USO RESTRITO MVS 8000X System MVS 7000X System SY 4 470 637 01 1 Sony Corporation 2013 ...
Страница 706: ...USO RESTRITO MVS 8000X System MVS 7000X System SY 4 470 637 01 1 Sony Corporation 2013 ...


