USO
RESTRITO
576
Overall Control Panel Settings (Config Menu)
Ch
a
p
te
r 19
Co
n
tr
o
l P
a
n
e
l S
e
tu
p
(P
a
n
e
l)
3
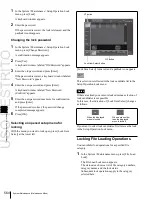
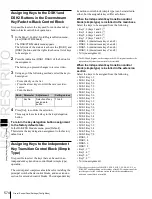
In the button indications on the left, press the button
for the assignment.
4
Using any of the following methods, select the signal
to be assigned.
•
Press directly on the list on the right.
•
In the list on the right, press the arrow keys to scroll
the reverse video cursor.
•
Turn the knob.
Knob
Parameter
Adjustment
Setting values
1
Button
Button selection
1 to maximum
value
5
Press [Set].
This assigns the signal selected in the list to the button.
To cancel an assignment
Select the button, then press [Clear].
This leaves nothing assigned.
To return all preview selection button
assignments to the factory default state
In the Fade To Black Module menu, press [Default].
Assigning Functions to the Device
Control Block
Assigning devices or functions to the
device selection buttons and other buttons
of the device control block (search dial)
You can assign devices and functions to the device
selection buttons, SBOX buttons and [DELAY] button of
the device control block (search dial).
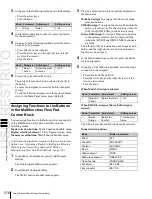
1
In the Panel >Config menu, press [Link/Program
Button].
The Link/Program Button menu appears.
2
Press [Device Control Module].
The Device Control Module menu appears.
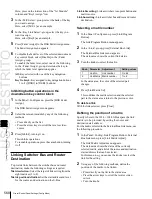
The left of the status area shows the device selection
buttons, SBOX buttons and [DELAY] button of the
device control block (search dial). The list on the right
shows the devices and functions that can be assigned.
3
In the button displays on the left, press the button for
the assignment.
4
Using any of the following methods, select the device
or function to be assigned.
•
Press directly on the list on the right.
•
In the list on the right, press the arrow keys to scroll
the reverse video cursor.
•
Turn the knob.
Knob
Parameter
Adjustment
Setting values
1
Device
Function
Selection of
device or function
to be assigned
1 to maximum
value
5
Press [Set].
To cancel an assignment
Select the button, then press [Clear].
This removes the assignment to that button.
To return all device selection button assignments
to the factory default state
In the Device Control Module menu, press [Default].
Assigning devices and functions to the
region selection buttons of the device
control block (trackball)/device control
block (joystick)
You can assign devices and functions to the region
selection buttons of the device control block (trackball)/
device control block (joystick).
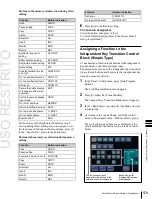
1
In the Panel >Config menu, press [Link/Program
Button].
The Link/Program Button menu appears.
2
Press [Joystick/Trackball Module].
The Joystick/Trackball Module menu appears.
3
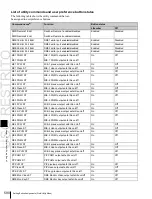
In the lower right <Mode Select> group, select
[Device/Clip] or [Wipe/RSZR].
Device/Clip:
Assignment while the device control
block [DEV] button is lit
Wipe/RSZR:
Assignment while no button is lit on the
device control block or the [RSZR] button is lit
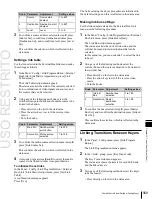
According to the selection, the left of the status area
shows the region selection buttons of the device
control block. The list on the right shows the devices
and functions that can be assigned.
4
In the button displays on the left, press the button for
the assignment.
5
Using any of the following methods, select the device
or function to be assigned.
•
Press directly on the list on the right.
•
In the list on the right, press the arrow keys to scroll
the reverse video cursor.
•
Turn the knob.
Содержание MVS-8000X SystemMVS-7000X System
Страница 358: ...USO RESTRITO 358 Wipe Pattern List Appendix Volume 1 Enhanced Wipes Rotary Wipes ...
Страница 360: ...USO RESTRITO Random Diamond DustWipes 360 1 w pe PaternLO ...
Страница 362: ...USO RESTRITO 362 DME Wipe Pattern List Appendix Volume 1 Door 2D trans 3D trans ...
Страница 363: ...USO RESTRITO DME Wipe Pattern List 363 Appendix Volume 1 Flip tumble Frame in out Picture in picture ...
Страница 364: ...USO RESTRITO 364 DME Wipe Pattern List Appendix Volume 1 Page turn Page roll ...
Страница 365: ...USO RESTRITO DME Wipe Pattern List 365 Appendix Volume 1 Mirror Sphere Character trail Wave Ripple Split slide ...
Страница 367: ...USO RESTRITO DME Wipe Pattern List 367 Appendix Volume 1 Squeeze 3D trans Picture in picture Page turn ...
Страница 376: ...USO RESTRITO 376 Menu Tree Appendix Volume 1 Frame Memory Menu FRAME MEM button Color Bkgd Menu COLOR BKGD button ...
Страница 377: ...USO RESTRITO Menu Tree 377 Appendix Volume 1 AUX Menu AUX button CCR Menu CCR button ...
Страница 379: ...USO RESTRITO Menu Tree 379 Appendix Volume 1 DME Menu DME button ...
Страница 380: ...USO RESTRITO 380 Menu Tree Appendix Volume 1 Global Effect Menu GLB EFF button Router Menu Device Menu DEV button ...
Страница 381: ...USO RESTRITO Menu Tree 381 Appendix Volume 1 Macro Menu MCRO button ...
Страница 382: ...USO RESTRITO 382 Menu Tree Appendix Volume 1 Key Frame Menu KEY FRAME button ...
Страница 383: ...USO RESTRITO Menu Tree 383 Appendix Volume 1 Effect Menu EFF button ...
Страница 384: ...USO RESTRITO 384 Menu Tree Appendix Volume 1 Snapshot Menu SNAPSHOT button ...
Страница 385: ...USO RESTRITO Menu Tree 385 Appendix Volume 1 Shotbox Menu SHOTBOX button ...
Страница 386: ...USO RESTRITO 386 Menu Tree Appendix Volume 1 File Menu FILE button ...
Страница 388: ...USO RESTRITO 388 Menu Tree Appendix Volume 1 ENG SETUP button to previous page topages after 390 to next page ...
Страница 389: ...USO RESTRITO Menu Tree 389 Appendix Volume 1 ENG SETUP button to page 387 to previous pages to following pages ...
Страница 390: ...USO RESTRITO 390 Menu Tree Appendix Volume 1 ENG SETUP button to previous pages to next page a MVS 7000X only ...
Страница 391: ...USO RESTRITO Menu Tree 391 Appendix Volume 1 ENG SETUP button to previous pages ...
Страница 392: ...USO RESTRITO 392 Menu Tree Appendix Volume 1 User Setup Menu USER SETUP button Diagnostic Menu DIAG button ...
Страница 413: ...USO RESTRITO MVS 8000X System MVS 7000X System SY 4 470 637 01 1 Sony Corporation 2013 ...
Страница 706: ...USO RESTRITO MVS 8000X System MVS 7000X System SY 4 470 637 01 1 Sony Corporation 2013 ...


