USO
RESTRITO
Macro Operations in the Numeric Keypad Control Block and the Keyframe Control Block
503
Ch
a
p
te
r 16
M
a
c
ro
s
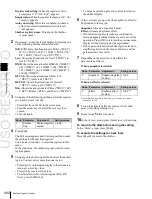
control block, then specify the range in the numeric
keypad control block.
3
Press the [COPY] button.
This copies the specified events into the paste buffer.
4
Move to the edit point which is the destination within
the macro to which you want to copy the events.
5
To paste the contents of the paste buffer after the edit
point, press the [PASTE] button in the keyframe
control block.
To paste before the edit point, hold down the [SHIFT]
button in the keyframe control block and press the
[PASTE] button.
This copies the events from the paste buffer.
Inserting a pause event
1
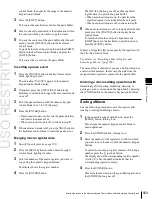
Press the [PAUSE] button in the keyframe control
block, lighting it green.
The indication “PAUSE” appears in the numeric
keypad control block display.
2
If required, press the [AUTO INS] button in the
keyframe control block to toggle the auto insert mode
on or off.
3
Enter the pause duration with the numeric keypad
control block (0 or 1 to 999 (frames)).
4
Press the [ENTER] button.
•
If auto insert mode is on, this sets the pause duration,
and inserts the pause event.
•
When auto insert mode is off, continue to step
5
.
5
When auto insert mode is off, press the [INS] button in
the keyframe control block to insert the pause event.
Merging macro register data
1
2
Press the [RCALL] button in the numeric keypad
control block, lighting it amber.
3
Enter the number of the macro register you want to
copy using the numeric keypad buttons.
The display shows the register number.
4
Press the [ENTER] button.
The [RCALL] button goes off, and the specified
register data is copied to the paste buffer.
•
When auto insert mode is on, the data from the
specified register is included after the edit point.
•
When auto insert mode is off, continue to step
5
.
5
When auto insert mode is off, to include after the edit
point, press the [PASTE] button in the keyframe
control block.
To include before the edit point, hold down the
[SHIFT] button in the keyframe control block, and
press the [PASTE] button.
In place of steps
2
to
4
, you can specify the register with
the Flexi Pad control block.
For details, see “Recalling a Macro Register and
Executing a Macro” (page 505).
The same effect is obtained if you use a button which has
a macro attachment set. In this case, the data from the
assigned macro register is copied into the paste buffer.
Undoing a macro editing operation with
the numeric keypad control block
Immediately after inserting, modifying, deleting, or
pasting an event, you can undo the operation by pressing
the [UNDO] button in the numeric keypad control block.
Saving a Macro
Use the following procedure to save the register after
creating or editing/modifying a macro.
1
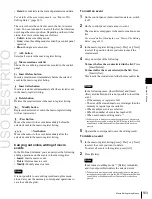
In the numeric keypad control block, press the
[MCRO] button, turning it on.
This assigns the numeric keypad control block to
macro operations.
2
Press the [STORE] button, turning it on.
3
Enter the number of the register (1 to 250) in which
you want to save the macro with the numeric keypad
buttons.
To search for an empty register, instead of entering a
number, press the [.] (period) button.
The display shows the corresponding register number.
A letter “E” after the number indicates that the
corresponding register is empty.
4
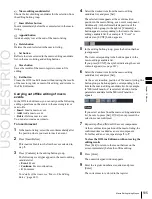
Press the [ENTER] button.
This saves the macro data in the specified register, and
the [STORE] button goes off.
Содержание MVS-8000X SystemMVS-7000X System
Страница 358: ...USO RESTRITO 358 Wipe Pattern List Appendix Volume 1 Enhanced Wipes Rotary Wipes ...
Страница 360: ...USO RESTRITO Random Diamond DustWipes 360 1 w pe PaternLO ...
Страница 362: ...USO RESTRITO 362 DME Wipe Pattern List Appendix Volume 1 Door 2D trans 3D trans ...
Страница 363: ...USO RESTRITO DME Wipe Pattern List 363 Appendix Volume 1 Flip tumble Frame in out Picture in picture ...
Страница 364: ...USO RESTRITO 364 DME Wipe Pattern List Appendix Volume 1 Page turn Page roll ...
Страница 365: ...USO RESTRITO DME Wipe Pattern List 365 Appendix Volume 1 Mirror Sphere Character trail Wave Ripple Split slide ...
Страница 367: ...USO RESTRITO DME Wipe Pattern List 367 Appendix Volume 1 Squeeze 3D trans Picture in picture Page turn ...
Страница 376: ...USO RESTRITO 376 Menu Tree Appendix Volume 1 Frame Memory Menu FRAME MEM button Color Bkgd Menu COLOR BKGD button ...
Страница 377: ...USO RESTRITO Menu Tree 377 Appendix Volume 1 AUX Menu AUX button CCR Menu CCR button ...
Страница 379: ...USO RESTRITO Menu Tree 379 Appendix Volume 1 DME Menu DME button ...
Страница 380: ...USO RESTRITO 380 Menu Tree Appendix Volume 1 Global Effect Menu GLB EFF button Router Menu Device Menu DEV button ...
Страница 381: ...USO RESTRITO Menu Tree 381 Appendix Volume 1 Macro Menu MCRO button ...
Страница 382: ...USO RESTRITO 382 Menu Tree Appendix Volume 1 Key Frame Menu KEY FRAME button ...
Страница 383: ...USO RESTRITO Menu Tree 383 Appendix Volume 1 Effect Menu EFF button ...
Страница 384: ...USO RESTRITO 384 Menu Tree Appendix Volume 1 Snapshot Menu SNAPSHOT button ...
Страница 385: ...USO RESTRITO Menu Tree 385 Appendix Volume 1 Shotbox Menu SHOTBOX button ...
Страница 386: ...USO RESTRITO 386 Menu Tree Appendix Volume 1 File Menu FILE button ...
Страница 388: ...USO RESTRITO 388 Menu Tree Appendix Volume 1 ENG SETUP button to previous page topages after 390 to next page ...
Страница 389: ...USO RESTRITO Menu Tree 389 Appendix Volume 1 ENG SETUP button to page 387 to previous pages to following pages ...
Страница 390: ...USO RESTRITO 390 Menu Tree Appendix Volume 1 ENG SETUP button to previous pages to next page a MVS 7000X only ...
Страница 391: ...USO RESTRITO Menu Tree 391 Appendix Volume 1 ENG SETUP button to previous pages ...
Страница 392: ...USO RESTRITO 392 Menu Tree Appendix Volume 1 User Setup Menu USER SETUP button Diagnostic Menu DIAG button ...
Страница 413: ...USO RESTRITO MVS 8000X System MVS 7000X System SY 4 470 637 01 1 Sony Corporation 2013 ...
Страница 706: ...USO RESTRITO MVS 8000X System MVS 7000X System SY 4 470 637 01 1 Sony Corporation 2013 ...


