USO
RESTRITO
Clip Transition Operations
219
Ch
a
p
te
r 7
F
ra
m
e
M
e
m
o
ry
To play the ancillary data, you must use the following
procedure to enable playback of the ancillary data.
For the subsequent playback operation, see “Clip
Playback” (page 215).
Notes
•
After recording a frame memory clip, the ancillary data
state is enabled for playback.
•
To play back the clip, set the signal output to through
mode.
For the method of setting through mode, see “Signal
Output Settings (Output Menu)” in Chapter 20
(Volume 2).
•
When the reposition function is on, ancillary data cannot
be played back.
•
Switching reposition function between on and off may
cause noise.
•
Only the AUX bus and edit preview bus can output
ancillary data.
•
Carrying out file operations on a frame memory clip may
result in the ancillary data being discontinuous, or in
noise occurring. However, if the first or last frame of the
clip is deleted, noise will not occur.
•
The audio sampling frequency is always 48 kHz.
•
When you play back the recorded embedded audio,
depending on the device to be used, noises are produced
at the playback start point and end point. For details of
devices that are used for playback, contact your Sony
service or sales representative.
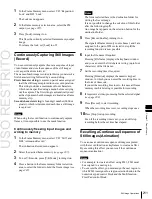
1
In the Frame Memory menu, select VF2 “Clip”, HF5
“Ancillary Enable.”
2
Select the frame memory folder and file to be played
back.
3
Turn [Ancillary Enable] On.
Clip Transition
Operations
A frame memory clip (movie) is played back, linked to a
transition using a mix (dissolve) or wipe.
The following restrictions apply to the use of a clip
transition.
•
Key frame capture is not possible.
•
It is not possible to apply a pattern limit.
•
Transitions executed in two strokes, such as a preset
color mix with the stroke mode set to Normal, or a DME
wipe with a picture-in-picture pattern, will not execute
correctly.
•
It is not possible to vary the transition rate of a clip
transition.
•
Transition preview cannot be used.
•
No instantaneous state of a clip transition can be saved
as a snapshot.
•
When recalling a snapshot including a clip transition
during executing another clip transition, the follow-on
transition does not operate properly. Be sure to complete
the transition before recalling a snapshot.
Notes
When a clip transition is selected as the transition type, if
one of the wipe direction selection buttons in the transition
control block is lit, it indicates the direction of clip
playback.
Setting a clip transition
The following example describes the case of a clip
transition using FM 1&2 Clip on the M/E-1 bank.
Notes
To use a clip transition effectively, the image from the
frame memory clip being played back during the clip
transition should be seen in the M/E-1 program output. For
example, inserting a key using frame memory output 1 and
frame memory output 2.
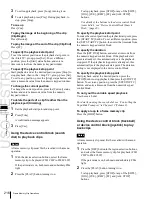
1
Display the M/E-1 >Misc >Transition menu, and in the
<Transition Type> group select “FM1&2 Clip.”
2
Press [Clip Transition].
The Clip Transition menu appears.
Содержание MVS-8000X SystemMVS-7000X System
Страница 358: ...USO RESTRITO 358 Wipe Pattern List Appendix Volume 1 Enhanced Wipes Rotary Wipes ...
Страница 360: ...USO RESTRITO Random Diamond DustWipes 360 1 w pe PaternLO ...
Страница 362: ...USO RESTRITO 362 DME Wipe Pattern List Appendix Volume 1 Door 2D trans 3D trans ...
Страница 363: ...USO RESTRITO DME Wipe Pattern List 363 Appendix Volume 1 Flip tumble Frame in out Picture in picture ...
Страница 364: ...USO RESTRITO 364 DME Wipe Pattern List Appendix Volume 1 Page turn Page roll ...
Страница 365: ...USO RESTRITO DME Wipe Pattern List 365 Appendix Volume 1 Mirror Sphere Character trail Wave Ripple Split slide ...
Страница 367: ...USO RESTRITO DME Wipe Pattern List 367 Appendix Volume 1 Squeeze 3D trans Picture in picture Page turn ...
Страница 376: ...USO RESTRITO 376 Menu Tree Appendix Volume 1 Frame Memory Menu FRAME MEM button Color Bkgd Menu COLOR BKGD button ...
Страница 377: ...USO RESTRITO Menu Tree 377 Appendix Volume 1 AUX Menu AUX button CCR Menu CCR button ...
Страница 379: ...USO RESTRITO Menu Tree 379 Appendix Volume 1 DME Menu DME button ...
Страница 380: ...USO RESTRITO 380 Menu Tree Appendix Volume 1 Global Effect Menu GLB EFF button Router Menu Device Menu DEV button ...
Страница 381: ...USO RESTRITO Menu Tree 381 Appendix Volume 1 Macro Menu MCRO button ...
Страница 382: ...USO RESTRITO 382 Menu Tree Appendix Volume 1 Key Frame Menu KEY FRAME button ...
Страница 383: ...USO RESTRITO Menu Tree 383 Appendix Volume 1 Effect Menu EFF button ...
Страница 384: ...USO RESTRITO 384 Menu Tree Appendix Volume 1 Snapshot Menu SNAPSHOT button ...
Страница 385: ...USO RESTRITO Menu Tree 385 Appendix Volume 1 Shotbox Menu SHOTBOX button ...
Страница 386: ...USO RESTRITO 386 Menu Tree Appendix Volume 1 File Menu FILE button ...
Страница 388: ...USO RESTRITO 388 Menu Tree Appendix Volume 1 ENG SETUP button to previous page topages after 390 to next page ...
Страница 389: ...USO RESTRITO Menu Tree 389 Appendix Volume 1 ENG SETUP button to page 387 to previous pages to following pages ...
Страница 390: ...USO RESTRITO 390 Menu Tree Appendix Volume 1 ENG SETUP button to previous pages to next page a MVS 7000X only ...
Страница 391: ...USO RESTRITO Menu Tree 391 Appendix Volume 1 ENG SETUP button to previous pages ...
Страница 392: ...USO RESTRITO 392 Menu Tree Appendix Volume 1 User Setup Menu USER SETUP button Diagnostic Menu DIAG button ...
Страница 413: ...USO RESTRITO MVS 8000X System MVS 7000X System SY 4 470 637 01 1 Sony Corporation 2013 ...
Страница 706: ...USO RESTRITO MVS 8000X System MVS 7000X System SY 4 470 637 01 1 Sony Corporation 2013 ...


