USO
RESTRITO
Macro Timeline
527
Ch
a
p
te
r 16
M
a
c
ro
s
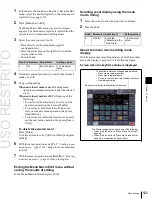
Forcibly ending a macro timeline
•
If the timeline has completed but a macro is still
executing, press the [REWIND] or [RUN] button in the
key frame control block to forcibly end the macro
timeline.
•
In a macro timeline, since a take operation is not
possible, if a macro included in the timeline has a pause
event with a pause time of zero, the remainder of the
timeline after the pause is ignored, and the macro
timeline ends at that point.
Register editing functions
You can use the following editing functions on a register
in which a macro timeline is stored.
•
Copy
•
Move
•
Swap
•
Merge
•
Lock
•
Name
•
Delete
File-related functions
You can save and recall a created macro timeline as effect
data, in the File menu.
Timeline operations are carried out on a macro timeline in
the same way as for normal effects.
For details of timeline operations, see “Keyframe Effects”
(page 434).
Notes
When using a macro timeline, note the following.
•
To use a macro timeline, the Macro region must be
assigned to a region selection button in the numeric
keypad control block.
For details of region assignment operations, see
“Assigning a Region to the Region Selection Buttons in
the Numeric Keypad Control Block or Multifunction
Flexi Pad Control Block” (page 570).
•
On a macro timeline, only macro recall and execution
actions are stored. The data for a macro to be recalled on
the macro timeline is not held on the timeline. It is
necessary to create the macro data first.
•
A macro timeline can be saved and recalled on the
master timeline or a shotbox register, but cannot be
saved as a snapshot.
Creating and Editing a Macro
Timeline
This section describes how to set actions, and add
keyframe points. Note that path settings are not needed on
the macro timeline.
For details of keyframe operations, see “Creating and
Editing Keyframes” (page 450).
Saving a keyframe
For the operations, use the Macro Timeline menu and the
[INS] button in the keyframe control block.
1
Press the [EDIT ENBL] button, turning it on.
This enables timeline editing in the keyframe control
block.
2
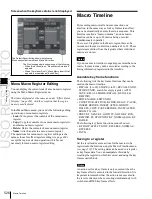
In the Macro menu, select VF4 ‘Timeline’ and HF1
‘Timeline.’
The Macro Timeline menu appears.
3
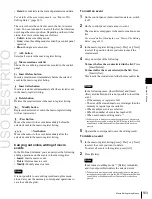
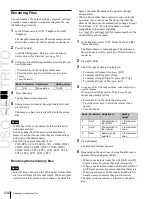
Select one of the actions (Recall, Take, Take All, No
Action) that appear on the right.
When you have selected Recall or Take, turn the knob
to select the number of the macro register.
Knob
Parameter
Adjustment
Setting values
3
Reg No
Selection of
macro register
1 to 250
4
Press [Set].
The selected action appears in the Action column on
the left.
5
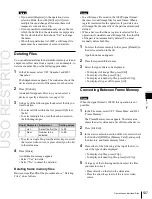
Press the [INS] button in the keyframe control block.
This creates the keyframe 1 on the macro timeline.
To set the action for a rewind operation
On the macro timeline, when the [REWIND] button in the
keyframe control block is pressed the action set for the first
keyframe is not executed; when the [RUN] button is
pressed, then the first keyframe action is executed.
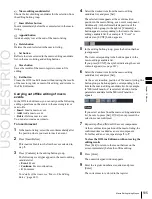
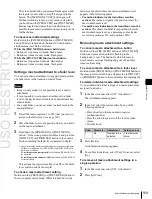
To execute an action when the [REWIND] button is
pressed, it is necessary to set this action (Rewind Action).
To carry out this setting, in the Macro >Timeline
>Timeline menu, press [Rewind Action] to recall the
Rewind Action menu. In this setting screen, use the same
setting method as in the screen for setting an action on the
macro timeline.
Alternatively, you can select the reverse arrangement,
whereby when the
[REWIND] button is pressed, this executes the action set
for the first keyframe, and when the [RUN] button is
Содержание MVS-8000X SystemMVS-7000X System
Страница 358: ...USO RESTRITO 358 Wipe Pattern List Appendix Volume 1 Enhanced Wipes Rotary Wipes ...
Страница 360: ...USO RESTRITO Random Diamond DustWipes 360 1 w pe PaternLO ...
Страница 362: ...USO RESTRITO 362 DME Wipe Pattern List Appendix Volume 1 Door 2D trans 3D trans ...
Страница 363: ...USO RESTRITO DME Wipe Pattern List 363 Appendix Volume 1 Flip tumble Frame in out Picture in picture ...
Страница 364: ...USO RESTRITO 364 DME Wipe Pattern List Appendix Volume 1 Page turn Page roll ...
Страница 365: ...USO RESTRITO DME Wipe Pattern List 365 Appendix Volume 1 Mirror Sphere Character trail Wave Ripple Split slide ...
Страница 367: ...USO RESTRITO DME Wipe Pattern List 367 Appendix Volume 1 Squeeze 3D trans Picture in picture Page turn ...
Страница 376: ...USO RESTRITO 376 Menu Tree Appendix Volume 1 Frame Memory Menu FRAME MEM button Color Bkgd Menu COLOR BKGD button ...
Страница 377: ...USO RESTRITO Menu Tree 377 Appendix Volume 1 AUX Menu AUX button CCR Menu CCR button ...
Страница 379: ...USO RESTRITO Menu Tree 379 Appendix Volume 1 DME Menu DME button ...
Страница 380: ...USO RESTRITO 380 Menu Tree Appendix Volume 1 Global Effect Menu GLB EFF button Router Menu Device Menu DEV button ...
Страница 381: ...USO RESTRITO Menu Tree 381 Appendix Volume 1 Macro Menu MCRO button ...
Страница 382: ...USO RESTRITO 382 Menu Tree Appendix Volume 1 Key Frame Menu KEY FRAME button ...
Страница 383: ...USO RESTRITO Menu Tree 383 Appendix Volume 1 Effect Menu EFF button ...
Страница 384: ...USO RESTRITO 384 Menu Tree Appendix Volume 1 Snapshot Menu SNAPSHOT button ...
Страница 385: ...USO RESTRITO Menu Tree 385 Appendix Volume 1 Shotbox Menu SHOTBOX button ...
Страница 386: ...USO RESTRITO 386 Menu Tree Appendix Volume 1 File Menu FILE button ...
Страница 388: ...USO RESTRITO 388 Menu Tree Appendix Volume 1 ENG SETUP button to previous page topages after 390 to next page ...
Страница 389: ...USO RESTRITO Menu Tree 389 Appendix Volume 1 ENG SETUP button to page 387 to previous pages to following pages ...
Страница 390: ...USO RESTRITO 390 Menu Tree Appendix Volume 1 ENG SETUP button to previous pages to next page a MVS 7000X only ...
Страница 391: ...USO RESTRITO Menu Tree 391 Appendix Volume 1 ENG SETUP button to previous pages ...
Страница 392: ...USO RESTRITO 392 Menu Tree Appendix Volume 1 User Setup Menu USER SETUP button Diagnostic Menu DIAG button ...
Страница 413: ...USO RESTRITO MVS 8000X System MVS 7000X System SY 4 470 637 01 1 Sony Corporation 2013 ...
Страница 706: ...USO RESTRITO MVS 8000X System MVS 7000X System SY 4 470 637 01 1 Sony Corporation 2013 ...

