USO
RESTRITO
Three-Dimensional Transformation Operations
287
Knob
Parameter
Adjustment
Setting values
1
Scale
Degree to
which the
graphics
display is
shrunk
0.00 to 100.00
Ch
a
p
te
r 11
DM
E
O
p
e
ra
ti
o
n
s
As the initial DME state, you can specify whether to use
the factory default settings or user settings in the Setup
menu.
For details see “Selecting the State After Powering On
(Start Up Menu)” in Chapter 18 (Volume 2).
Graphics Display Operation
Use the DME menu to make graphics display settings. You
can make separate settings for separate channels. To select
a target DME channel, use the device control block.
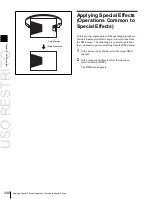
As the value of the setting grows, the monitor shrinks
further toward the center point.
6
To automatically erase the graphic display while the
keyframes are executing, press [Auto Erase], turning it
on, and then set the following parameter.
For the types of graphics displayed, see “Graphics
Display” (page 273).
Displaying graphics
1
In the menu control block, select the top menu
selection button [DME].
The DME menu appears.
2
Select VF6 ‘Input/Output’ and HF4 ‘Graphic.’
The Graphic menu appears.
3
Turn [Graphic] on.
The system enters graphics display mode, enabling
graphics to be displayed in the monitor screen.
4
Turn on the buttons of the graphics you want to show.
To show axes:
Turn [Axis] on.
To show axis names:
Turn [Axis Name] on.
To show the channel ID:
Turn [Ch ID] on.
To show a wire frame:
Turn [Wire Frame] on.
To show the grid:
Turn [Grid] on.
To show the flex shadow axis:
Turn [Flex Shadow
Axis] on.
The selected graphics appear in the monitor screen.
Notes
The flex shadow axis function is not supported on the
MVE-8000A.
5
If you want to shrink the graphics display to show the
range not displayed on a normal monitor, turn [Scale]
on and set the following parameters.
Knob
Parameter
Adjustment
Setting values
1
Recover
Time
Time until
graphic
display
appears
again after
keyframe
execution
0 to 300 (frames)
Outputting graphics to the monitor output
connector
In the Graphic menu, press [Monitor Out], turning it on.
Graphics are displayed on the device connected to the
monitor output connector.
Canceling Virtual Images
When a transformation is executed with an extreme degree
of perspective set for an image, the part of the image
exceeding the virtual view point is displayed wrapped
around on the monitor screen. The wrapped-around
portion is referred to as a virtual image.
Using the DME menu, you can make a setting not to show
the virtual images.
Canceling virtual images
1
In the DME menu, select VF6 ‘Input/Output’ and HF2
‘Video/Key.’
The Video/Key menu appears.
2
Press [Wrap Around], turning it on.
Содержание MVS-8000X SystemMVS-7000X System
Страница 358: ...USO RESTRITO 358 Wipe Pattern List Appendix Volume 1 Enhanced Wipes Rotary Wipes ...
Страница 360: ...USO RESTRITO Random Diamond DustWipes 360 1 w pe PaternLO ...
Страница 362: ...USO RESTRITO 362 DME Wipe Pattern List Appendix Volume 1 Door 2D trans 3D trans ...
Страница 363: ...USO RESTRITO DME Wipe Pattern List 363 Appendix Volume 1 Flip tumble Frame in out Picture in picture ...
Страница 364: ...USO RESTRITO 364 DME Wipe Pattern List Appendix Volume 1 Page turn Page roll ...
Страница 365: ...USO RESTRITO DME Wipe Pattern List 365 Appendix Volume 1 Mirror Sphere Character trail Wave Ripple Split slide ...
Страница 367: ...USO RESTRITO DME Wipe Pattern List 367 Appendix Volume 1 Squeeze 3D trans Picture in picture Page turn ...
Страница 376: ...USO RESTRITO 376 Menu Tree Appendix Volume 1 Frame Memory Menu FRAME MEM button Color Bkgd Menu COLOR BKGD button ...
Страница 377: ...USO RESTRITO Menu Tree 377 Appendix Volume 1 AUX Menu AUX button CCR Menu CCR button ...
Страница 379: ...USO RESTRITO Menu Tree 379 Appendix Volume 1 DME Menu DME button ...
Страница 380: ...USO RESTRITO 380 Menu Tree Appendix Volume 1 Global Effect Menu GLB EFF button Router Menu Device Menu DEV button ...
Страница 381: ...USO RESTRITO Menu Tree 381 Appendix Volume 1 Macro Menu MCRO button ...
Страница 382: ...USO RESTRITO 382 Menu Tree Appendix Volume 1 Key Frame Menu KEY FRAME button ...
Страница 383: ...USO RESTRITO Menu Tree 383 Appendix Volume 1 Effect Menu EFF button ...
Страница 384: ...USO RESTRITO 384 Menu Tree Appendix Volume 1 Snapshot Menu SNAPSHOT button ...
Страница 385: ...USO RESTRITO Menu Tree 385 Appendix Volume 1 Shotbox Menu SHOTBOX button ...
Страница 386: ...USO RESTRITO 386 Menu Tree Appendix Volume 1 File Menu FILE button ...
Страница 388: ...USO RESTRITO 388 Menu Tree Appendix Volume 1 ENG SETUP button to previous page topages after 390 to next page ...
Страница 389: ...USO RESTRITO Menu Tree 389 Appendix Volume 1 ENG SETUP button to page 387 to previous pages to following pages ...
Страница 390: ...USO RESTRITO 390 Menu Tree Appendix Volume 1 ENG SETUP button to previous pages to next page a MVS 7000X only ...
Страница 391: ...USO RESTRITO Menu Tree 391 Appendix Volume 1 ENG SETUP button to previous pages ...
Страница 392: ...USO RESTRITO 392 Menu Tree Appendix Volume 1 User Setup Menu USER SETUP button Diagnostic Menu DIAG button ...
Страница 413: ...USO RESTRITO MVS 8000X System MVS 7000X System SY 4 470 637 01 1 Sony Corporation 2013 ...
Страница 706: ...USO RESTRITO MVS 8000X System MVS 7000X System SY 4 470 637 01 1 Sony Corporation 2013 ...


