


25
Names and Functions of Parts of the Control Panel
Cha
pt
er 2
Name
s an
d F
unc
tions
of
P
ar
ts
For details about assignments for the transition type
selection buttons,
“Setting Transition Control Block
.
c
Transition execution section
This section is used to carry out a transition and check the
progress of the transition.
d
Wipe direction selection buttons
When a wipe or DME wipe is selected as the transition
type, you can press to light these buttons to select the wipe
direction.
e
TRANS PVW (transition preview) button
With the preview output of the M/E bank and PGM/PST
bank, you can check the effect of a transition in advance.
During the preview, you can use the fader lever, [AUTO
TRANS] button, and [CUT] button. One of the following
functions of this button can be selected in a Setup mode.
• When the transition completes, the system returns to the
normal mode.
• The transition preview mode is maintained while this
button is pressed.
• Switching is made between the transition preview mode
and normal mode every time this button is pressed.
f
PRIOR (priority) SET button
While this button is held down, you can set the key
priority.
The setting mode when this button is pressed depends on
whether or not the [KEY PRIOR] button is lit, as follows.
• When the [KEY PRIOR] button is off, the current key
priority is set.
• When the [KEY PRIOR] button is lit, the key priority
after the next transition is set.
Press the [KEY PRIOR] button as required, to switch
between these two modes.
In either mode, hold down the [PRIOR SET] button, and
press the [KEY1] to [KEY4] ([DSK1] to [DSK4]) button
corresponding to the key you want to bring to the front.
For details,
“Setting the Key Priority in the Transition
.
g
Key priority display
The current key priority status is displayed on the left,
while the key priority status after the transition is displayed
on the right.
h
Independent key transition execution section
This is used to insert or delete keys 1 to 4, and carry out
auto transitions.
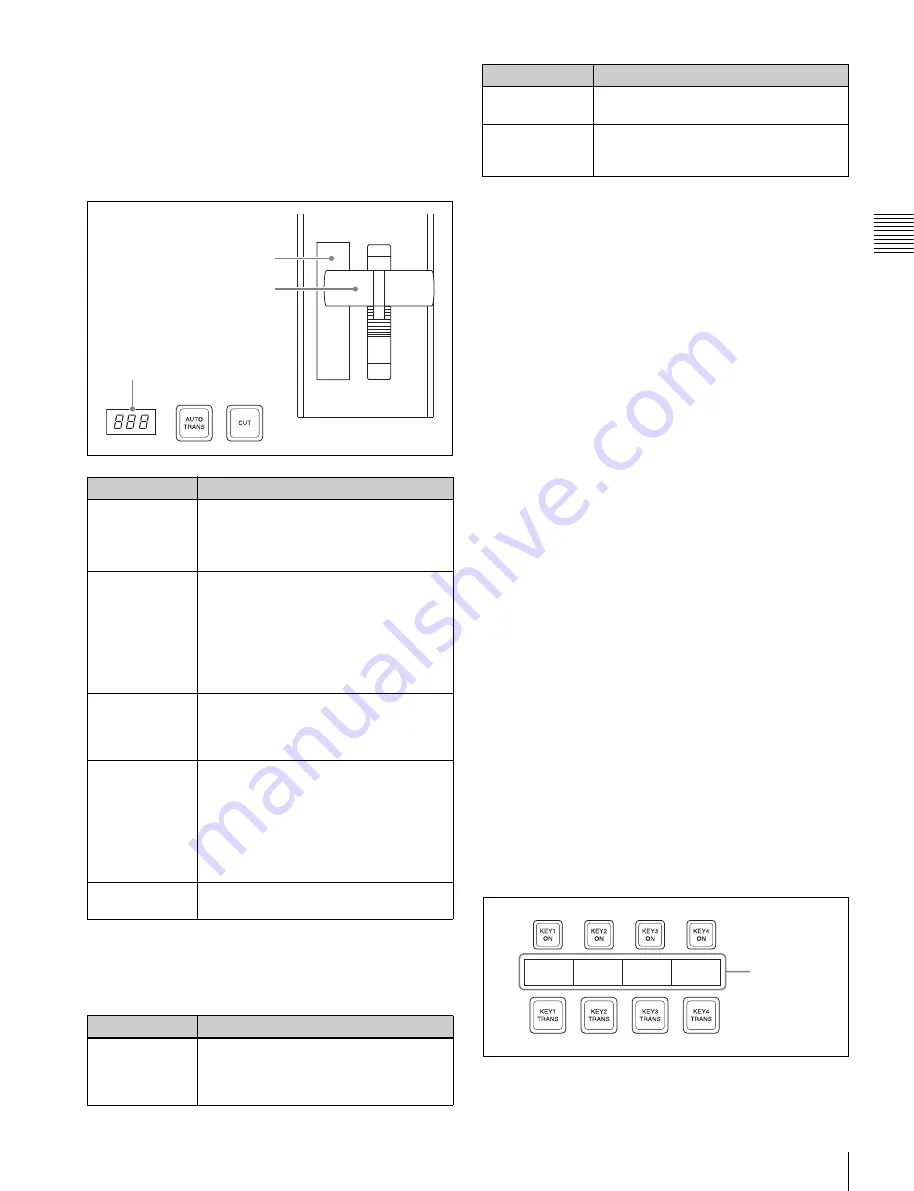
Name
Description
Fader status
display
• Displays the transition progress as a
bar (transition indicator).
• In a non-sync state, “Non Sync” and
“Sync” appear at the top and bottom.
Fader lever
• Move this up or down to carry out the
transition.
• When you press the transition type
selection button to which the KF button
function has been assigned and turn it
on, you can use this as a keyframe
fader.
Transition rate
display
This shows the “transition rate” (the time
from the beginning of a transition to its
completion) set for an auto transition, in
frames.
AUTO TRANS
(transition)
button
• Pressing this button carries out an auto
transition of the set transition rate
(duration). The transition starts
immediately, and the button lights
amber.
• When the transition completes, the
button goes off.
CUT button
Pressing this button carries out the
transition as a cut (i.e. instantaneously).
Name
Description
NORM (normal) The wipe proceeds in the direction from
black to white or in the direction of the
arrows as shown in
.
Fader status display
Fader lever
Transition rate display
REV (reverse)
The wipe proceeds in the opposite
direction of [NORM].
NORM/REV
(normal/reverse)
The wipe direction alternates between
normal and reverse every time a
transition is executed.
Name
Description
Key source
name display


