


116
Clip Transition Operations
Chap
te
r 7
F
ra
m
e
Memor
y
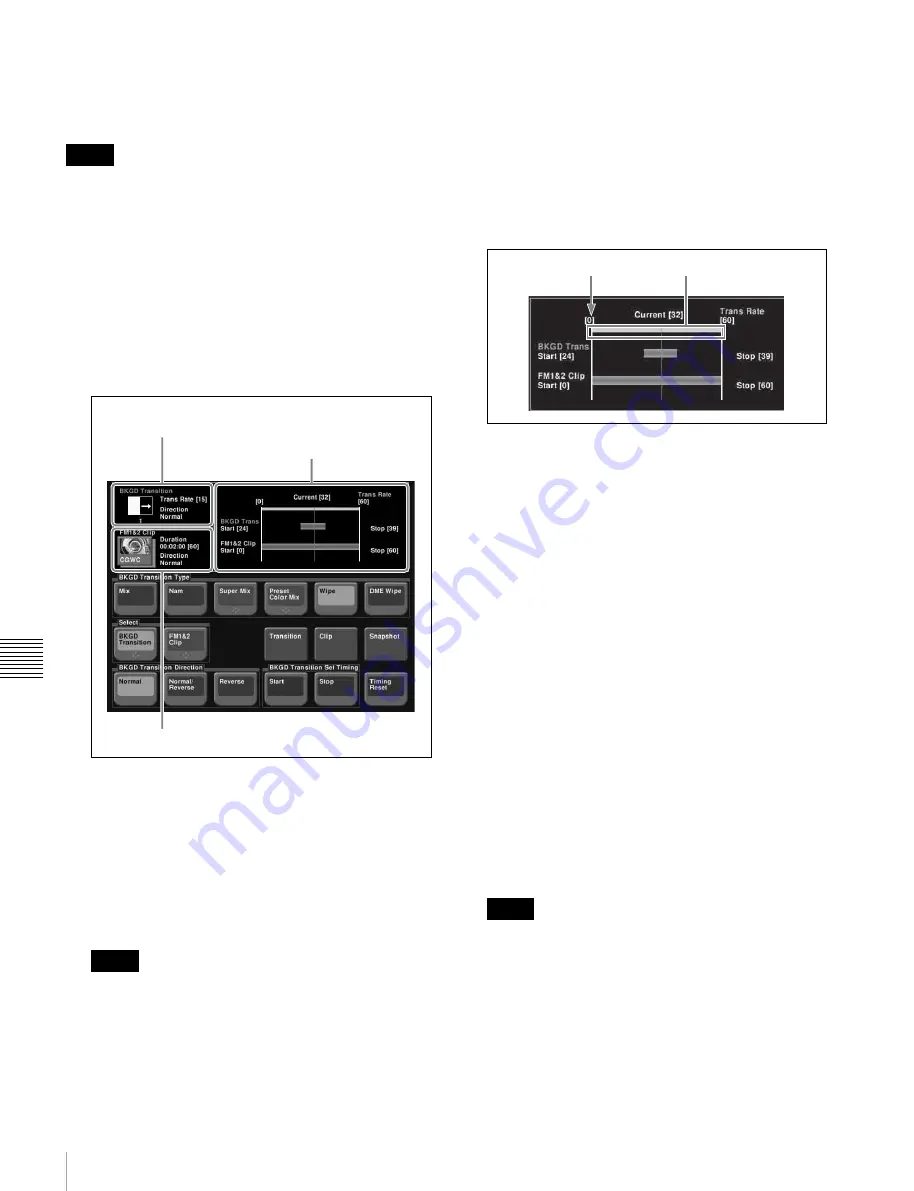
Setting a clip transition
This section describes a clip transition using FM1&2 Clip
on the M/E-1 bank as an example.
To use a clip transition effectively, the image from the
frame memory clip being played back during the clip
transition should be applied to the M/E-1 program output.
For example, inserting a key using frame memory output 1
and frame memory output 2.
1
In the M/E-1 >Misc >Transition menu (1171), and
select “FM1&2 Clip” in the <Transition Type> group.
2
Press [Clip Transition].
The Clip Transition menu (1176) appears.
3
Press [Clip].
The status area shows a list of clips.
4
Select the clip to use in the clip transition.
5
Return to the Clip Transition menu, and in the <BKGD
Transition Type> group, select the background
transition type.
For details about the background transition selected
here, see the various adjustments in the M/E-1 >Misc
>Transition menu.
6
In the <Select> group, press [BKGD Transition].
7
Use either of the following methods to set the
background transition start point independently of the
clip playback timing.
• Move the fader lever to the desired position, and in
the <BKGD Transition Set Timing> group, press
[Start].
• Set the number of frames in the [BKGD Trans Start]
parameter. (The left end of the reference axis (see
following figure) is the position of frame 0.)
8
Using either of the following methods, set the end
point of the background transition.
• Move the fader lever to the desired position, and in
the <BKGD Transition Set Timing> group, press
[Stop].
• Set the number of frames in the [BKGD Trans Stop]
parameter.
9
If [Wipe] or [DME Wipe] is selected in the <BKGD
Transition Type> group, in the <BKGD Transition
Direction> group, select the background transition
direction.
10
In the <Select> group, press [FM1&2 Clip].
11
Using either of the following methods, set the start
point of the clip.
• Move the fader lever to the desired start point, and in
the <Clip Transition Set Timing> group, press
[Start].
• Set the number of frames in the [Clip Start]
parameter. (The left end of the reference axis (see
previous figure) is the position of frame 0.)
It is not possible to set the clip end point.
12
In the <Clip Transition Direction> group, select the
playback direction of the clip.
To reset the start point and end point
Press [Timing Reset].
The background transition start point and end point, and
the clip start point are all reset.
Notes
Notes
Background transition
display area
Clip transition
display area
Clip display area
Notes
Position of frame 0
Reference axis


