


2-8
D i g i t a l 8 • B u s
Digital 8•Bus Description
gp
NEAR FIELD button
Turns on the Control Room NEAR FIELD
output.
gq
MAIN button
Turns on the Control Room MAIN output.
Note:
The NEAR FIELD and MAIN buttons
cannot both be on at the same time.
gr
SPEAKER LEVEL V-Pot
Adjusts the individual output level of the se-
lected Control Room output (NEAR FIELD or
MAIN). This control does not affect the signal
level that is sent to the Phones/Cue Mix Section.
gs
DIM button
Quickly attenuates the Control Room output
by 20 dB, in case you’re interrupted by a visitor
or the phone ringing.
gt
TALKBACK button
Routes the signal arriving at the in-panel
Talkback Mic to Phones/Cue Mixes 1 and 2.
Clipboard Section
Provides cut, copy,
paste, and undo functions
for specific fader opera-
tions, channel
parameters, and automa-
tion events.
gu
CUT/ZERO SET button
Deletes parameters from the currently se-
lected channel(s), and returns the channel
settings to the default. Options are selected in
the Fat Channel Display.
hl
COPY button
Copies parameters from the currently se-
lected channel(s). Options are selected in the
Fat Channel Display.
hm
PASTE button
Pastes copied parameters to the currently
selected channel(s).
hn
UNDO button
Reverts the currently selected channel(s) to
their previous status, before a cut, copy, or paste
operation was initiated. There is only one level
of undo. Pressing the UNDO button a second
time will undo the undo, or “redo” the operation.
Master L-R Section
The buttons in this section apply to the Mas-
ter Fader.
ho
SELECT button
Selects the Master Fader for edit operations.
hp
WRITE button
Engages the Master Fader to record auto-
mation events dependent on the current
automation mode.
SELECT
CONTROL
WRITE
ALT
MASTER L/R
SHORTCUTS
ho
hp
hq
hr
Shortcuts Section
hq
CONTROL button
Used in combination with other buttons as a
modifier key. See Appendix I for a listing of
shortcut keys.
hr
ALT button
Used in combination with other buttons as a
modifier key. See Appendix I for a listing of
shortcut keys.
Bus Assignment Section
This is where you assign
channels to up to ten differ-
ent buses, as well as to any
direct TAPE OUT.
hs
BUS 1–8 buttons
Selects a bus for channel
assignments. Only one bus
may be assigned at a time.
Press a channel’s ASSIGN
button to route the channel’s post-fader signal
to the selected bus. Since the ASSIGN button
lights when its channel is assigned to a se-
lected bus, you can quickly see what channels
have been assigned. Press the ASSIGN button
again to unassign the channel from the se-
lected bus.
ht
MASTER L-R button
Pressing this button allows you to assign
channels to the L-R bus by pressing the chan-
nel ASSIGN buttons. The internal FX returns
(FX 1–16) and alternate returns (RET 1–8) can
also be assigned to the L-R bus. Since the AS-
SIGN button lights when its channel is
assigned to the selected L-R bus, you can
BUS 1
BUS 2
BUS 3
BUS 4
BUS 5
BUS 7
BUS 6
BUS 8
L-R
ROUTE TO
TAPE
ASSIGNMENT
ASSIGN
ASSIGN
ASSIGN
ASSIGN
ASSIGN
ASSIGN
ASSIGN
ASSIGN
ASSIGN
ASSIGN
hs
ht
hu
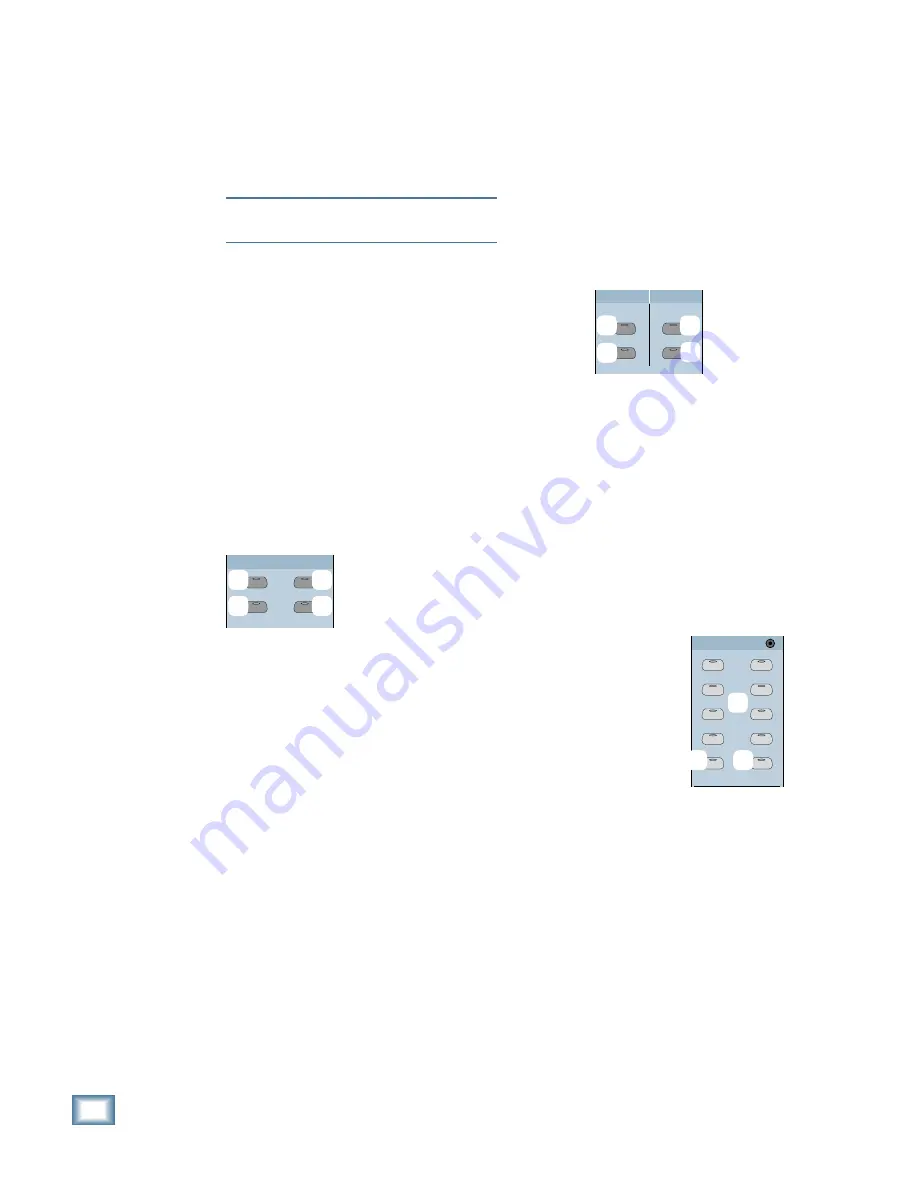
PASTE
UNDO
CUT/ZERO SET
COPY
CLIPBOARD
gu
hl
hm
hn
Содержание 8-BUS Series
Страница 49: ...3 16 D i g i t a l 8 B u s Start Up ...
Страница 57: ...4 8 D i g i t a l 8 B u s Connections ...
Страница 77: ...5 20 D i g i t a l 8 B u s Preparing for a Session ...
Страница 177: ...7 20 D i g i t a l 8 B u s Automation ...
Страница 207: ...D 2 D i g i t a l 8 B u s Apogee UV22 ...
Страница 219: ...F 4 D i g i t a l 8 B u s Optional I O Cards ...
Страница 227: ...H 2 D i g i t a l 8 B u s Upgrading ...
Страница 232: ...J 3 O w n e r s M a n u a l Screen Shots Surround Sound Matrix Mackie FX Control Panel IVL Vocal Studio Control Panel ...
Страница 233: ...J 4 D i g i t a l 8 B u s Screen Shots Disk Manager File Menu Channel Menu Automation Menu Edit Menu Windows Menu ...
Страница 235: ...K 2 D i g i t a l 8 B u s ...
Страница 237: ...D i g i t a l 8 B u s ...
Страница 239: ...D i g i t a l 8 B u s ...


