


7-10
D i g i t a l 8 • B u s
Automation
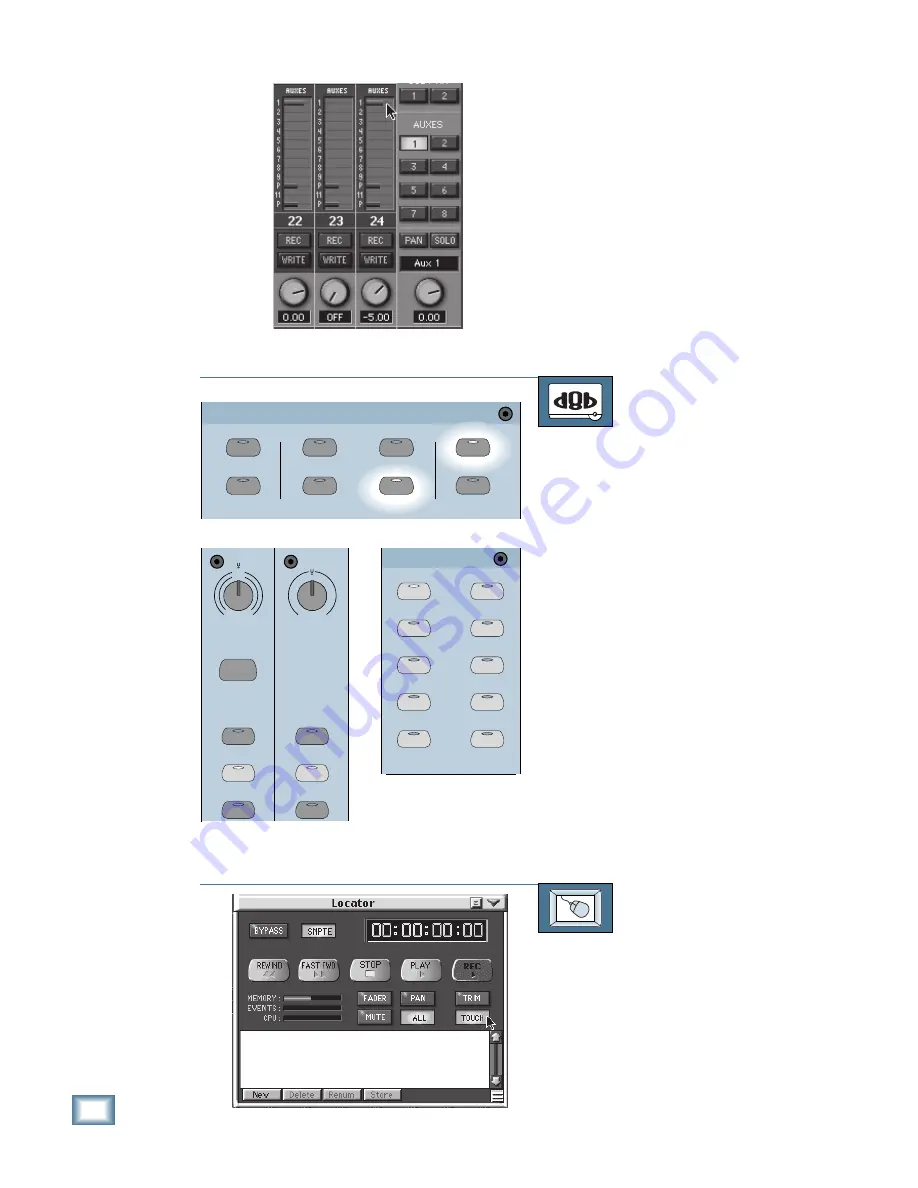
Alternatively, click on a bar in the
individual channel’s AUXES section to
adjust an aux send level. A numerical
representation of the aux send level
appears in place of the channel
number just above the AUXES box.
6. Upon completion of the automation
pass, if you’re satisfied with the auto-
mated fader moves, make sure to save
the session (click on “File” in the upper
menu bar and choose “Save Session”).
Writing Bus Assignments
TO WRITE BUS ASSIGNMENTS
From the console:
1. Turn off the BYPASS button in the
automation section to engage the
automation functions.
2. Press the ALL and AUTO TOUCH
buttons. Bus assignments are
automated using Auto Touch mode.
3. Press the PLAY button in the
Transport Section, or press Play on
the recorder to initiate timecode.
4. Press one of the BUS buttons in the
bus Assignment Section.
5. At the desired times, press the
ASSIGN button on the channels you
want to assign to the selected bus.
6. Upon completion of the automation
pass, if you’re satisfied with the
automated bus assignments, make
sure to save the session (press SAVE
in the Setup Section).
TO WRITE BUS ASSIGNMENTS
From the screen:
1. Click on the Locator button in the
lower menu bar. The Locator window
appears on the screen.
2. Click on the BYPASS and ALL buttons
in the Locator window.
3. Click on the TOUCH button in the
Locator window to initiate Auto
Touch mode.
BYPASS
FADERS
MUTES
AUTO TOUCH
FADER MOTORS
OFF
PAN
ALL
TRIM LEVELS
AUTOMATION
BUS 1
BUS 2
BUS 3
BUS 4
BUS 5
BUS 7
BUS 6
BUS 8
L-R
ROUTE TO
TAPE
ASSIGNMENT
ASSIGN
ASSIGN
ASSIGN
ASSIGN
ASSIGN
ASSIGN
ASSIGN
ASSIGN
ASSIGN
ASSIGN
TRIM
TRIM
12
13
-
20
+20
MIC
0
60
-
20dB +40dB
LINE
ASSIGN
WRITE
ASSIGN
WRITE
MIC
REC/RDY
REC/RDY
Содержание 8-BUS Series
Страница 49: ...3 16 D i g i t a l 8 B u s Start Up ...
Страница 57: ...4 8 D i g i t a l 8 B u s Connections ...
Страница 77: ...5 20 D i g i t a l 8 B u s Preparing for a Session ...
Страница 177: ...7 20 D i g i t a l 8 B u s Automation ...
Страница 207: ...D 2 D i g i t a l 8 B u s Apogee UV22 ...
Страница 219: ...F 4 D i g i t a l 8 B u s Optional I O Cards ...
Страница 227: ...H 2 D i g i t a l 8 B u s Upgrading ...
Страница 232: ...J 3 O w n e r s M a n u a l Screen Shots Surround Sound Matrix Mackie FX Control Panel IVL Vocal Studio Control Panel ...
Страница 233: ...J 4 D i g i t a l 8 B u s Screen Shots Disk Manager File Menu Channel Menu Automation Menu Edit Menu Windows Menu ...
Страница 235: ...K 2 D i g i t a l 8 B u s ...
Страница 237: ...D i g i t a l 8 B u s ...
Страница 239: ...D i g i t a l 8 B u s ...


