6-10
D i g i t a l 8 • B u s
Starting a New Session
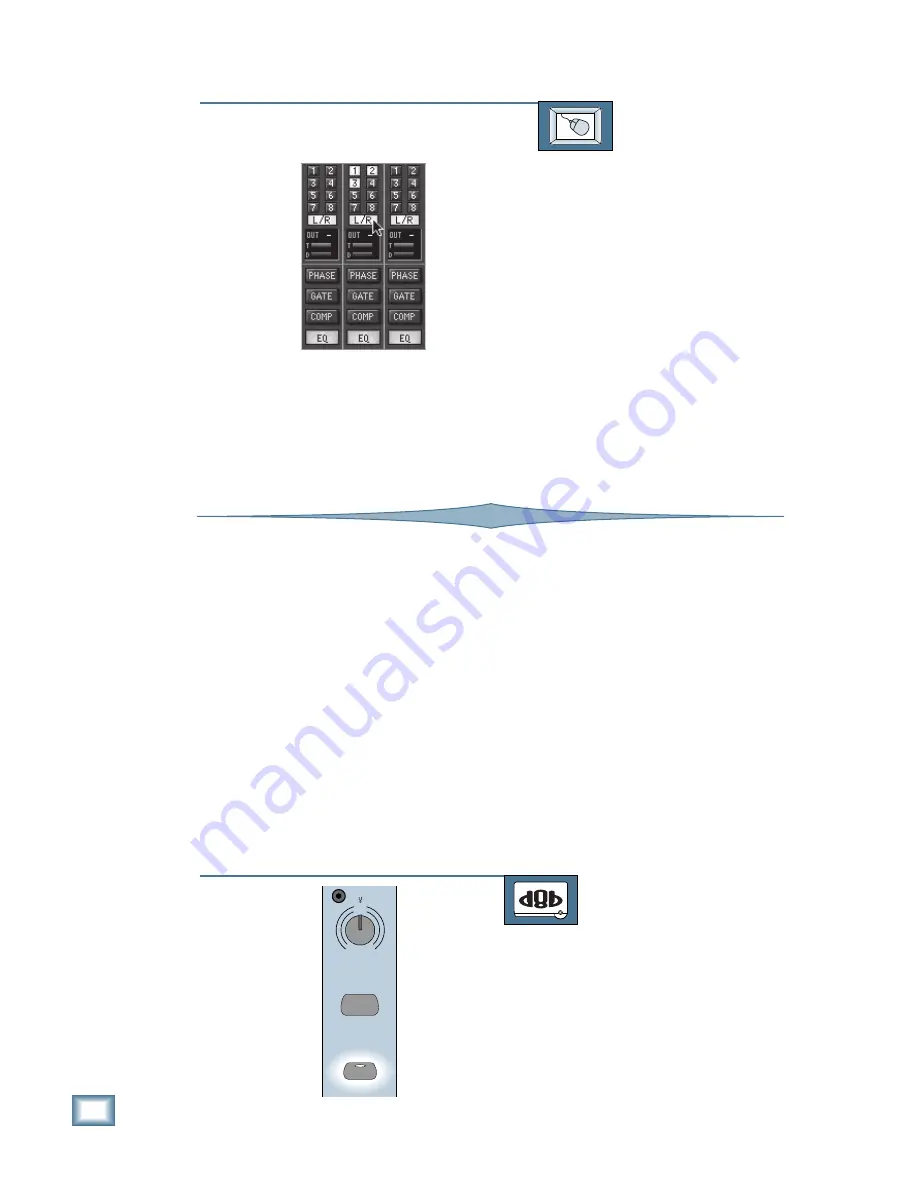
TO ASSIGN CHANNELS TO BUS OUTPUTS
From the screen:
1. Click on the appropriate button above
the Master Fader to select the fader
deck containing the channel you want
to assign.
2. Click on the bus assignment numbers
at the top of the channel strip to as-
sign the channel to one of the eight
buses. You can select the L-R buses
here, too. The selected bus numbers
light when selected.
3. You can click and hold on a bus as-
signment button, and sweep across
adjacent channels to assign the se-
lected bus to multiple channels. You
can repeat this step to remove chan-
nels from a bus.
Arming External Recorders from the Console
ID”assignment. They send out an MMC com-
mand when pressed that arms the corresponding
track for recording.
The following is a summary of REC/RDY LED
activity:
1. The LED will not light if REC/RDY is not en-
gaged.
2. The LED flashes whether tape is rolling or not
when channel REC/RDY is enabled and the
Master RECORD is not enabled.
3. The LED lights continuously when tape is roll-
ing, the channel REC/RDY is enabled, and the
Master RECORD is enabled. Audio is being re-
corded.
If your MDM/DAW has MIDI Machine Control
(MMC) capabilities, connect a MIDI cable be-
tween the MIDI Out on the Remote CPU and the
MIDI timecode interface as described in the MIDI
Connections section in Chapter 4. You can control
the transport mechanisms with the transport but-
tons on the console surface. Transport MMC
control messages (like Stop, Play, etc.) from the
Digital 8•Bus are sent as “ALL CALL” to any de-
vice in your studio setup.
The channel strip REC/RDY buttons are active
regardless of the selected fader bank on the D8B.
These switches are specifically mapped to the
MIDI’s according to the setup “MIDI Device
TRIM
9
MIC
0
60
-
20dB +40dB
LINE
MIC
REC/RDY
See Chapter 8, “Advanced Functions,” to learn how to create groups using the ASSIGN button.
TO ARM CHANNELS FOR RECORDING
From the console:
1. Press the REC/RDY button for each Tape
Output you want to arm for recording. The
red LED in the button flashes.
Содержание 8-BUS Series
Страница 49: ...3 16 D i g i t a l 8 B u s Start Up ...
Страница 57: ...4 8 D i g i t a l 8 B u s Connections ...
Страница 77: ...5 20 D i g i t a l 8 B u s Preparing for a Session ...
Страница 177: ...7 20 D i g i t a l 8 B u s Automation ...
Страница 207: ...D 2 D i g i t a l 8 B u s Apogee UV22 ...
Страница 219: ...F 4 D i g i t a l 8 B u s Optional I O Cards ...
Страница 227: ...H 2 D i g i t a l 8 B u s Upgrading ...
Страница 232: ...J 3 O w n e r s M a n u a l Screen Shots Surround Sound Matrix Mackie FX Control Panel IVL Vocal Studio Control Panel ...
Страница 233: ...J 4 D i g i t a l 8 B u s Screen Shots Disk Manager File Menu Channel Menu Automation Menu Edit Menu Windows Menu ...
Страница 235: ...K 2 D i g i t a l 8 B u s ...
Страница 237: ...D i g i t a l 8 B u s ...
Страница 239: ...D i g i t a l 8 B u s ...


