6-12
D i g i t a l 8 • B u s
Starting a New Session
Adding EQ, Dynamics and Effects to Input
Signals
As a general rule, you want to minimize your
use of EQ and effects when recording on your
multitrack master. That said, there are occasions
when you will want to use them, particularly the
dynamics processors (compressor and gate).
Due to the tremendous power of the Digital
8•Bus, you can assign compression and gating to
any channel, with two individual settings for each
channel. This can save you the cost of a rack-full
of external compressors and gate processors.
Refer to “Adding EQ, Dynamics, and Effects to
Tape Returns” on page 6-28 for details on how to
use these functions.
Monitoring in the Control Room
The most straightforward way to monitor dur-
ing a recording or overdubbing session is by
listening to the output of the recorder, played
through channels 25–48 and assigned to the L-R
bus. Properly configured, your recorder will auto-
matically switch between source and playback as
you put the deck into stop, play, fast wind, record
and so on. That way, you’re always hearing the
instruments after they travel through the multi-
track deck, regardless of whether or not the tape
is rolling.
This method allows you to set up a custom
mix of the tape tracks, independent of your re-
cording levels. You can independently adjust the
level, pan, reverb and even EQ in your monitor
mix while you record. You can even patch the
L-R outputs into a 2-track recorder for a rough
mix of the session.
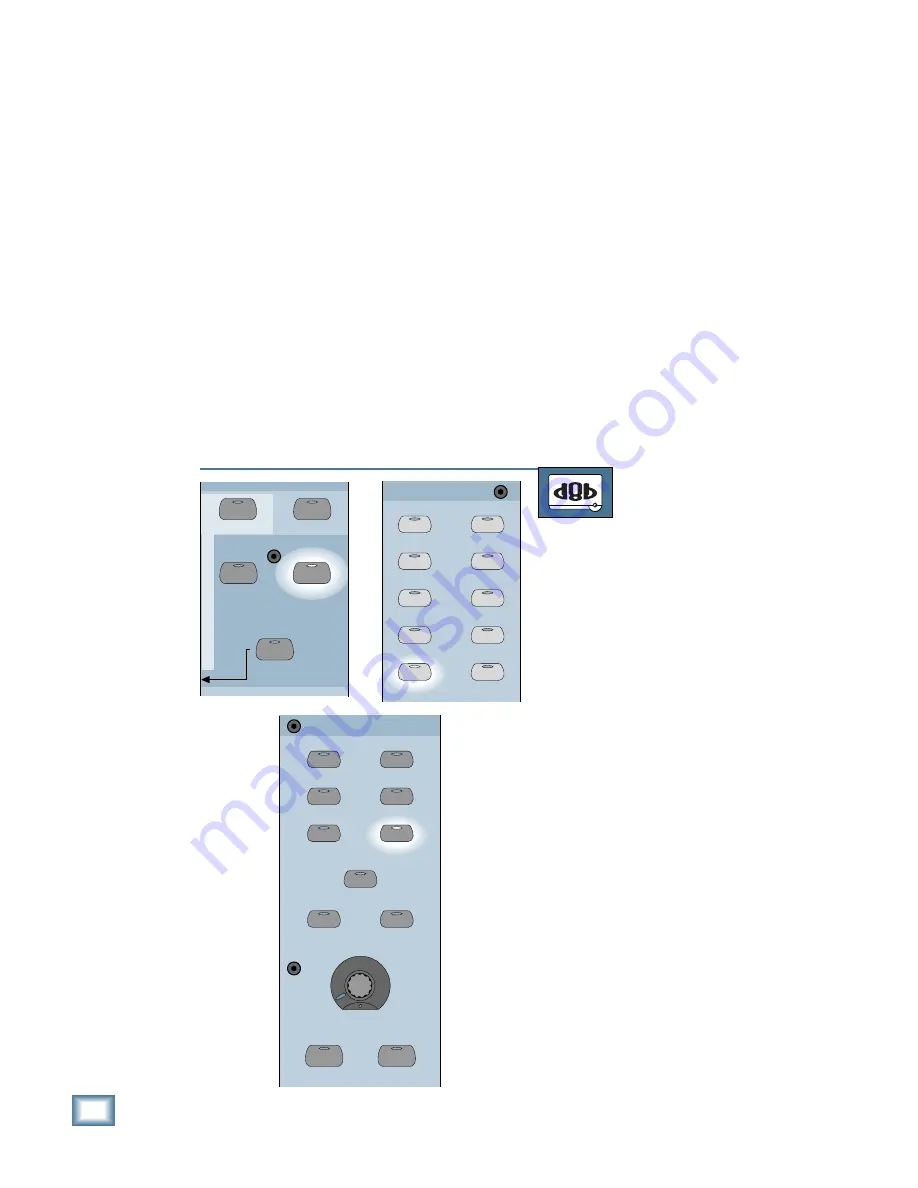
TO MONITOR IN THE CONTROL ROOM
From the console:
1. Select Fader Bank 2 by pressing the
TAPE IN (25–48) button.
2. Press the L-R button in the Assign-
ment Section.
3. If the channels aren’t already assigned
to the L-R bus, sweep your finger
across all the channel ASSIGN but-
tons to assign all the channels to the
L-R bus.
4. Press the MASTER L-R button in the
Control Room Source Section.
5. Turn the SPEAKER LEVEL V-Pot all
the way down.
6. Select the speakers you want to use
for monitoring by pressing their corre-
sponding button (MAIN or NEAR
FIELD).
7. Adjust the SPEAKER LEVEL V-Pot to
a comfortable listening level.
SHIFT
MASTERS
1
-
24
25
-
48
49
-
72
(TRACK)
(MONITOR)
BANK SELECT
EFFECTS
MIC/LINE
TAPE IN
BUS 1
BUS 2
BUS 3
BUS 4
BUS 5
BUS 7
BUS 6
BUS 8
L-R
ROUTE TO
TAPE
ASSIGNMENT
ASSIGN
ASSIGN
ASSIGN
ASSIGN
ASSIGN
ASSIGN
ASSIGN
ASSIGN
ASSIGN
ASSIGN
2 TRACK A
DIGITAL IN 1
2 TRACK B
DIGITAL IN 2
2 TRACK C
MASTER
L-R
NEAR FIELD
MAIN
DIM
TALKBACK
CONTROL ROOM
SPEAKER LEVEL
MONO
SPEAKERS
Содержание 8-BUS Series
Страница 49: ...3 16 D i g i t a l 8 B u s Start Up ...
Страница 57: ...4 8 D i g i t a l 8 B u s Connections ...
Страница 77: ...5 20 D i g i t a l 8 B u s Preparing for a Session ...
Страница 177: ...7 20 D i g i t a l 8 B u s Automation ...
Страница 207: ...D 2 D i g i t a l 8 B u s Apogee UV22 ...
Страница 219: ...F 4 D i g i t a l 8 B u s Optional I O Cards ...
Страница 227: ...H 2 D i g i t a l 8 B u s Upgrading ...
Страница 232: ...J 3 O w n e r s M a n u a l Screen Shots Surround Sound Matrix Mackie FX Control Panel IVL Vocal Studio Control Panel ...
Страница 233: ...J 4 D i g i t a l 8 B u s Screen Shots Disk Manager File Menu Channel Menu Automation Menu Edit Menu Windows Menu ...
Страница 235: ...K 2 D i g i t a l 8 B u s ...
Страница 237: ...D i g i t a l 8 B u s ...
Страница 239: ...D i g i t a l 8 B u s ...


