7-6
D i g i t a l 8 • B u s
Automation
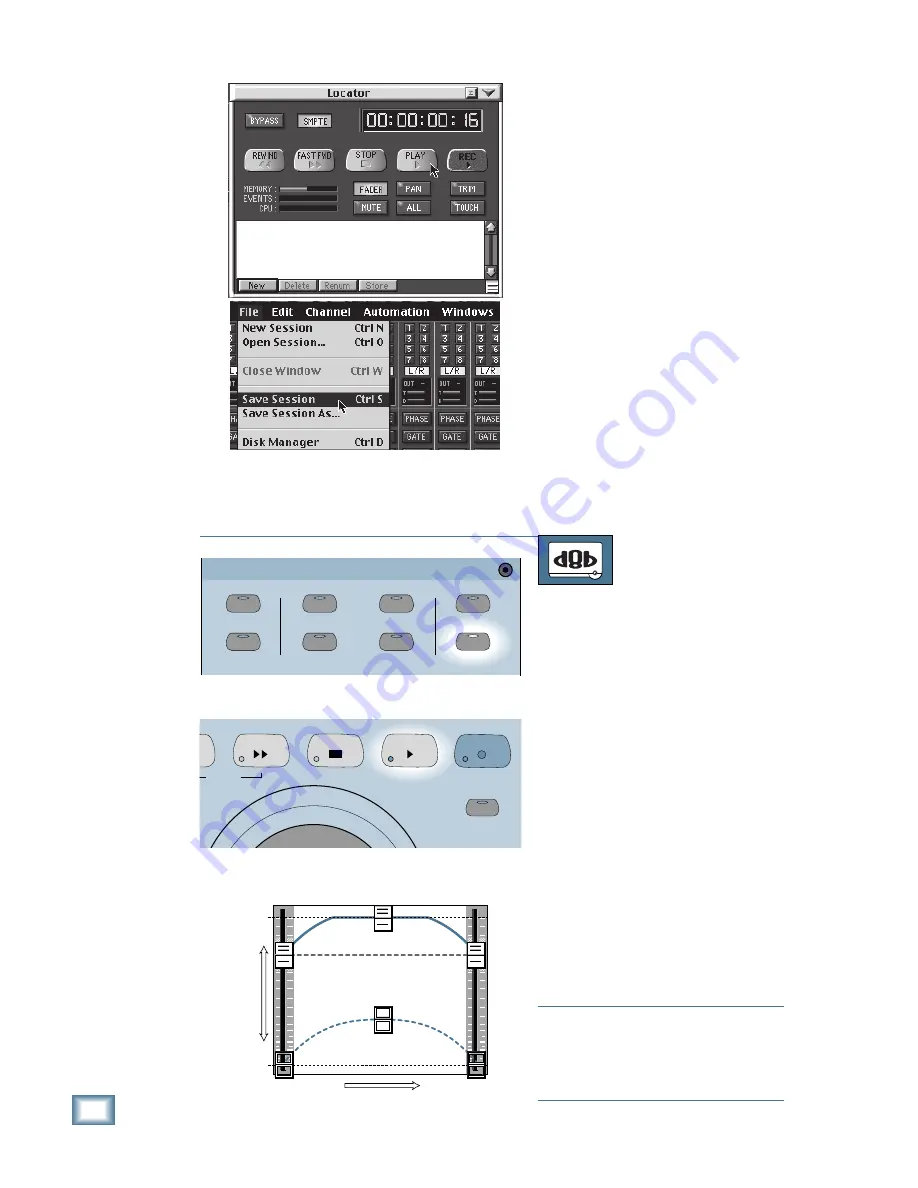
4. Click on the PLAY transport control,
or press Play on the recorder, to
initiate timecode.
5. If you’re using Absolute Write mode
instead of AUTO TOUCH, make sure
to click on the WRITE button on the
channels that are to be automated.
6. At the desired times, click/hold and
drag on the channel faders you want
to automate.
7. Upon completion of the automation
pass, if you’re satisfied with the
automated fader moves, make sure to
save the session (click on “File” in the
upper menu bar and choose “Save
Session”).
Writing Fader Moves in Trim
Levels Mode
TO WRITE FADER MOVES IN TRIM LEVELS
MODE
From the console:
1. Press the TRIM LEVELS button in the
Automation Section. All the faders
jump to their unity positions. You can
readjust the fader positions at this
point, if required. If you are going to
add more than 10 dB to the existing
fader value, you need to lower the fader
so that you have enough fader
movement available to add to the
existing fader position (see note below).
2. Roll your tape by pressing the PLAY
button in the Transport Section.
3. Place all the tracks you want to
automate into WRITE mode, or
engage AUTO TOUCH mode.
4. Make your level changes by moving
the fader(s) up or down at the desired
points. Note that any previous moves
are retained, but at a modified overall
level determined by your trim move.
Note:
Be careful that you don’t run out of
headroom: you cannot have your fader near
the top of its travel already and then add a
lot more to it in Trim mode. The ceiling
stays at +10 dB, no matter how you do it.
BYPASS
FADERS
MUTES
AUTO TOUCH
FADER MOTORS
OFF
PAN
ALL
TRIM LEVELS
AUTOMATION
JOG & SHUTTLE
SHUTTLE
D
FAST FWD
STOP
PLAY
RECORD
original pass
ad
dit
iona
l pass
res
ult
ing level
TRIM MODE (maxing out)
∞
(min)
+10 dB
(max)
A
punch in
B
punch out
time
fader position
Содержание 8-BUS Series
Страница 49: ...3 16 D i g i t a l 8 B u s Start Up ...
Страница 57: ...4 8 D i g i t a l 8 B u s Connections ...
Страница 77: ...5 20 D i g i t a l 8 B u s Preparing for a Session ...
Страница 177: ...7 20 D i g i t a l 8 B u s Automation ...
Страница 207: ...D 2 D i g i t a l 8 B u s Apogee UV22 ...
Страница 219: ...F 4 D i g i t a l 8 B u s Optional I O Cards ...
Страница 227: ...H 2 D i g i t a l 8 B u s Upgrading ...
Страница 232: ...J 3 O w n e r s M a n u a l Screen Shots Surround Sound Matrix Mackie FX Control Panel IVL Vocal Studio Control Panel ...
Страница 233: ...J 4 D i g i t a l 8 B u s Screen Shots Disk Manager File Menu Channel Menu Automation Menu Edit Menu Windows Menu ...
Страница 235: ...K 2 D i g i t a l 8 B u s ...
Страница 237: ...D i g i t a l 8 B u s ...
Страница 239: ...D i g i t a l 8 B u s ...


