8-4
D i g i t a l 8 • B u s
Advanced Techniques
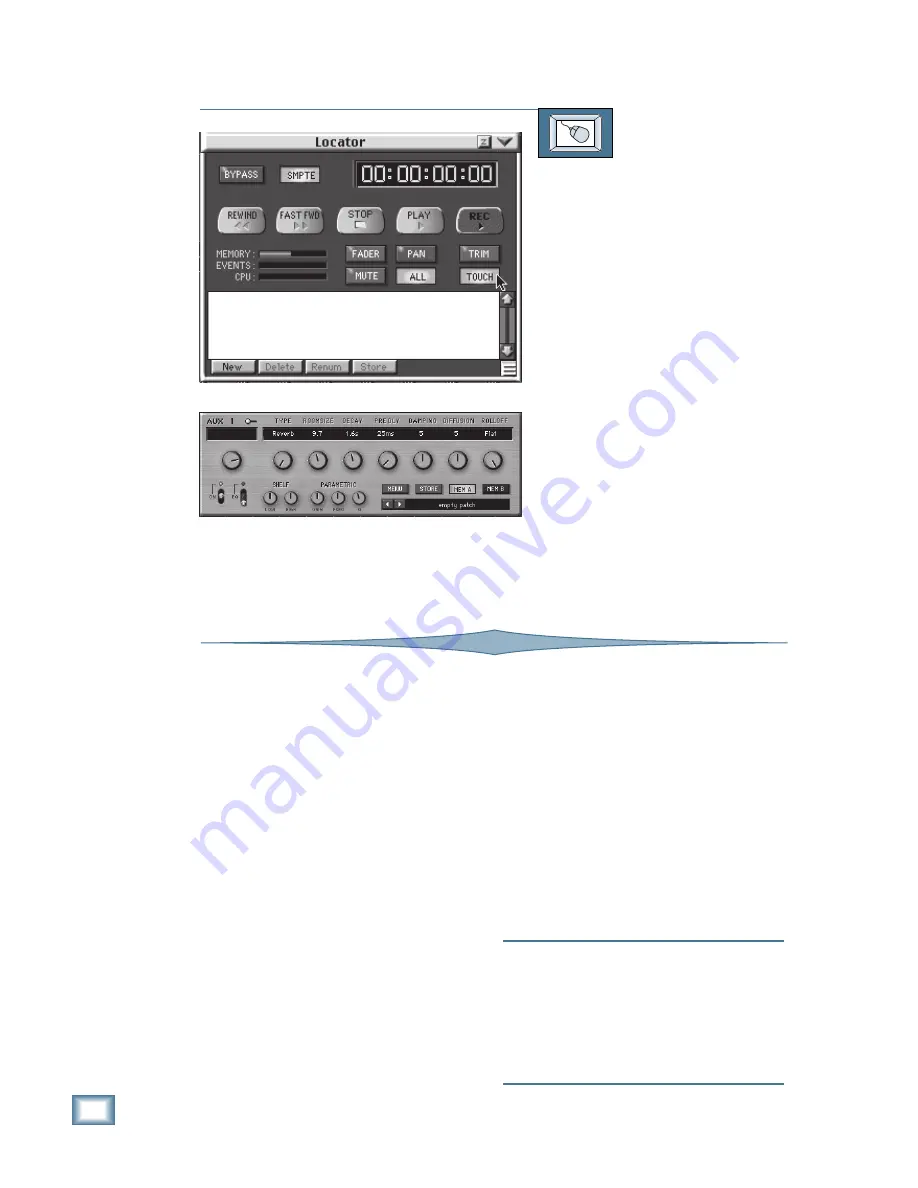
TO RECORD EFFECTS CHANGES
From the screen:
1. Click on the Locator button in the
lower menu bar. The Locator dialog
box appears on the screen.
2. Click on the TOUCH button in the
Locator window to initiate AUTO
TOUCH mode (make sure the Bypass
button is turned off).
3. Begin rolling tape by either clicking
Play in the Locator window, or from
the recorder.
4. Click on the CARD button in the lower
menu bar to open the control panel for
the effect you want to change.
5. At the desired times, click/hold and
drag on the controls you want to
automate.
6. Upon completion of the automation
recording pass, if you’re satisfied with
the recorded effects adjustments,
make sure to save the session (click
on “File” in the upper menu bar and
choose “Save Session”).
Virtual Grouping/Ungrouping
The Digital 8•Bus has eight software-based
“Virtual Groups.” These are similar to the analog
subgroups you’re used to, but with virtual groups
there are no separate buses, no separate gain
stages, and no separate outputs.
Instead, you are merely instructing the DSP en-
gine to apply the same commands, be they fader
moves or mutes, to all faders assigned to that
group. In other words, when you move a group
fader up 3 dB, the DSP engine adds 3 dB to each
fader assigned to that group. As with hardware
groups, you don’t actually see the individual faders
move, but you do hear the results in real time.
For instance, let’s say you have five channels
of backing vocals on channels 8–12 assigned to a
Virtual Group, and you need to drop their levels
about 5 dB relative to the rest of the mix. When
you pull down the group master fader, each of the
channels in that group is affected equally. As your
group master is being pulled down, the process of
calculating channel output is happening smoothly
and invisibly throughout the fader throw.
It is important to remember that, because you
do not have a separate gain stage, you cannot
add gain with a group fader beyond the gain
available in each individual fader assigned to
that group. Say you have Fader 1 at about +4 dB
(above Unity, roughly MIDI number 110), you as-
sign it to a group, and then try to add 10 dB of
gain with the group fader. It can’t go past +10 dB
(MIDI 126), so you will run out of headroom.
You can make most of your grouping decisions
before you even sit down to mix. For example,
you might put all the drum tracks in one group,
the horn section in a second group, and the back-
ground vocals in a third.
Note:
Any number of faders in Fader Banks 1, 2,
3, and 4 can be assigned to a Virtual Group; how-
ever, a single channel cannot be assigned to
more than one group at a time. Additionally, a
channel that is assigned to a Virtual Group can
still be controlled by its own channel fader and
any moves will be in proportion/relation to the
group it is assigned to.
Содержание 8-BUS Series
Страница 49: ...3 16 D i g i t a l 8 B u s Start Up ...
Страница 57: ...4 8 D i g i t a l 8 B u s Connections ...
Страница 77: ...5 20 D i g i t a l 8 B u s Preparing for a Session ...
Страница 177: ...7 20 D i g i t a l 8 B u s Automation ...
Страница 207: ...D 2 D i g i t a l 8 B u s Apogee UV22 ...
Страница 219: ...F 4 D i g i t a l 8 B u s Optional I O Cards ...
Страница 227: ...H 2 D i g i t a l 8 B u s Upgrading ...
Страница 232: ...J 3 O w n e r s M a n u a l Screen Shots Surround Sound Matrix Mackie FX Control Panel IVL Vocal Studio Control Panel ...
Страница 233: ...J 4 D i g i t a l 8 B u s Screen Shots Disk Manager File Menu Channel Menu Automation Menu Edit Menu Windows Menu ...
Страница 235: ...K 2 D i g i t a l 8 B u s ...
Страница 237: ...D i g i t a l 8 B u s ...
Страница 239: ...D i g i t a l 8 B u s ...


