


8-2
D i g i t a l 8 • B u s
Advanced Techniques
TO RECORD EQ, COMPRESSOR, AND GATE
CHANGES
From the screen:
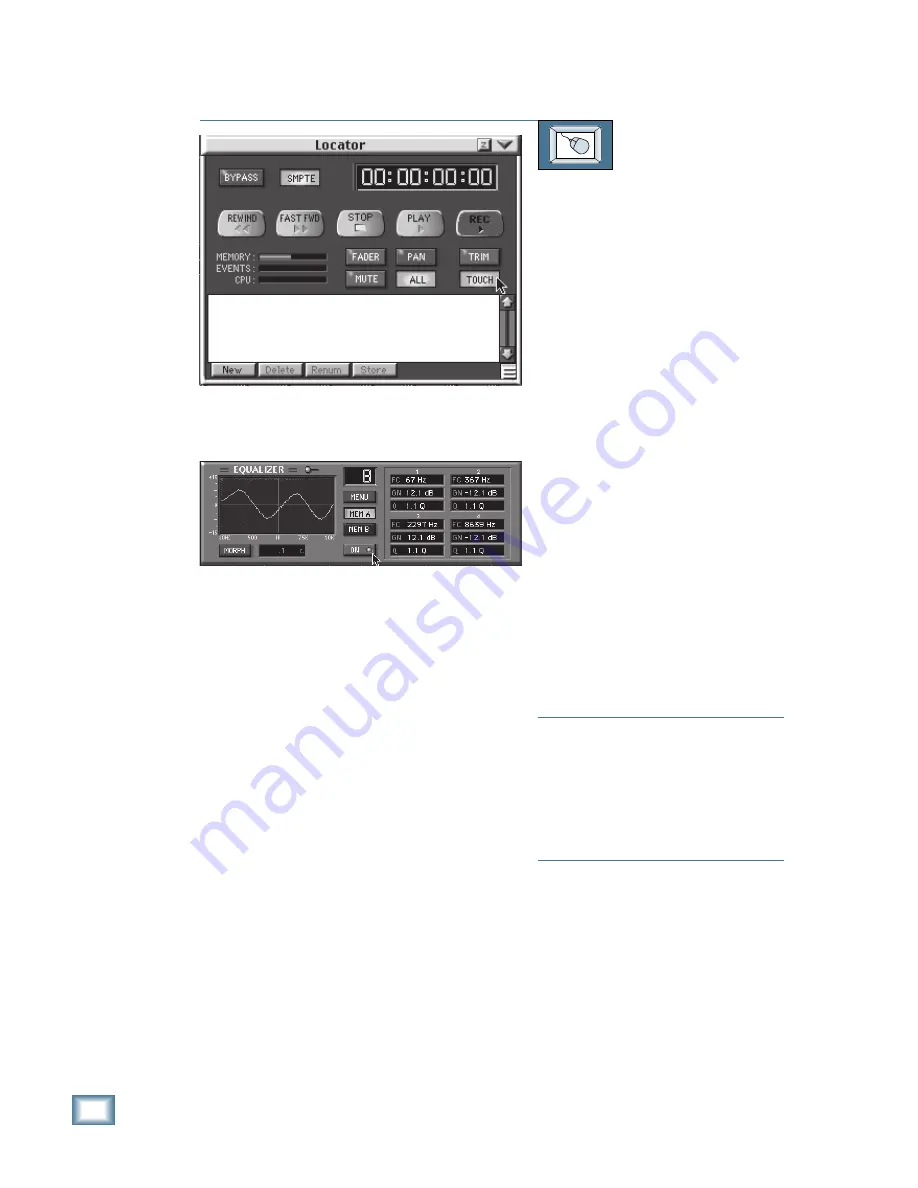
1. Click on the Locator button in the
lower menu bar. The Locator dialog
box appears on the screen.
2. Click on the ALL and TOUCH buttons
in the Locator window to initiate
AUTO TOUCH mode (make sure
Bypass is turned off).
3. Begin rolling tape by either clicking
Play in the Locator window, or from
the recorder.
4. Click on the SELECT button for the
channel you want to adjust.
5. Click on the EQ, Compressor, or Gate
button in the lower menu bar. The
control panel for the selected
processor appears in the screen.
6. At the desired times, click/hold and
drag on the controls you want to
automate.
7. Upon completion of the automation
recording pass, if you’re satisfied with
the recorded processor adjustments,
make sure to save the session (click
on “File” in the upper menu bar and
choose “Save Session”).
Note:
You can view a graphical representa-
tion of the EQ parameters for each channel
in the box located midway in the channel
strip. You can even click and drag in the
box to change the EQ parameters, just as
you would in the EQ control panel. Or you
can double-click in the box to open the EQ
control panel.
Before we leave this subject, there’s one other
option you should know about. Mackie Real Time
OS automation allows you to automate switching
between MEMORY A and MEMORY B settings
and allows you to load patches from the hard
drive (in real time) into the dynamic automation
pass. Say you want to make a radical change in
EQ during a mix. Set up MEMORY A with the
initial settings and MEMORY B with the final
settings. Then during a Touch Write automation
pass, start with MEMORY A engaged for the
selected channel, then press MEMORY B at the
required time. The change is recorded in the
session. You can switch back and forth between
MEMORY A and B as many times as you want.
You can also load EQ settings from the hard
drive (as well as gates, compression, and channel
patches). From the EQ window, under the Menu
option, select the desired EQ patch, and when
you’re ready to load it on your Write-enabled
channel, press Open. This may be more time-
consuming than simply clicking the A & B
settings, but it allows you to take “mini-snapshots”
of dynamic events on a local DSP basis.
Содержание 8-BUS Series
Страница 49: ...3 16 D i g i t a l 8 B u s Start Up ...
Страница 57: ...4 8 D i g i t a l 8 B u s Connections ...
Страница 77: ...5 20 D i g i t a l 8 B u s Preparing for a Session ...
Страница 177: ...7 20 D i g i t a l 8 B u s Automation ...
Страница 207: ...D 2 D i g i t a l 8 B u s Apogee UV22 ...
Страница 219: ...F 4 D i g i t a l 8 B u s Optional I O Cards ...
Страница 227: ...H 2 D i g i t a l 8 B u s Upgrading ...
Страница 232: ...J 3 O w n e r s M a n u a l Screen Shots Surround Sound Matrix Mackie FX Control Panel IVL Vocal Studio Control Panel ...
Страница 233: ...J 4 D i g i t a l 8 B u s Screen Shots Disk Manager File Menu Channel Menu Automation Menu Edit Menu Windows Menu ...
Страница 235: ...K 2 D i g i t a l 8 B u s ...
Страница 237: ...D i g i t a l 8 B u s ...
Страница 239: ...D i g i t a l 8 B u s ...


