3-13
O w n e r ’ s M a n u a l
Start-Up
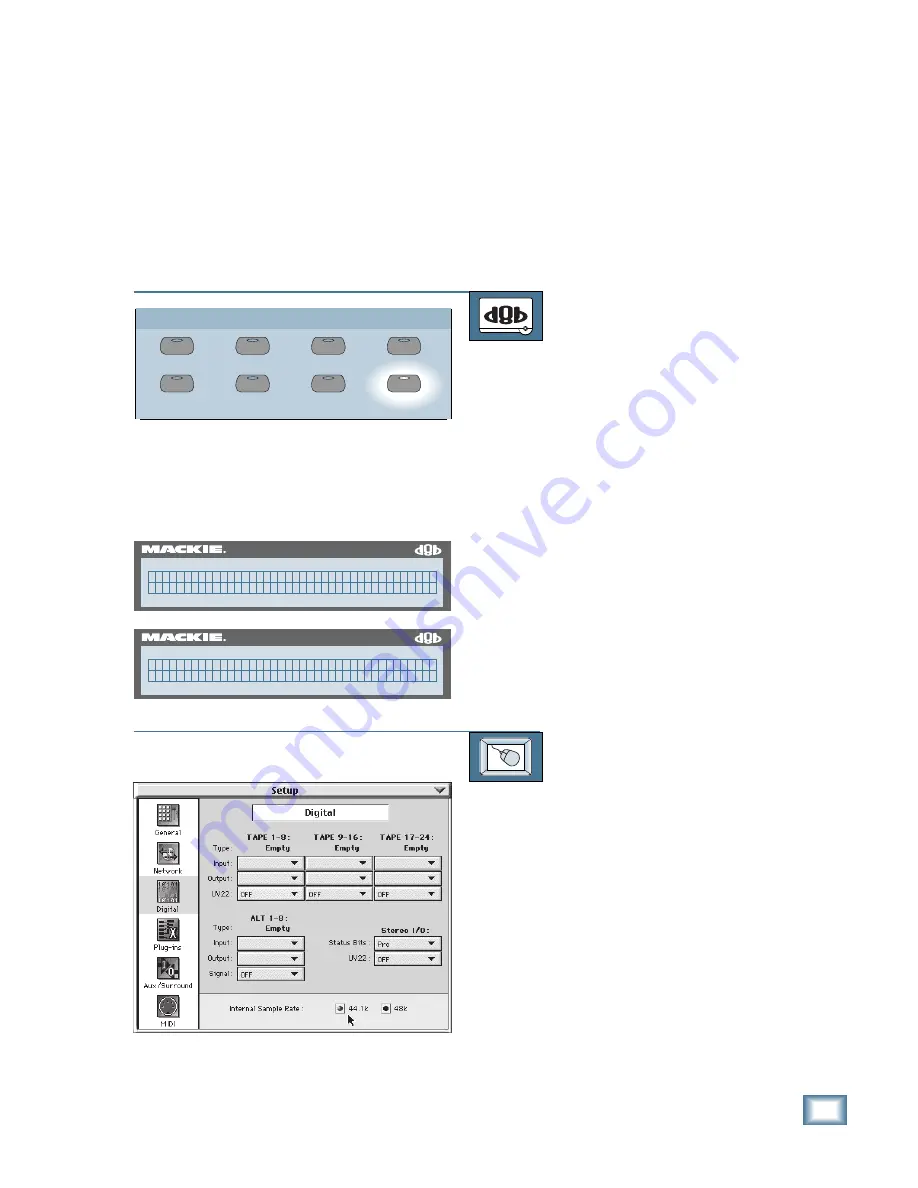
Setting the Console’s Sample Rate
The Digital 8•Bus console can operate at ei-
ther of two user-selected sample rates, 44.1kHz
and 48kHz. When beginning a new session, think
about which sample rate is best for the job. If you
intend to stay in the digital domain from start to
finish on a project, you must consider what
sample rate the final product requires. (If you
aren’t using digital inputs and outputs, then this
GROUP
GENERAL
PLUG INS
DIGITAL I/O
SAVE
SAVE AS...
NEW
LOAD
SETUP
56 INPUT / 72 CHANNEL DIGITAL MIXER
D8B
( D I G I T A L I / O S E T U P P g . 2 )
S t e r e o I / O S a m p l e r a t e
56 INPUT / 72 CHANNEL DIGITAL MIXER
D8B
P i c k a s a m p l e r a t e : ( S A M P L E R A T E )
4 4 . 1 k 4 8 k E x i t
setting doesn’t matter.) Commercial compact
discs are standardized at 44.1kHz. If you intend
to complete your project by mastering for CD,
you may want to choose this sample rate. If a
project is recorded at 48kHz but will eventually
end up on a 44.1kHz CD, it will be necessary to
go through one stage of analog at the main out-
puts, or to use a sample rate converter.
TO SET THE CONSOLE’S SAMPLE RATE
From the console:
1. Press the DIGITAL I/O button in the
Setup Section. The Digital I/O Setup
menu appears in the Fat Channel
Display.
2. Press the NEXT button in the Fat
Channel Section to scroll to page 2 of
the Digital I/O Setup menu.
3. Press the SELECT button below
Samplerate in the Fat Channel Display.
The Sample Rate Setup menu appears.
4. Press the SELECT button below the
desired sample rate.
5. The console is now set to operate at
the selected sample rate.
TO SET THE CONSOLE’S SAMPLE RATE
From the screen:
1. Click on the Setup button in the lower
menu bar. The Setup dialog box opens.
2. Click on the Digital icon on the left side
of the box. The Digital Setup dialog box
opens.
3. In the Internal Sample Rate section,
click the desired sample rate.
4. Click on the Close button in the upper
right corner of the Setup dialog box to
close it (or click on the Setup button in
the menu bar).
Содержание 8-BUS Series
Страница 49: ...3 16 D i g i t a l 8 B u s Start Up ...
Страница 57: ...4 8 D i g i t a l 8 B u s Connections ...
Страница 77: ...5 20 D i g i t a l 8 B u s Preparing for a Session ...
Страница 177: ...7 20 D i g i t a l 8 B u s Automation ...
Страница 207: ...D 2 D i g i t a l 8 B u s Apogee UV22 ...
Страница 219: ...F 4 D i g i t a l 8 B u s Optional I O Cards ...
Страница 227: ...H 2 D i g i t a l 8 B u s Upgrading ...
Страница 232: ...J 3 O w n e r s M a n u a l Screen Shots Surround Sound Matrix Mackie FX Control Panel IVL Vocal Studio Control Panel ...
Страница 233: ...J 4 D i g i t a l 8 B u s Screen Shots Disk Manager File Menu Channel Menu Automation Menu Edit Menu Windows Menu ...
Страница 235: ...K 2 D i g i t a l 8 B u s ...
Страница 237: ...D i g i t a l 8 B u s ...
Страница 239: ...D i g i t a l 8 B u s ...


