


5-14
D i g i t a l 8 • B u s
Preparing for a Session
Note:
If you enter a number that is already
used, you will overwrite the previous
locate time with the new one.
5. Press the ENTER button. The Fat
Channel Display indicates that the
locate point has been stored.
You can store a locate point on the fly:
• Roll the tape.
• With LOCATOR selected in the
Transport Section, press the STORE
button.
• Enter a two-digit number to identify
the locate point.
• Press the ENTER button at the point
in time you want to store the locate.
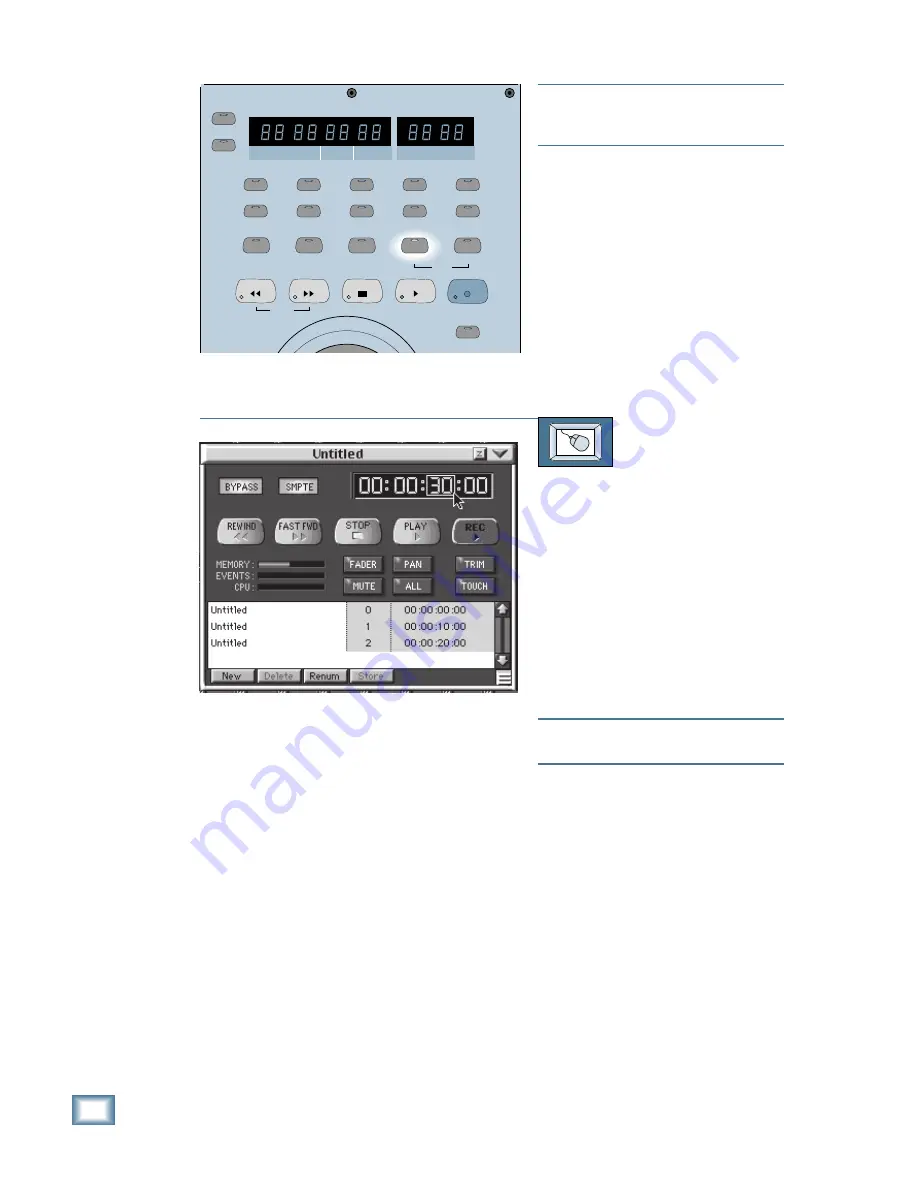
TO CREATE LOCATE POINTS
From the screen:
1. Click on the Locator button in the
lower menu bar. The Transport
window appears in the screen.
2. Click on the time display to enter a
new time using the keyboard. Tab-left
or Shift-Tab-right to navigate in the
display.
3. Click on the “New” button at the
bottom of the Transport window. A
new locate point appears in the cue
list using the first unused number.
Note:
You must Tab out of the display in
order for the New button to work.
4. You can change the name of the locate
point to something more useful, like
“First Verse.” Double-click on the
Untitled name to highlight it, and type
in the new name using the keyboard.
At the bottom of the Transport window
are three more buttons for managing
locate points.
• To delete a locate point, click on the
name of the locate point to highlight it,
and then click on the “Delete” button.
• To renumber the locate points, click on
the “Renum” button. The stored locate
points are re-ordered chronologically
according to SMPTE times. Note that
some of the locate numbers may
change.
SMPTE VIEW
SET TIME
MINUTES
HOURS
SECONDS
FRAMES
BARS
BEATS
LOOP
TICKS
POSITION
RANGE
MODE
FROM
TO
2
3
4
5
7
1
6
8
9
0
ENTER
STORE
LOCATOR
LOOP
SNAPSHOT
JOG & SHUTTLE
SHUTTLE
REWIND
FAST FWD
STOP
PLAY
RECORD
Содержание 8-BUS Series
Страница 49: ...3 16 D i g i t a l 8 B u s Start Up ...
Страница 57: ...4 8 D i g i t a l 8 B u s Connections ...
Страница 77: ...5 20 D i g i t a l 8 B u s Preparing for a Session ...
Страница 177: ...7 20 D i g i t a l 8 B u s Automation ...
Страница 207: ...D 2 D i g i t a l 8 B u s Apogee UV22 ...
Страница 219: ...F 4 D i g i t a l 8 B u s Optional I O Cards ...
Страница 227: ...H 2 D i g i t a l 8 B u s Upgrading ...
Страница 232: ...J 3 O w n e r s M a n u a l Screen Shots Surround Sound Matrix Mackie FX Control Panel IVL Vocal Studio Control Panel ...
Страница 233: ...J 4 D i g i t a l 8 B u s Screen Shots Disk Manager File Menu Channel Menu Automation Menu Edit Menu Windows Menu ...
Страница 235: ...K 2 D i g i t a l 8 B u s ...
Страница 237: ...D i g i t a l 8 B u s ...
Страница 239: ...D i g i t a l 8 B u s ...


