3-4
D i g i t a l 8 • B u s
Start-Up
2. Press the SELECT button below
SURROUND in the Fat Channel
Display to view the Surround menu.
3. Press the SELECT buttons below the
arrows in the Fat Channel Display to
scroll through the available surround
modes.
4. When the mode you want to select
appears in the display, press the
SELECT button below OK. The
selected surround mode will now be
used by the Digital 8•Bus.
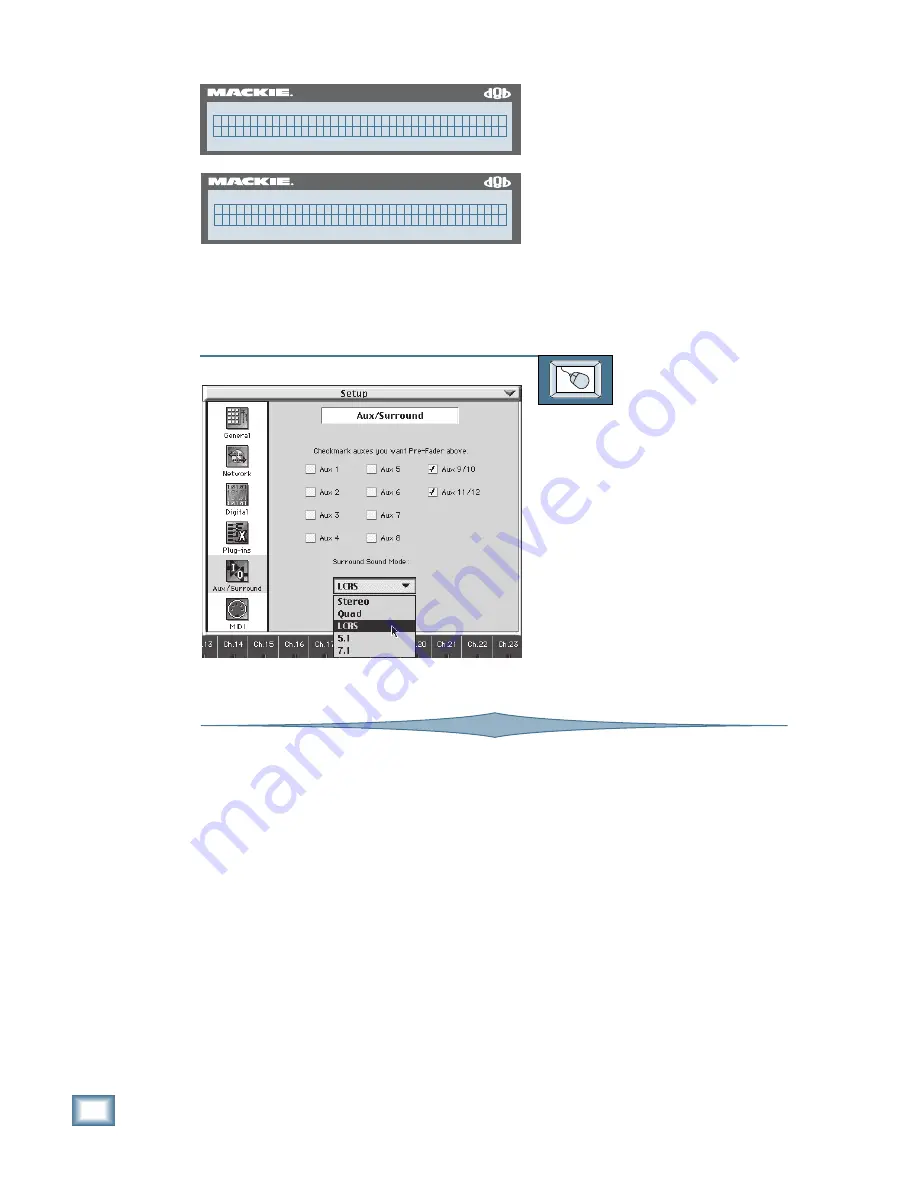
TO SET THE SURROUND MODE
From the screen:
1. Click on the Setup button in the lower
menu bar. The Setup dialog box opens.
2. Click on the General icon on the left
side of the box. The General dialog
box opens.
3. Click and hold on the Surround Mode
box. Drag down to the desired
surround mode and then release to
finalize your selection.
4. Click on the Close button in the upper
right corner of the dialog box to close
the Setup dialog box (or click on the
Setup button in the menu bar).
56 INPUT / 72 CHANNEL DIGITAL MIXER
D8B
( G E N E R A L S E T U P P g 1 - > )
L a n g u a g e S u r r o u n d M I D I A u t o S a v e
56 INPUT / 72 CHANNEL DIGITAL MIXER
D8B
S t e r e o ( G L O B A L P A N M E N U )
< < > > C a n c e l O K
Configuring MIDI Parameters
The Digital 8•Bus Remote CPU has a MIDI
card installed in the rear panel. The MIDI I/O
ports on it can be configured to send and receive
MIDI channel messages and Sysex messages, or
to send MIDI Machine Control (MMC) and re-
ceive MIDI Time Code (MTC). The following
parameters can be configured.
MMC DEVICE ID:
Some 8-track digital recorders
require that you define the device ID numbers
used for each recorder in the MIDI Machine
Controller. Typically, tracks 1–8 are device 0,
tracks 9–16 are device 1, and tracks 17–24 are
device 2.
SINGLE BUTTON RECORD: You can also select
whether to press the PLAY and RECORD but-
tons to enter record mode, or just press the
RECORD button (Single Button Record). We
recommend leaving Single Button Record off
to provide an extra measure of safety in case
you inadvertently press the RECORD button
in the Transport Section.
MTC OFFSET:
MIDI File Offset can be used to in-
dicate the starting time of a Standard MIDI File
(SMF), referenced to absolute timecode. This
option allows you to enter a MIDI File Offset
using the number buttons in the Transport Sec-
tion. This is used to re-reference the Digital
8•Bus to a starting point other than zero.
TEMPO MAP:
If you use sequencers in your re-
cording process, you can create a standard MIDI
file from the song(s) you’ve recorded. You can
copy the tempo map from the SMF to the Digital
8•Bus and “synchronize” the D8B to the
Bars:Beats:Ticks of the sequenced program.
SMFs are loaded from the floppy disk drive.
Содержание 8-BUS Series
Страница 49: ...3 16 D i g i t a l 8 B u s Start Up ...
Страница 57: ...4 8 D i g i t a l 8 B u s Connections ...
Страница 77: ...5 20 D i g i t a l 8 B u s Preparing for a Session ...
Страница 177: ...7 20 D i g i t a l 8 B u s Automation ...
Страница 207: ...D 2 D i g i t a l 8 B u s Apogee UV22 ...
Страница 219: ...F 4 D i g i t a l 8 B u s Optional I O Cards ...
Страница 227: ...H 2 D i g i t a l 8 B u s Upgrading ...
Страница 232: ...J 3 O w n e r s M a n u a l Screen Shots Surround Sound Matrix Mackie FX Control Panel IVL Vocal Studio Control Panel ...
Страница 233: ...J 4 D i g i t a l 8 B u s Screen Shots Disk Manager File Menu Channel Menu Automation Menu Edit Menu Windows Menu ...
Страница 235: ...K 2 D i g i t a l 8 B u s ...
Страница 237: ...D i g i t a l 8 B u s ...
Страница 239: ...D i g i t a l 8 B u s ...


