2-1
O w n e r ’ s M a n u a l
Digital 8•Bus Description
2. Digital 8•Bus Description
Refer to the foldout page at the end of this
chapter for a complete view of all of the Digital
8•Bus’s features and components.
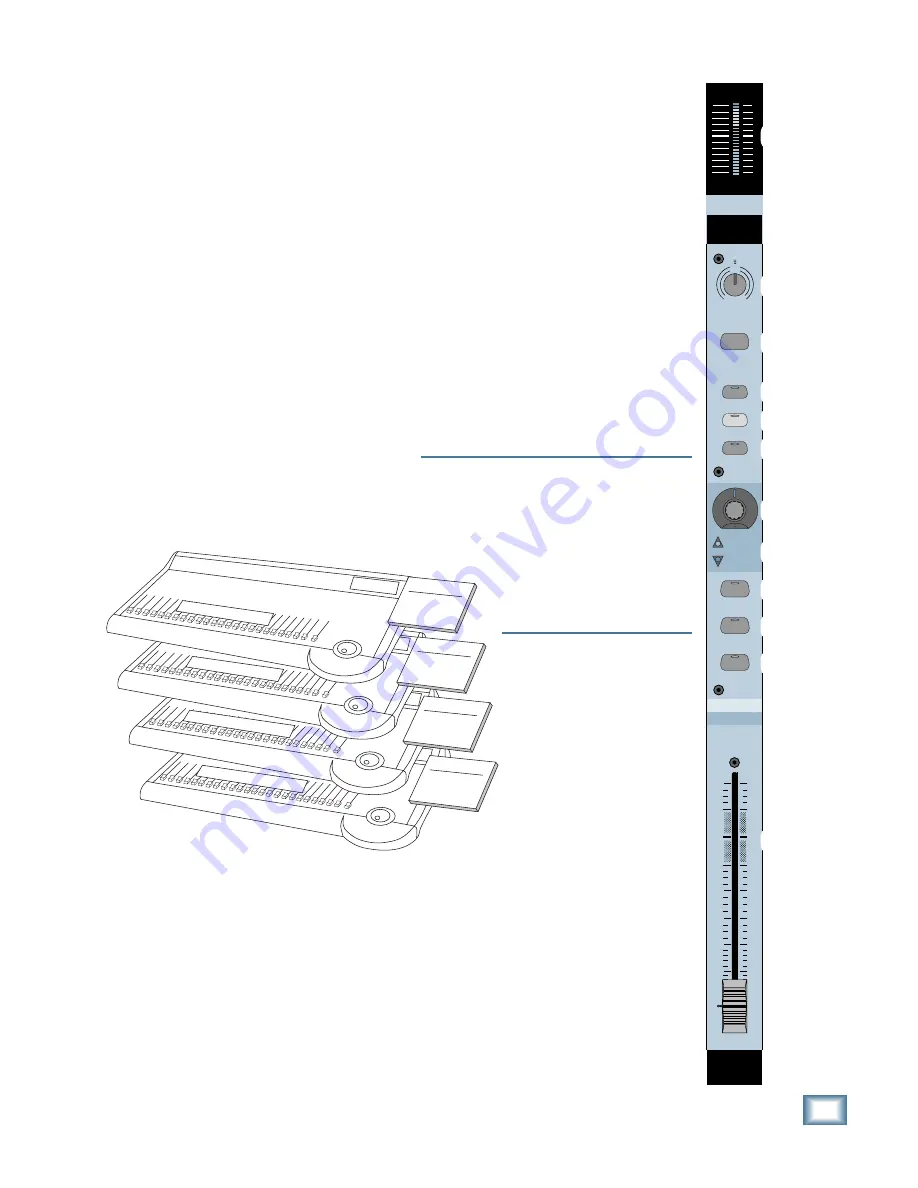
Channel Strip Description
There are 24 channel strips on the Digital
8•Bus, configurable as one of four tiers, or
banks. We refer to them as Fader Banks 1, 2,
3, and 4.
• Fader Bank 1 includes channels 1–12,
which have both mic and line input capabil-
ity, and channels 13–24, which have
line-level inputs only.
• Fader Bank 2 includes 24 channels of Tape
Inputs which are accessed through the three
optional TAPE IN/OUT cards in the rear
panel.
• Fader Bank 3 includes sixteen internal ef-
fects returns (FX 1–16), and eight alternate
returns which are accessed through the op-
tional ALT I/O card in the rear panel.
• Fader Bank 4 includes eight Virtual Groups,
eight MIDI controllers, and eight Bus Mas-
ters (Bus 1–8).
Each channel
strip has the following:
• Meter ladder (dB FS)
• Analog TRIM control
• Latching MIC/Line button (Ch 1–12 only)
• MMC REC/RDY button
• ASSIGN button
• Automation WRITE enable button
• V-Pot controller
• 2 Fader Bank indicator LEDs per channel
• SELECT button
• SOLO button
• MUTE button
• 100mm motorized Fader
1
TRIM control
This is an analog preamp trim control for
channels 1–24 only; its circuit is similar to the
one we use in our large-format analog mixing
consoles. Channels 1–12 share the same pre-
amp for both the Mic and Line inputs (channels
13–24 are line input only). The Mic level pre-
amp’s gain range is from 0 dB to +60 dB. The
line input gain range on channels 1–12 is from
–20 dB (pad) to +40 dB, while channels 13–24
range from –20 dB (pad) to +20 dB.
The trim control is active at all times, re-
gardless of whether Fader Bank 1, 2, 3, or 4 is
selected.
2
MIC button
The MIC button appears on channels 1–12,
since these are the only channels with mic in-
puts. This button engages only one connector
to the preamp, so if MIC is engaged, any signal
connected to that channel’s line input jack is
disconnected.
Note:
TRIM controls and MIC switches cannot
be controlled with the mouse/keyboard combi-
nation, nor can they be automated or saved
with snapshots. In most cases, though, these
controls are set at the beginning
of a session and then left alone.
We have included a Track Sheet
at the back of this manual for
documenting the settings of
these controls if necessary.
3
REC/RDY enable button
Press this button to arm the
corresponding HDR/MDM track
(via MIDI) for recording audio.
The REC/RDY LED flashes
when the recorder is in record
standby mode, and lights con-
tinuously when the master
RECORD button in the transport
section is engaged.
4
ASSIGN button
The ASSIGN button serves two functions: it’s
used to assign a channel to a bus or tape output,
and to indicate if the channel is assigned to a se-
lected bus or tape output (with its LED).
5
WRITE button
Press this button to enable (arm) a channel
for an automation pass. Used with the buttons
in the Automation Section (
il
–
is
).
Fader Bank 1
Channels 1-24
Mic/Line
Tracking
Channels 1-24
Channels 25-48
FX Return 1-16; ALT Return 1-8
Groups 1-8; MIDI 1-8; Bus 1-8
Fader Bank 2
Channels 25-48
Monitor/Tape In
Mixdown
Fader Bank 3
FX Return 1-16
ALT Return 1-8
Fader Bank 4
Virtual Groups 1-8
MIDI Controllers 1-8
Bus 1-8 Masters
TRIM
12
12
36
12
36
10
dB
30
20
10
40
5
5
U
60
50
FX 12
MIDI 4
MIC
0
60
-
20dB +40dB
LINE
ASSIGN
WRITE
MIC
REC/RDY
SELECT
MUTE
SOLO
12
36
OL
2
50
4
7
10
15
20
25
30
35
40
1
bn
2
3
4
5
6
7
8
9
bl
bm
Содержание 8-BUS Series
Страница 49: ...3 16 D i g i t a l 8 B u s Start Up ...
Страница 57: ...4 8 D i g i t a l 8 B u s Connections ...
Страница 77: ...5 20 D i g i t a l 8 B u s Preparing for a Session ...
Страница 177: ...7 20 D i g i t a l 8 B u s Automation ...
Страница 207: ...D 2 D i g i t a l 8 B u s Apogee UV22 ...
Страница 219: ...F 4 D i g i t a l 8 B u s Optional I O Cards ...
Страница 227: ...H 2 D i g i t a l 8 B u s Upgrading ...
Страница 232: ...J 3 O w n e r s M a n u a l Screen Shots Surround Sound Matrix Mackie FX Control Panel IVL Vocal Studio Control Panel ...
Страница 233: ...J 4 D i g i t a l 8 B u s Screen Shots Disk Manager File Menu Channel Menu Automation Menu Edit Menu Windows Menu ...
Страница 235: ...K 2 D i g i t a l 8 B u s ...
Страница 237: ...D i g i t a l 8 B u s ...
Страница 239: ...D i g i t a l 8 B u s ...


