4
8.
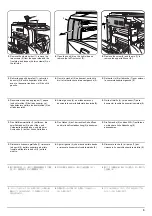
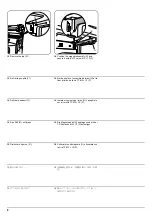
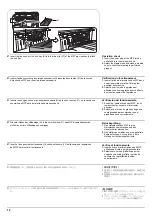
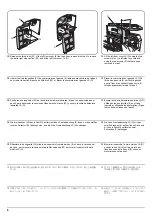
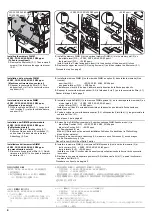
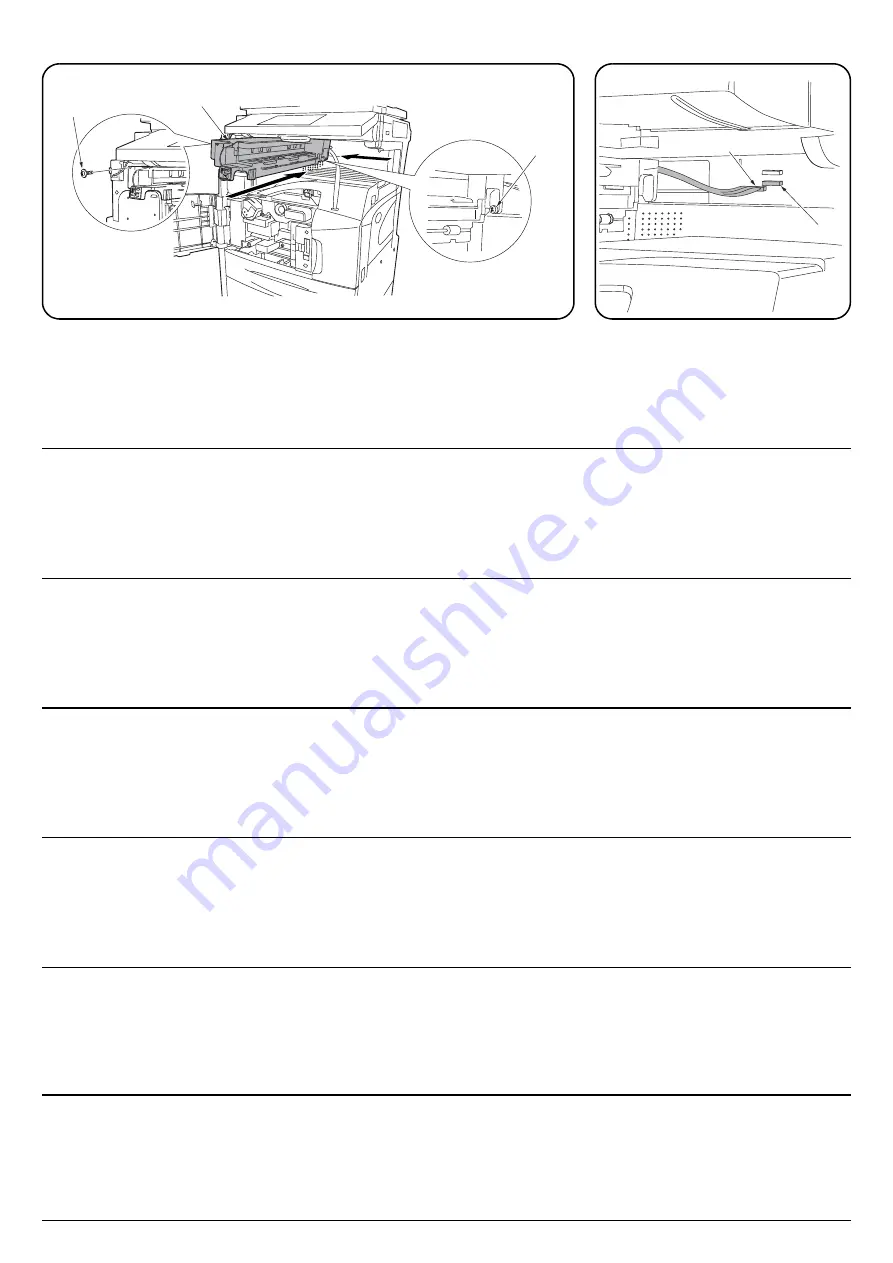
Insert the job separator (A) into the MFP from the front side and slide it to the left. Secure the rear
side using a pin (14) and the front side using a TP screw M3 × 05 (E).
9.
Connect the connector (15) of the job
separator to the lower connector (16) of the
MFP.
8.
Insérer le séparateur de travaux (A) dans le MFP depuis le côté avant et le faire glisser vers la
gauche. Fixer l’arrière à l’aide d’une goupille (14) et l’avant à l’aide d’une vis TP M3 × 05 (E).
9.
Connecter le connecteur (15) du séparateur
de travaux au connecteur inférieur (16) du
MFP.
8.
Inserte el separador de trabajos (A) en el MFP del lado delantero y deslice hacia la izquierda.
Asegure el lado trasero utilizando un pasador (14) y el lado delantero utilizando un tornillo TP M3
× 05 (E).
9.
Conecte el conector (15) del separador de
trabajos en el conector inferior (16) del MFP.
8.
Den Jobtrenner (A) von der Vorderseite in den MFP einführen und nach links schieben. Die
Rückseite mit einem Stift (14), und die Vorderseite mit einer TP-Schraube M3 × 05 (E) sichern.
9.
Den Steckverbinder (15) des Jobtrenners an
den unteren Steckverbinder (16) des MFP
anschließen.
8.
Inserite il separatore (A) nell’MFP dal lato frontale e fatelo scorrere a sinistra. Assicuratene il lato
posteriore usando un pernetto (14) e il lato frontale usando una vite TP M3 × 05 (E).
9.
Collegate il connettore (15) del separatore al
connettore inferiore (16) dell’MFP.
8.
ジョブセパレータ (A) を MFP 本体の機械前側より挿入し、左側にスライドする。後側をピン
(14) 1 本で固定してから前側をビス M3 × 05TP (E) 1 本で固定する。
9.
ジョブセパレータのコネクタ (15) を本体
のコネクタ(下側)
(16) に接続する。
8.
从 MFP 主机的前侧插入作业分离器(A)后,向左侧滑动。用 1 个卡销(14)固定后侧,然后再用 1
个螺丝 M3
×
05TP(E)固定前侧。
9.
将作业分离器的连接插头(15)连接在本体的
连接插座(下侧)
(16)上。
A
14
E
15
16
Содержание TASKalfa 420i
Страница 1: ...SERVICE MANUAL Published in May 2010 842KS113 2KSSM063 Rev 3 TASKalfa 420i TASKalfa 520i ...
Страница 4: ...This page is intentionally left blank ...
Страница 10: ...This page is intentionally left blank ...
Страница 14: ...2KR 2KS This page is intentionally left blank ...
Страница 224: ...2KR 2KS 1 4 66 This page is intentionally left blank ...
Страница 328: ...2KR 2KS 2 3 30 This page is intentionally left blank ...
Страница 371: ...INSTALLATION GUIDE FOR PAPER FEEDER ...
Страница 381: ...INSTALLATION GUIDE FOR 3000 SHEETS PAPER FEEDER ...
Страница 436: ...INSTALLATION GUIDE FOR CENTER FOLDING UNIT ...
Страница 450: ...INSTALLATION GUIDE FOR MAILBOX ...
Страница 458: ...INSTALLATION GUIDE FOR HOLE PUNCH UNIT ...
Страница 470: ...INSTALLATION GUIDE FOR BUILT IN FINISHER ...
Страница 483: ...INSTALLATION GUIDE FOR JOB SEPARATOR ...
Страница 491: ...INSTALLATION GUIDE FOR FAX System ...
Страница 507: ......
Страница 508: ......

