


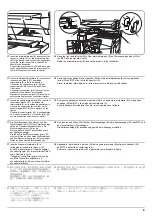


5
9.
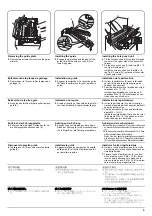
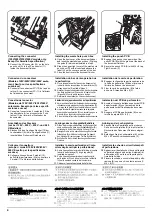
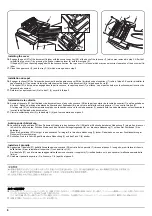
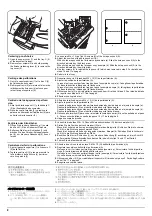
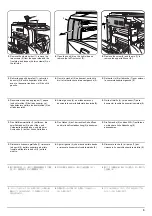
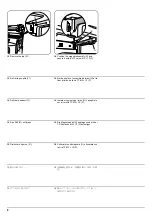
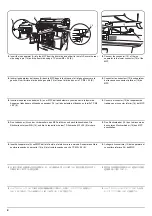
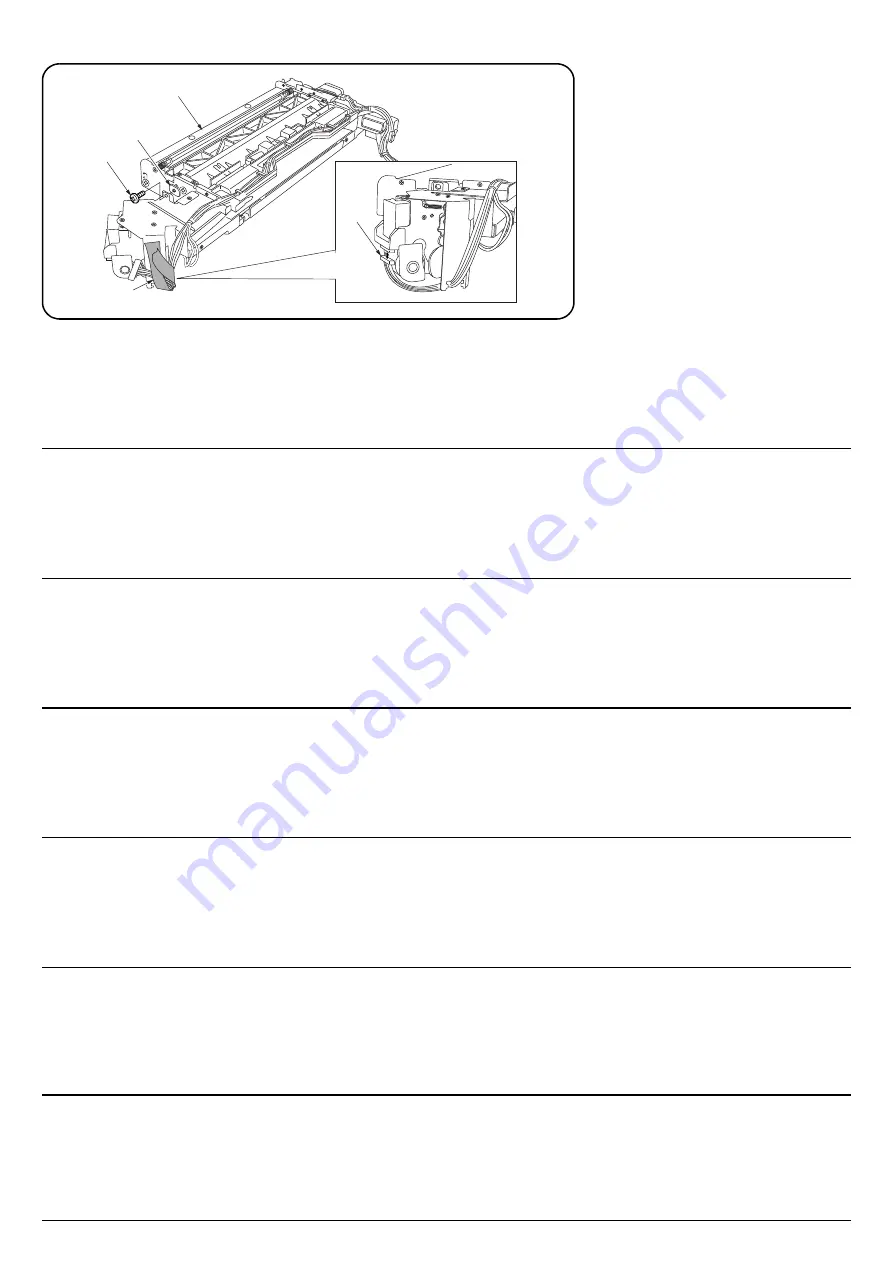
拆下输送组件(A)的 1 个蓝色螺丝(14)后,取下固定板(15)。
10.
揭下 13 脚插头(16)的 1 条固定胶带(17)后,将电线穿过装订器马达下面连接 13 脚插头(16)。
16
A
14
15
17
9.
搬送ユニット (A) の青ビス (14)1 本を外して固定板 (15) を取り外す。
10.
13P コネクタ (16) の固定テープ (17)1 本を取り外し、ステープルモータの下に電線を通して 13P
コネクタ (16) を接続する。
9.
Remove the blue screw (14) from the transfer unit (A) and then remove the securing plate (15).
10.
Remove the securing tape (17) from the 13-pin connector (16), pass the wire under the stapler
motor, and connect the wire with the 13-pin connector (16).
9.
Quite el tornillo azul (14) de la unidad de transferencia (A) y desmonte la placa de fijación (15).
10.
Despegue la cinta de fijación (17) del conector de 13 pasadores (16), pase el cable por debajo
del motor del grapador y conecte el cable con el conector de 13 pasadores (16).
9.
Retirer la vis bleue (14) de l’unité de transfert (A) puis enlever la plaque de fixation (15).
10.
Retirer la bande de fixation (17) du connecteur à treize broches (16), passer le fil au-dessous du
moteur de l’agrafeuse, et connecter le fil à l’aide du connecteur à treize broches (16).
9.
Die blaue Schraube (14) von der Transfereinheit (A) entfernen, und dann die Halteplatte (15)
abnehmen.
10.
Das Sicherungsband (17) vom 13-poligen Steckverbinder (16) entfernen, dann das Kabel unter
dem Heftermotor hindurchführen und an den 13-poligen Steckverbinder (16) anschließen.
9.
Rimuovete la vite blu (14) dall’unità di trasferimento (A) e poi rimuovete la piastra di fissaggio
(15).
10.
Rimuovere il nastri di sicurezza (17) dal connettore a 13 pin (16), far passare il filo sotto il motore
della pinzatrice e collegare il filo con il connettore a 13 pin (16).
Содержание TASKalfa 420i
Страница 1: ...SERVICE MANUAL Published in May 2010 842KS113 2KSSM063 Rev 3 TASKalfa 420i TASKalfa 520i ...
Страница 4: ...This page is intentionally left blank ...
Страница 10: ...This page is intentionally left blank ...
Страница 14: ...2KR 2KS This page is intentionally left blank ...
Страница 224: ...2KR 2KS 1 4 66 This page is intentionally left blank ...
Страница 328: ...2KR 2KS 2 3 30 This page is intentionally left blank ...
Страница 371: ...INSTALLATION GUIDE FOR PAPER FEEDER ...
Страница 381: ...INSTALLATION GUIDE FOR 3000 SHEETS PAPER FEEDER ...
Страница 436: ...INSTALLATION GUIDE FOR CENTER FOLDING UNIT ...
Страница 450: ...INSTALLATION GUIDE FOR MAILBOX ...
Страница 458: ...INSTALLATION GUIDE FOR HOLE PUNCH UNIT ...
Страница 470: ...INSTALLATION GUIDE FOR BUILT IN FINISHER ...
Страница 483: ...INSTALLATION GUIDE FOR JOB SEPARATOR ...
Страница 491: ...INSTALLATION GUIDE FOR FAX System ...
Страница 507: ......
Страница 508: ......