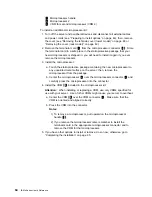
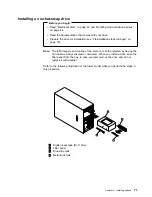

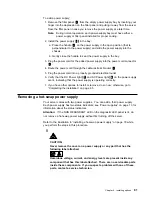
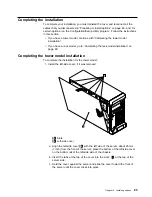
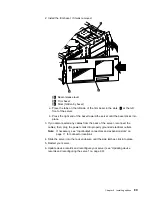

To replace a drive in a hot-swap bay:
1. If your server is a tower model, unlock and open the server door.
Attention: To maintain proper system cooling, do not operate the server for
more than two minutes without either a drive or a filler panel installed in each
bay.
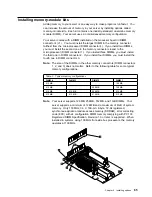
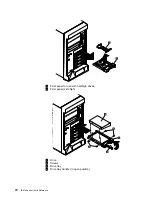
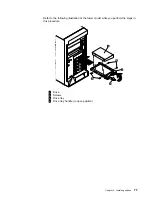
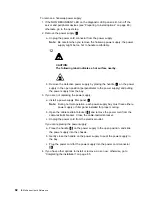
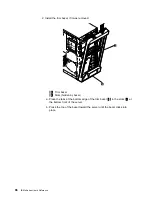
2. Remove the defective hard disk drive
3
by placing the handle
6
on the
drive to the open position (perpendicular to the drive) and pulling the hot-swap
tray from the bay.
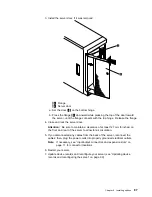
3. Remove the four screws
4
that attach the drive
3
to the hot-swap tray
5
,
and remove the drive from the tray.
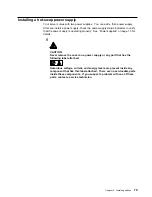
4. Place the new hard disk drive on the hot-swap tray and, being careful not to
over-tighten the screws, attach the drive to the tray using four screws.
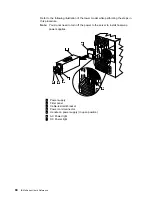
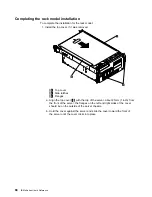
5. Install the hard disk drive in the hot-swap bay:
a. Ensure the tray handle is open (that is, perpendicular to the drive).
b. Align the drive/tray assembly so that it engages the guide rails in the bay.
c. Push the drive assembly into the bay until the drive connects to the
backplane.
d. Push the tray handle to the right until it locks.
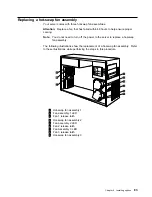
6. Check the hard disk drive status indicators to verify that the hard disk drive is
installed properly. See “Identifying problems using status LEDs” on page 151
for details.
7. If your server is a tower model, close and lock the server door.
78
IBM xSeries User's Reference
Содержание eServer 240 xSeries
Страница 1: ...User s Reference xSeries 240...
Страница 26: ...16 IBM xSeries User s Reference...
Страница 50: ...40 IBM xSeries User s Reference...
Страница 116: ...106 IBM xSeries User s Reference...
Страница 170: ...160 IBM xSeries User s Reference...
Страница 180: ...170 IBM xSeries User s Reference...
Страница 219: ...IBM Part Number 21P9014 Printed in the United States of America 21P9 14...