Starting up the receiver
Preliminary remarks
Notice
With this
mz-24
HoTT Pro transmitter it is possi-
ble to control up to 12 functions. Any servos
which are connected to the receiver outputs 13
and higher remain in their middle position by default and
cannot be actuated by the transmitter.
As described in the manual of the related receiver,
after switching it on a LED indicates the missing re-
ception, so long as "its" transmitter is out of range or
switched off or simply the wrong model memory has
been selected in the transmitter. This means that a link
has not (yet) been established with a
Graupner
-HoTT
transmitter.
To establish a connection with the transmitter, first the
Graupner
HoTT receiver must be "bound" to its model
memory in its
Graupner
HoTT transmitter. This pro-
cess is known as "
Binding
". This "binding" is however
required only once for each receiver-model memory
combination or, after changes have been made to one
or more model memories (see page
39
), only once
for each transmitter-receiver combination . Therefore
you need to perform a "binding" only after buying a
new transmitter or other receivers or for example if
you have changed model memory (and you can re-
peat it at any time).
Notice
If the LED of your receiver indicates that it is ready
for use and the receiver does not react to the SET
button and to the control movements, then you
would be better to check the polarity of your receiver
power supply.
On-board voltage display
When a telemetry link exists, the current voltage of
the receiver power supply appears in the transmitter
display in white.
Temperature warning
If the receiver temperature falls below a threshold
which can be set in the receiver (-10°C by default) or
exceeds a top warning threshold (+55°C by default)
which can also be set in the receiver, the receiver
emits a warning in the form of a beep that repeats
approximately once per second.
Note the installation instructions for the receiver, re-
ceiver antennas and servos on page
16
.
Notice
If you are using a speed controller with an inte-
grated BEC* in addition to the receiver battery,
the plus pole (red cable) may have to be removed
from the 3-pin plug depending on the speed controller.
In this regard, take note of the related information in the
speed controller instructions.
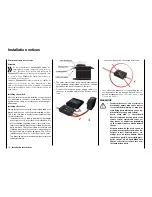
Use a short screwdriver to careful-
ly lift the middle tab of the plug (1),
remove the red cable (2), and use
electrician's tape to protect against
shorts (3).
Reset
To reset the receiver, hold down the SET button on the
top of the receiver while turning on the power.
If the reset is performed while the transmitter is
switched off or with a not bound receiver, the LED on
the receiver indicates the actual status according to
the description included in the package. If there is no
different description, release the button after about 3
seconds.
If the reset is performed with a not bound receiver, you
can then start a binding process at any time.
If a linked receiver is reset and the associated model
memory is active in the turned-on transmitter, the LED
indicates for about 2-3 seconds, accordingly to the
description included in the package of the receiver, to
indicate that your transmitter/receiver system is ready
to use.
Note
Through a RESET ALL of the settings in the re-
ceiver are brought to the factory settings with the
exception of the HoTT synchronization informa-
tion!
If a reset is performed accidentally, all of these settings
that were made using the "
Telemetry
" menu in the re-
ceiver should be restored.
Resetting is particularly recommendable when you want
to switch a receiver to a different model. This makes it
easy to keep settings which do not match from being
transferred.
* BEC = Battery Elimination Circuit
14
Starting up the receiver
Содержание mz-24 PRO
Страница 13: ...13 Personal notes...
Страница 19: ...19 Personal notes...
Страница 37: ...37 Personal notes...
Страница 59: ...Touch 59 Base menu Model selection...
Страница 79: ...79 Personal notes...
Страница 89: ...89 Personal notes...
Страница 115: ...115 Personal notes...
Страница 153: ...Helicopter model function menus Common function menus 153 Personal notes...
Страница 169: ...169 Personal notes...
Страница 187: ...187 Personal notes...
Страница 199: ...199 Personal notes...
Страница 207: ...Fixed wing model function menus System menus 207 Personal notes...
Страница 211: ...211 Personal notes...
Страница 219: ...219 Personal notes...
Страница 237: ...237 Personal notes...
Страница 238: ...238 Personal notes...
Страница 239: ...239 Personal notes...


