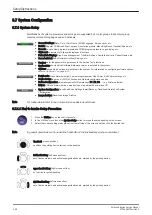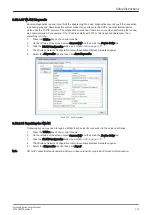
3.7.1.5 How to activate Screen Lock
1.
Invoke System Setup as described in
.
2.
On the left side of the screen select
General
and then click the
General
Settings
tab.
3.
Check mark "Screen Lock".
a.
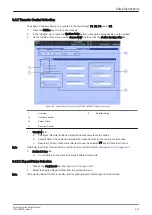
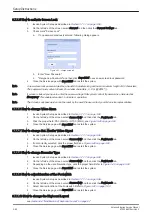
If no password previously entered, following dialog appears.
Figure 3-61 change password
b.
Enter "New Password".
c.
"Retype new Password" and then click
Save&Exit
to save new screen lock password.
4.
Close the Service page with
Save&Exit
and restart the system.
Note
A new screen lock password must be at least 6 characters long and has a maximum length of 80 characters.
The password must contain at least 2 non-letter characters, 0...9 or !@#$%^*().
Note
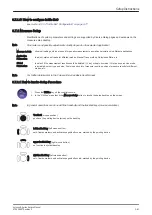
If screen is locked you have to enter the password to get full system control. If password is unknown click
Emergency. This enables standard - but limited - operation.
Note
The Screen Lock password cannot be reset by the user! Please contact your GE service representative.
3.7.1.6 How to change Video Norm
1.
Invoke System Setup as described in
.
2.
On the left side of the screen select
Connectivity
and then click the
Peripherals
tab.
3.
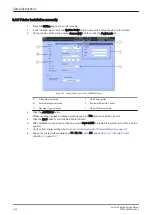
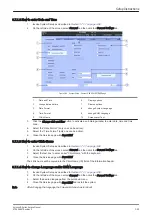
Click the proper field: PAL (50Hz) or NTSC (60Hz); see
.
4.
Close the Service page with
Save&Exit
and restart the system.
3.7.1.7 How to change Ext. Monitor Video Signal
1.
Invoke System Setup as described in
.
2.
On the left side of the screen select
Connectivity
and then click the
Peripherals
tab.
3.
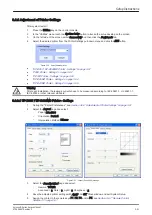
If not currently selected, click the proper field; see
4.
Close the Service page with
Save&Exit
and restart the system.
3.7.1.8 How to change Recorder Type
1.
Invoke System Setup as described in
.
2.
On the left side of the screen select
Connectivity
and then click the
Peripherals
tab.
3.
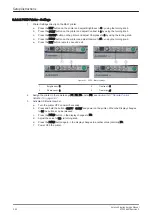
Depending on the used Recorder type, click the proper field. Refer to
.
4.
Close the Service page with
Save&Exit
and restart the system.
3.7.1.9 How to adjust function of the Footswitch
1.
Invoke System Setup as described in
.
2.
On the left side of the screen select
Connectivity
and then click the
Peripherals
tab.
3.
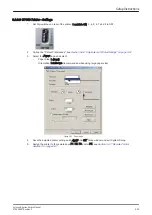
Select desired function of the Footswitch. Refer to
.
4.
Close the Service page with
Save&Exit
and restart the system.
3.7.1.10 How to change the Keyboard Layout
see
Section 6.4 "Modification of Keyboard Layout" on page 6-7
Setup Instructions
3-60
Voluson E-Series Service Manual
KTD106657 Revision 2
Содержание H48681XB
Страница 11: ...Introduction Voluson E Series Service Manual KTD106657 Revision 2 1 3 ...
Страница 12: ...Introduction 1 4 Voluson E Series Service Manual KTD106657 Revision 2 ...
Страница 13: ...Introduction Voluson E Series Service Manual KTD106657 Revision 2 1 5 ...
Страница 14: ...Introduction 1 6 Voluson E Series Service Manual KTD106657 Revision 2 ...
Страница 15: ...Introduction Voluson E Series Service Manual KTD106657 Revision 2 1 7 ...
Страница 16: ...Introduction 1 8 Voluson E Series Service Manual KTD106657 Revision 2 ...
Страница 17: ...Introduction Voluson E Series Service Manual KTD106657 Revision 2 1 9 ...
Страница 36: ...This page was intentionally left blank Introduction 1 28 Voluson E Series Service Manual KTD106657 Revision 2 ...
Страница 172: ...This page was intentionally left blank Functional Checks 4 46 Voluson E Series Service Manual KTD106657 Revision 2 ...
Страница 226: ...This page was intentionally left blank Service Adjustments 6 8 Voluson E Series Service Manual KTD106657 Revision 2 ...
Страница 288: ...This page was intentionally left blank Replacement Procedures 8 30 Voluson E Series Service Manual KTD106657 Revision 2 ...
Страница 364: ...This page was intentionally left blank Care and Maintenance 10 24 Voluson E Series Service Manual KTD106657 Revision 2 ...
Страница 365: ......
Страница 366: ...GE Healthcare Austria GmbH Co OG Tiefenbach 15 4871 Zipf Austria www gehealthcare com ...

